
Alan built shuttering for the slab. As the weather was so hot, we lined it with polythene to stop the concrete drying out too quickly. Similarly to the slab for the shed, we were able to use up lots of leftover materials to make the concrete.

Once the slab was completed, we had a better idea of how the heat pump would sit... and it didn't seem quite right. Apart from the way it would look in the front garden, there were a number of other issues that only arose after we made the slab, such as - the entry point for the pipework (which would mean digging through the concrete floor in the new house), possible problems with falling leaves into the pump and having to build a decorative enclosure around it (as the heat pump looks a bit 'industrial').
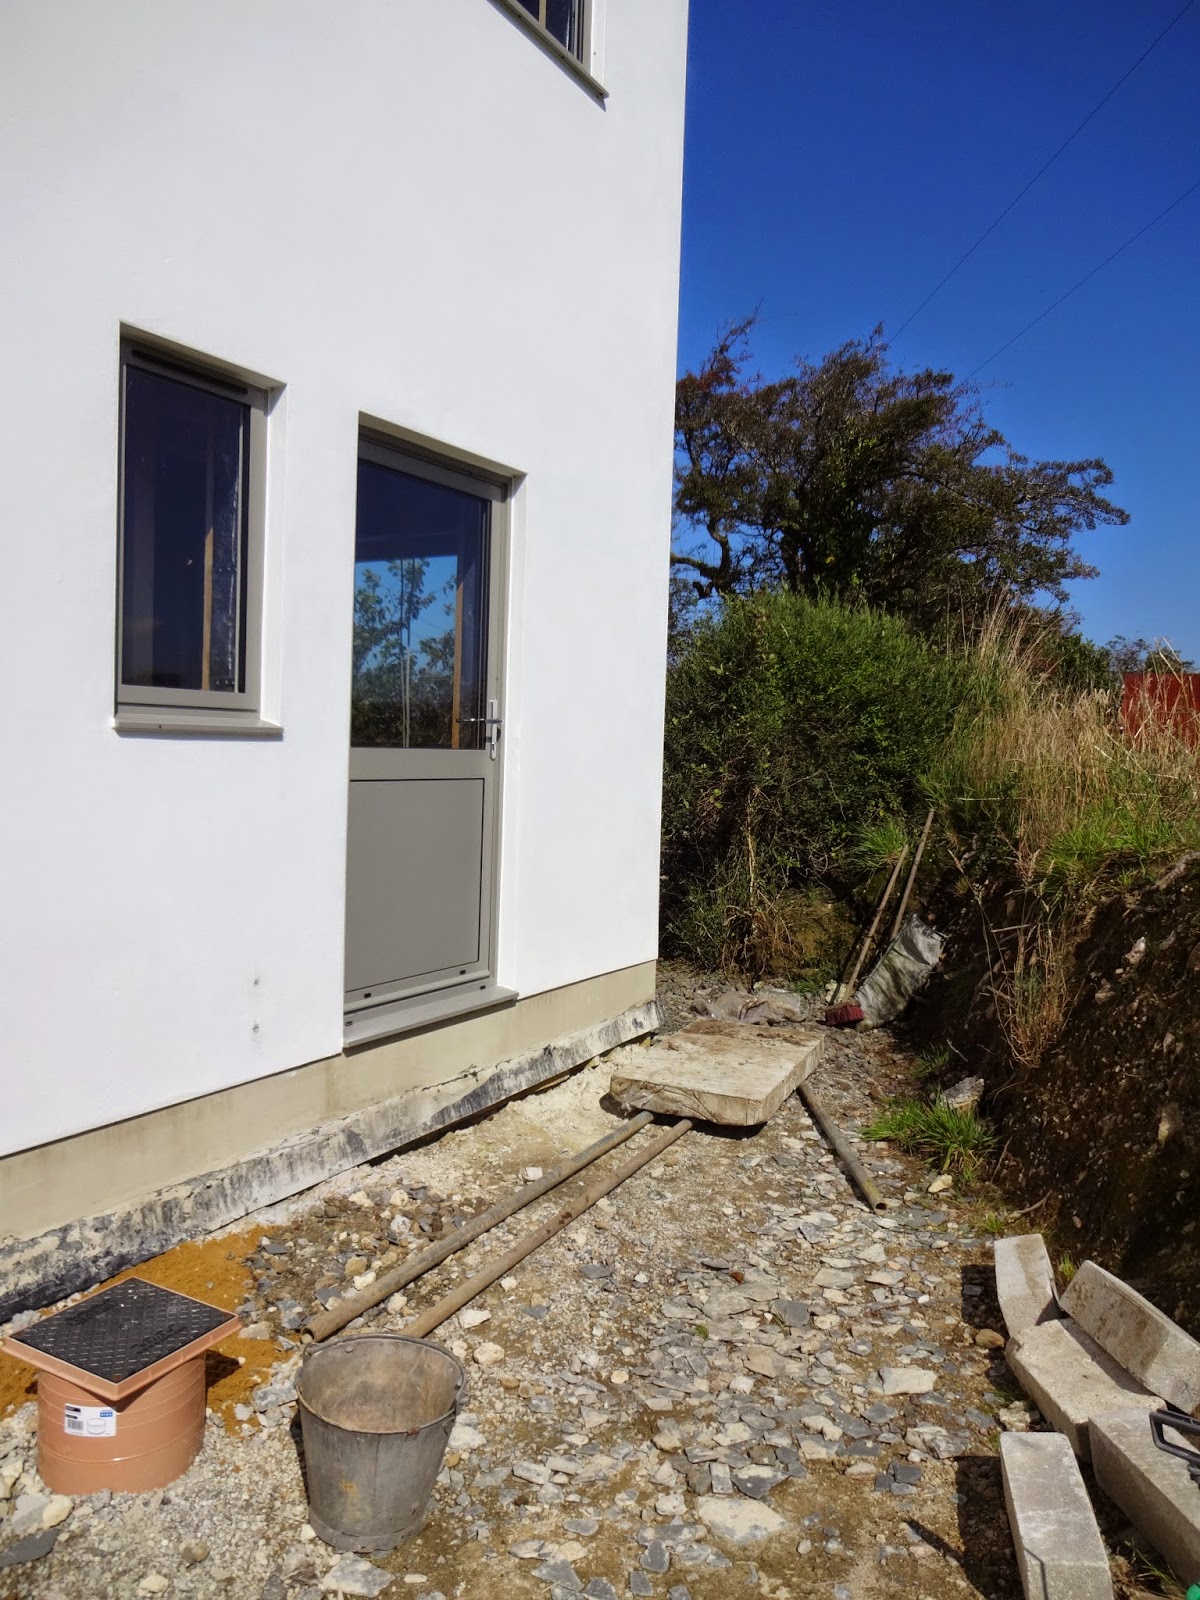
Our other option was to position the heat pump on the east side of the house.

Rather than make a new slab, we managed to move the existing one. It weighed far too much to lift so we slid it to its new location using scaffolding poles as log runners - if it worked for the Egyptians building their pyramids...

Halfway there.

The last push.
Finally in place along the east side of the house.

With the heat pump location finally sorted, the installers were able to lay down their 1st fix pipework. This was much simpler than it would have been at the front of the house - the heat pump will sit right outside the external wall under the toilet window. So the pipes can now go straight through the wall into the back of the pump rather than the horror of excavating through our new concrete floor.


Another advantage to moving the heat pump is shorter pipe runs which should make the unit slightly more efficient (the longer the run the more heat is lost through the pipes). The hot water cylinder will be installed under the stairs (under the ladder in this picture) so the pipe run from the heat pump to the cylinder is extremely short.

The next job was to install the 1st fix plumbing. This is the soil stack that connects to our three toilets and exits via the drainage system that runs around the outside of the house. This will eventually be connected to our existing septic tank.

The soil stack has to be ventilated up at roof level. We already specified a slate vent during the roof build so it was relatively easy for Ali the plumber to link it all together.


White waste pipes from showers, basins and a bath were connected to the soil stack and routed through the Posi-joists.

Ali used traditional copper pipe for connecting the heating system but we decided to use plastic for all the other pipework. One of the problems with using a private water supply round here is that the water can be quite acidic (the existing house uses well water that turns bright green after being warmed in a copper cylinder...)
Although the new water filtration system will include a P.H. filter to sort that out, we still felt it safer to use plastic pipe. It is lucky that we did as one of the local farmers told us afterwards that they had to rip out all their copper plumbing because the water had eroded the metal & caused pinhole leaks everywhere.

White push-fit pipe went in very quickly. We did intend to fit this ourselves, but we had to finish building the shed ready for the water filters, so Ali did it instead.

15mm white pipes for the hot and cold water were fitted under the window ready for the kitchen sink and the larger 40mm waste pipe was installed into the drainage system in the floor.

Posi-joists make fitting services so much easier than traditional joists which require lots of drilling and notching. All the external walls also came complete with service voids as part of the panels so pipe and cable routing was very much quicker (and therefore cheaper).


1st fix plumbing in the utility room. Large 28mm grey pipe was used for the main water inlet to maximise flow rate from the borehole pump.

To finish off, Ali pressure-tested all the 1st fix pipework using compressed air to ensure there were no leaks.

Meanwhile, we had just managed to get the shed ready in time for the arrival of the water filtration equipment.

The first job was to decide where everything was going to be positioned. Although the shed was built specifically for the water filters, we also hoped to use it as a normal shed/summerhouse if we could create enough room.

With the filters on one side, the pressure vessel could sit neatly under the window opposite. Its job is to store water under pressure so that the borehole pump does not have to run every time a tap is turned on.

Liam and Tyler from the borehole company filling one of the cylinders. Each of the filters contains different materials depending on what it needs to filter out of the water. The water test we had last year showed high levels of iron and manganese (not unusual for this part of Cornwall) so filtration is more involved and more costly than we'd have hoped.

Inside the 'Ark of the Covenant' (as I call it - ref: see Raiders of the Lost Ark), the pipe drops down the borehole some 30 metres where it is connected to the power of God pump.

Pipes are run from the borehole to the shed and laid in the shallow trenches we dug weeks ago.

One blue pipe carries water from the borehole into the shed where it is filtered and another blue pipe carries the clean, filtered water all the way to the new house. Another black armoured cable had to be squeezed through the conduit to provide power from the shed to the borehole pump.

Inside the shed. The conduit was only just big enough to fit all pipes and cables.

TECHNICAL BIT. From right to left:
The first unit aerates the water making it easier to remove the iron.
The second unit is a multimedia filter (sand, gravel and anthracite) to remove any tiny particles.
The third unit is filled with a type of limestone to adjust the P.H balance of the water and neutralise excess acidity.
The fourth unit contains 'Filox', a mysterious ingredient that miraculously removes iron and manganese from water... providing it has been aerated and P.H balanced beforehand.

The entry point for the water pipe is in the utility room of the new house. This will eventually be connected to the whole plumbing system, however since our well was struggling to provide enough water in the hot weather, we fitted a temporary standpipe inside to use as an alternative supply of fresh water.

Alan made an OSB backboard to attach all the additional equipment. The filters are all fitted with digital backwash heads which are set to run through a regular cleaning cycle. This blasts loads of water back through the system and exits via the new waste pipe and soakaway we installed during the shed build.

Liam timing the water flow rate. We asked them to boost the flow rate slightly higher than normal to satisfy the requirements of the heat pump water cylinder (also it would be nice to have powerful showers).

Water pipes all installed and ready to be back-filled. Note - My feet and shovel at the ready.

We are using temporary extension leads as we won't have any electricity supply to the shed until the 2nd fix electrics in the new house are completed.

Boreholes do not generally need UV filters to kill bacteria as, unlike wells, the water comes from much deeper underground so is less likely to be affected by surface contaminants (like animal poop and chemicals). In the water test our borehole water was completely free of bacteria, but to be extra safe (and considering how much farmers round here seem to love spreading cow muck over every square centimetre of land) we opted to fit a UV filter and additional debris filter.
The filtering system wasn't cheap (though having a private water system means we will never pay water rates) but the end result was amazing. The water coming directly out of the borehole was slightly murky, eggy and tasted metallic, but after filtration it was crystal clear, odourless and tasted delicious. We even tried blind taste tests against bottled mineral water and the borehole won every time.

While working in the garden we spotted a strange snake-like caterpillar of a type that we have come across from time to time. He is quite large (his body is thicker than an adult finger and about 7cm long). He is an Elephant Hawk Moth caterpillar...

... and this is the big beauty he turns into! Sadly, we haven't seen this version of him yet (so I found this photo on the internet).

The borehole was completed just in time. Once again, our well had dried up during the hot weather so we had to shower using the new system. The water was absolutely freezing as Alan discovered when he decided to wash outdoors.
I'll spare you from the 'shorts off' picture...

No comments :
Post a Comment