We looked at umpteen sheds but they all seemed so flimsily built and hugely overpriced. Living in a fairly exposed area, we wanted something sturdy to store the expensive filtering equipment - last winter's high winds destroyed most of our friends and neighbours' sheds. With so much work to do on the house, the last thing we needed to do was build and design our own shed from scratch but it really seemed to be the only viable option.
While we had the digger on hire we cleared an unused area at the back of the garden near the borehole where we had decided to site the new shed.

After excavating a large soil bank and dry stone wall, we unearthed a mysterious concrete slab. We were slightly concerned that it might be the lid to an old disused well/septic tank - perhaps there was treasure buried underneath it or more likely (knowing our luck) the body of a murder victim. We had visions of the area being cordoned off by police and the house build suspended indefinitely while more and more skeletons were raked up from the garden. After careful investigation it turned out that it was just an old slab - so we smashed it to pieces for causing us so much worry.

The pile of stones dug up from the garden keeps growing.

The filtration equipment runs a regular backwash cleaning cycle so the shed was going to need its own soakaway for the water to drain off.

We dug out about a cubic metre of earth...

...and filled it with a dumpy bag full of large pieces of rubble to allow plenty of gaps for the water to flow through.

We ran some drainage pipes in a trench to take the backwash from the shed to the soakaway.

After levelling the ground, we laid down a layer of hardcore.We also dug trenches to carry the water supply pipes from the borehole to the shed with a length of conduit to carry the pipes through the planned slab.

Another layer of hardcore flattened down by hand.

We built shuttering ready to hold the concrete and levelled out the base using a layer of sand. We spent quite a bit of time making sure that the shuttering was lined up correctly and perfectly level.

As it was a hot day we laid down a sheet of plastic before pouring in the concrete to stop it from drying out too quickly and cracking. It was hard work mixing up the concrete as the materials could not be delivered to this end of the garden so we had to transport several tonnes of ballast, sand and cement by wheelbarrow.


Once all the concrete had been mixed and poured into the shuttering, we levelled it off using a length of timber.


We had to regularly hose down the slab to stop it from drying out too quickly.

A few days later and the slab had dried out. The site inspector conducted a series of tests to ensure quality control.

Absorbing heat test: We passed with flying colours.

The design of the shed was going to be based on a summerhouse that we found on the internet (see image below). We liked the contemporary style but weren't too keen on the £10,000 price tag...

...so Alan got to work drawing up a set of plans based on this image we found.


I became quite impatient with him (putting it politely) as he spent hours every evening drawing and re-drawing 3D plans, working out how everything would fit together and scaling up all the angles and dimensions from this one photograph we had found - we did still have a house to build after all.
But finally he emerged with a set of usable plans and we could get to work on building the damned thing.

Building the shed was similar to the way we had built our house. We laid a damp proof course before bolting down the treated timber 'soleplate' that would support the shed frame.

We had put threaded rods in the wet concrete whilst pouring the slab so they were set solidly within the slab. To coin a popular double-negative phrase, 'This baby ain't goin' nowhere!'

We built the frame of the shed in our new kitchen...it was a level, dry and roomy work space. We built the studwork out of 75 x 50 mm timber - by comparison all the flimsy sheds we'd seen for sale (at £1,000+...) used a measly 37 x 25 mm timber which just wouldn't be strong enough in windy North Cornwall.

Double checking that the frame fits accurately on the slab.

After carefully cutting and assembling the shed walls according to Alan's rigorous plans, we started work on the tricky angled roof.

It was nice to work indoors and not be affected by the weather. It allowed us to spend time getting it right before assembling it permanently outside.

The site inspector kept a close eye on things from his personal observation post high in the joists.

Look at that tum - someone needs to lay off the biscuits...

Finally, all the angled roof timbers are cut and the shed frame is ready to be put together outside.


Having pre-made the panels to size in our kitchen, it was very easy to screw it accurately in place on the slab.

We spent a bit of time making sure all the walls were level before putting together the roof timbers.


The site inspector was a stickler for details and conducted another series of tests to evaluate the quality of the workmanship.


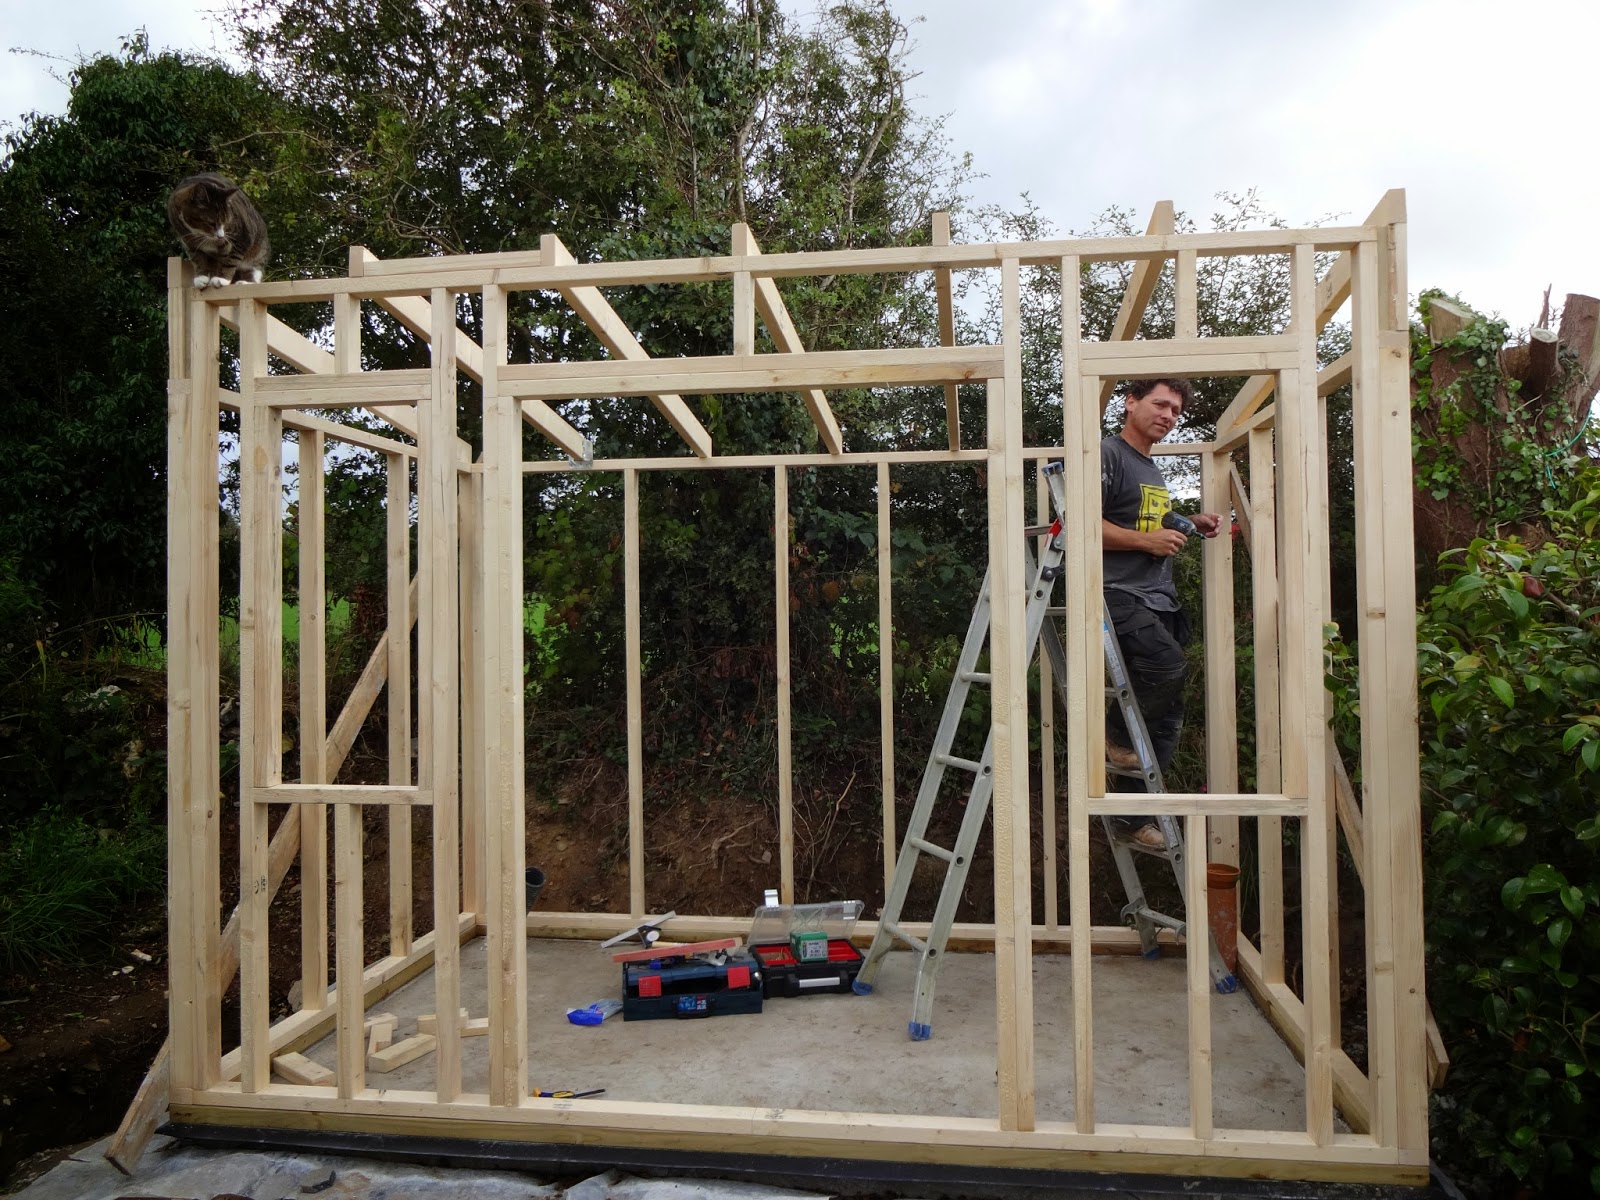
We foolishly thought we were building a shed/summerhouse, someone else decided that it was actually a giant climbing frame/scratching post.


Good grief!

With the frame completed, it was ready for cladding. We needed to protect it from any wet weather so, of course we dragged out the over-used and haggard-looking plastic keep it dry.

No comments :
Post a Comment