Neither of us had driven a mini-digger before but it was surprisingly easy to figure out the controls, especially for two seasoned computer geeks as it was rather like learning controls for a new game.
The first task was to dig trenches for our drainage pipes that would take the water to the soakaway.

Video: Alan digging the first trench. (And he would like to point out that his digger driving got a lot better than this after a bit of practice...)
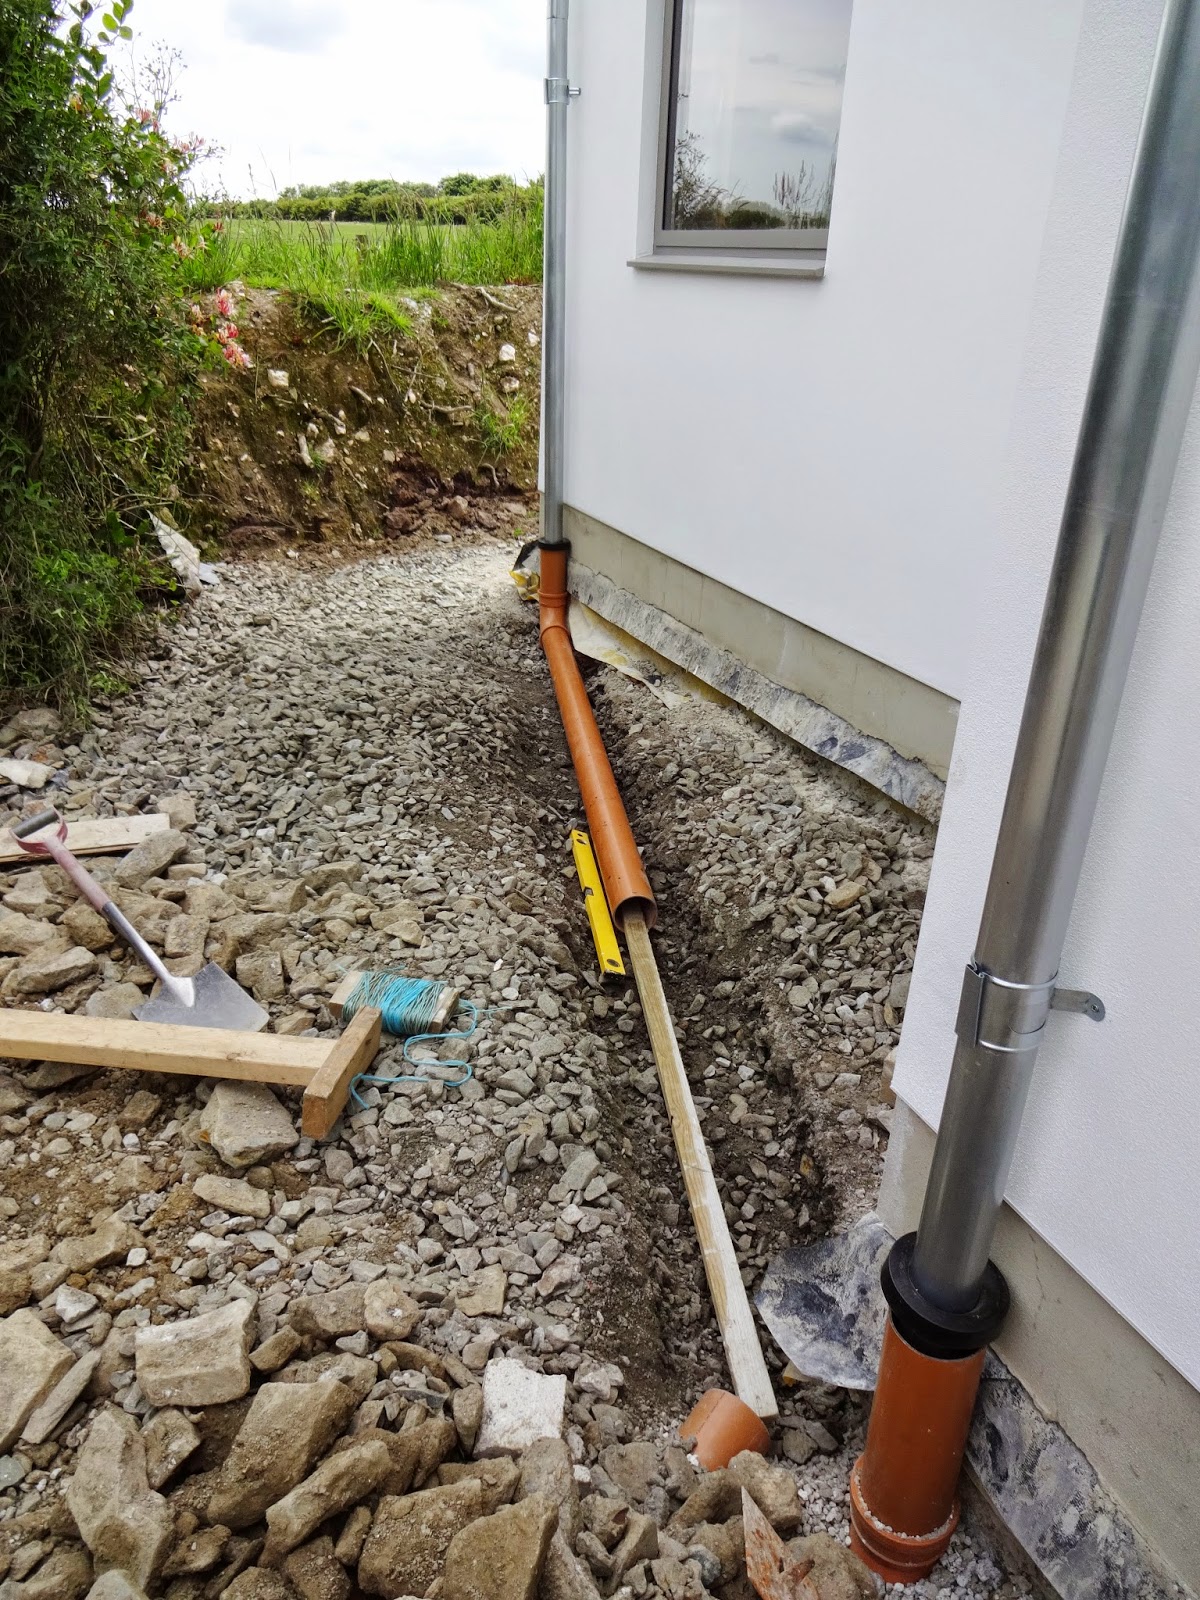
We dug two trenches - the one on the left in this picture takes rainwater from the porch whilst the one on the right connects up to all the drainpipes at the back of the house. The pipes are laid on a bed of gravel to protect them from stone damage. The good news was that we had lots of gravel left over from the original groundworks; the bad news was that our groundworkers buried most of it in the ground (for reasons best known to themselves). I spent some time unearthing all the gravel with a shovel as it was in an area that the digger couldn't reach. Grrrrrrrrrrrrrravel!

After cutting and connecting the pipes we set the fall according to building regulations. I spent quite a bit of time adjusting the angle of the pipes using the spirit level for reference.

Once we were happy with the fall, we backfilled around the pipes using our recently reclaimed gravel.


Just one more drainpipe left to connect. We added another drainage pipe onto the system to carry rainwater from the other side of the house.

The last drainpipe is hooked up.


Ta-da!

Alan began digging the soakaway pit.


A lot of self-builders use soakaway crates - these are like large milk crates that are buried in the ground to create a void for the water to run into (and gradually soak away). We were going to use them but they are very expensive. We also realised that having put somewhere in the region of 100 tonnes of stone into the driveway for heavy vehicle access, our whole front garden was effectively one huge soakaway. So we decided to just do what all the locals do... fill large dumpy bags with clean stone and rubble and stick it in the ground.
Though it still seemed absurd to dig out tonnes of rubble and stone (see huge pile below) in order to bury... more rubble and stone.

There is a complicated formula that calculates the exact size of the soakaway based on the total roof area and ground porosity. Three cubic metres of rubble should be more than enough for even the wettest Cornish winters.

Once our soakaway pit was filled with stone, we extended the drainage pipe to the centre...

... covered the soakaway with landscape membrane to stop mud from clogging it up...

...and backfilled it to make the ground level again.


All filled in. You wouldn't even know the soakaway was there.

After all the mayhem peace was restored.
1 comment :
Hello
I Read your article. Thanks for sharing such beautiful information, and I hope you will share some more info about Soakaway crates. You wrote really very well, I really like your blog and information provided by you. I appreciate your work.
Thanks
Post a Comment