Monday 9 December 2013

Timber frame: Part 1 - Preparation

A few days after the concrete had been poured we removed the wooden shuttering and preparation started for the timber frame.


The raised level meant another course of blocks would need to be laid around the perimeter of the house.


Dolly blocks were laid on top of the slab ready for the sole plates (base) of the timber frame panels to be attached. These needed to be very accurately aligned and getting it right took some time.


The finished course of dolly blocks.


The cavity in the blocks around the perimeter was filled with a weak mix of concrete and gravel. This prevents any movement in the base of the wall once we back-fill and build up the outside ground level.


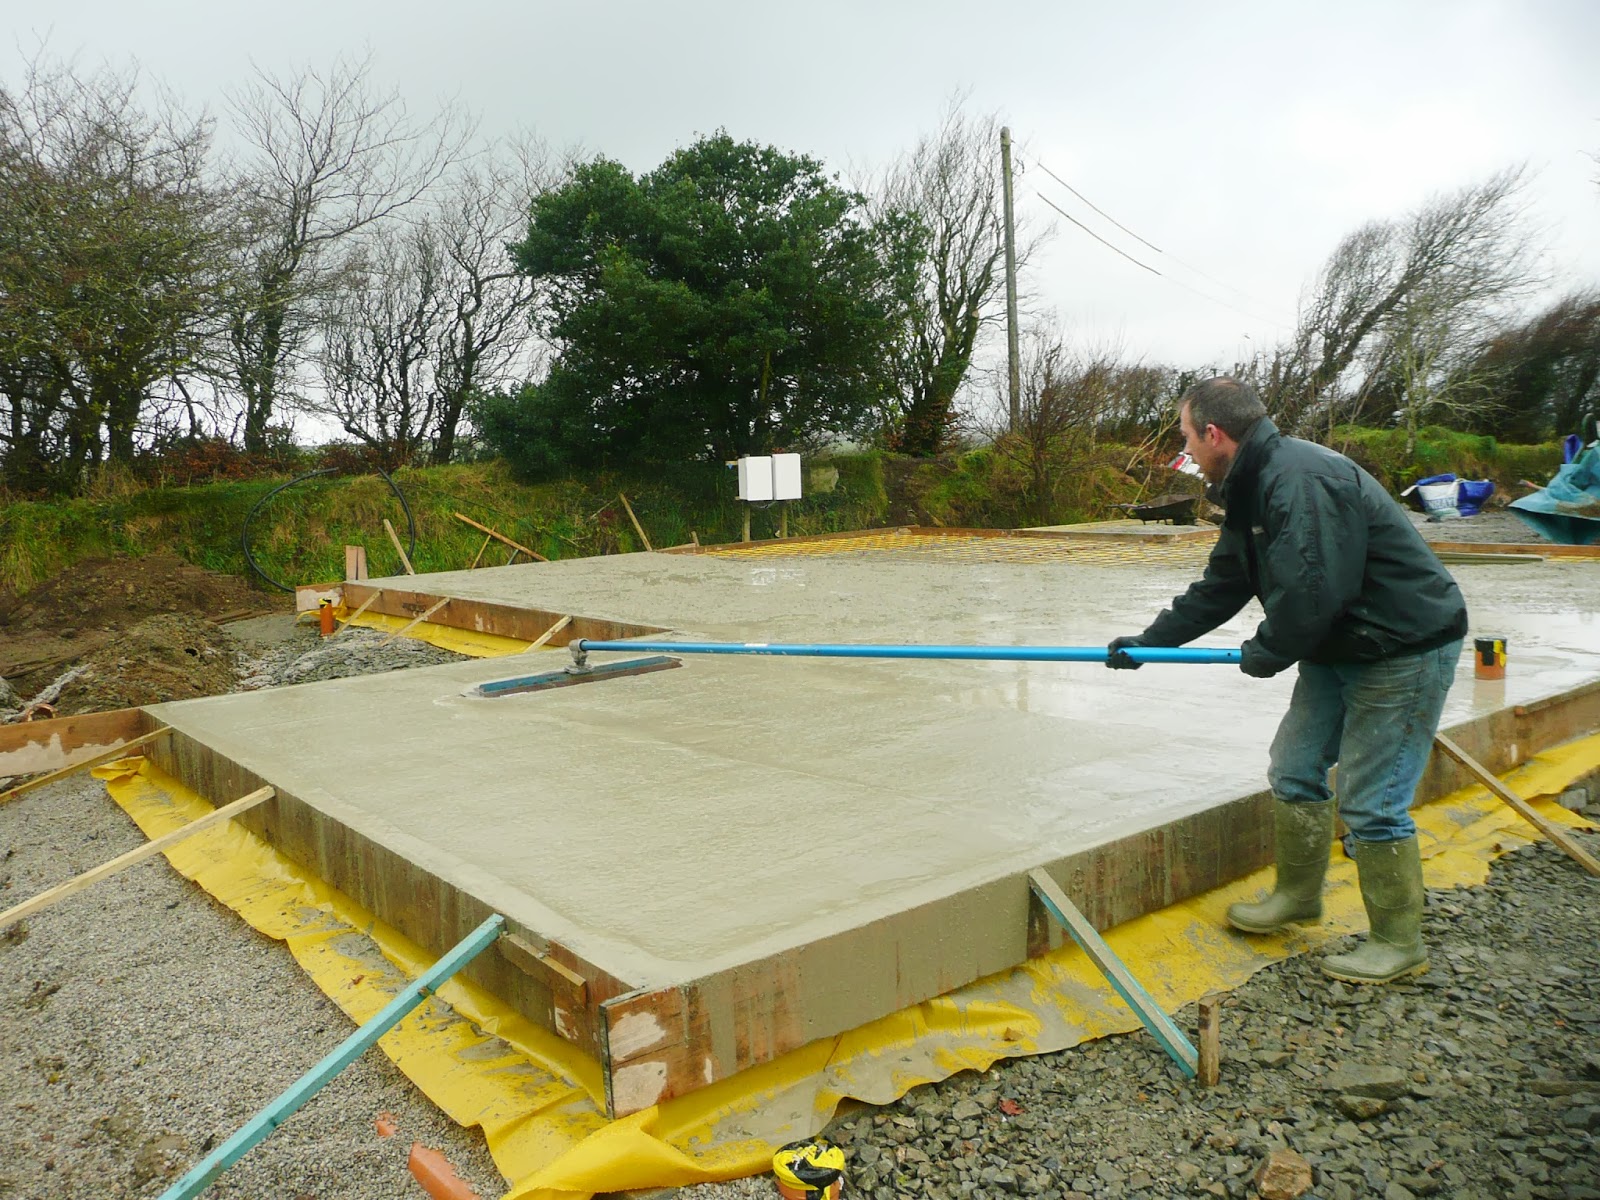
The contracts manager of the frame company came to inspect and measure the completed slab. He was very happy with it and even went so far as to say that it was one of the most accurate he'd seen. Considering all the problems we had I wondered what on earth the other sites were like.


After the Christmas break the scaffolding went up. It took three scaffolders almost four days to put together.


Testing out the view from the first level.


The second level going up.


Once the scaffolding was complete we were able to trim the overhanging Holly tree.


The inside volume of the house looked very big when viewed from the second level of scaffolding.
An unusually sunny day in January gave us an idea of what the view would be like from the upstairs windows once the house is built.


With the delivery of the portable toilet (aka 'thunderbox'), a health and safety requirement, our site finally had everything ready and waiting for the timber frame.


Tuesday 3 December 2013

Services: Moving the electric cable

Unfortunately the overhead electricity cable supplying the existing house was right over the foundations for the new house and had to be moved before the timber frame arrived (see cable in top right of pic). 


Renowned for high costs, long waiting lists and piles of administrative red-tape, the electricity company had the potential to bring the whole build to a standstill. Luckily we first contacted them back in June and after much filling-in of forms and follow-up phone calls, we finally managed to get them booked in for the end of November.
 
In preparation, we needed to dig a trench for the new underground electricity supply and in order to spare our poor cherry trees from another battering by the digger, we decided it was safer to bypass them completely by running the trench around the outside of our bank and then digging a hole straight through it to reach the new meter.     


Mark the electrician got the meter boxes prepared ready for Western Power's arrival. We were hoping they'd let us keep the old overhead line to use for the existing house which would save us having to buy an expensive new cable.


Hoorah! Not only did the electricity company arrive on time but they also kindly let us keep the old cable. The chap who took down the overhead line was particularly interested in our build as he'd come very close to buying our house about 20 years ago.     


An hour or so later and our house supply was back up and running. We added some outdoor power sockets to the temporary supply box for site use and will move the meter box across to the new house once we have some walls up.


Putting the bank back together exposed some nice old stones that had been buried under all the long grass. We think there may be more hidden along the whole length of the plot which we'd like to eventually uncover.


Monday 2 December 2013

Groundwork: Part 5 - Concrete floor slab

With the concrete lorries booked for the following morning, all we needed was approval from the building inspector before we went ahead with pouring the floor slab. We began laying out the radon membrane, but unfortunately our local building inspector took one look at the site and refused to pass it. (Click pics to expand)

Although he had no issue with the quality of the building work, the approved radon measures had not been implemented correctly. Normally it would be fine to just pour the concrete within the blockwork walls as we were about to do, however as we lived just within a designated radon area we were supposed to lay the slab on top of the blockwork walls. It was frustratingly arbitrary; if we lived a mile or so up the road none of these radon measures would be necessary.


With the groundwork already having dragged on longer than we'd have liked, this was a bit of a setback. The concrete delivery was cancelled and after some heated discussion about whose fault it was, we all set about trying to put it right.

The least painful option was to simply raise the level using yet more sand and stone. Though it cost us more time and money, on the plus side it would raise our finished floor level giving us a better view of the surrounding countryside and would also sort out the issue we had with the shallow drains.


Gahhhhhh! All our beautiful sand blinding work buried under yet another load of stone - that's 75 tonnes in total, needless to say the local quarry loved us.


After the stone was compacted another layer of sand was added - that's 8 tonnes in total, needless to say the local quarry loved us.


Getting the mini-digger onto the oversite caused some damage to the blocks. We repaired these once the sand was compacted.


One knock-on effect of laying the slab on top of the blocks was that it would be slightly bigger in area. This meant more materials were needed than originally planned (sigh), needless to say the radon membrane suppliers loved us.


With the radon membrane overlaid and taped, Alan helped Nick securely fix scaffolding boards around the perimeter to act as shuttering for the concrete slab.


Relief. The building inspector returned and approved all the work.


Sunrise on the morning of the concrete pour and Alan and I set out early to finish preparations for the slab.


Alan taped around the pipework so that the radon membrane was completely sealed.


Another radon requirement was that the floor slab be reinforced with steel mesh. In order for this to sit in the middle of the slab, I set out small concrete 'castles' to support the mesh - that's 165 castles and 14 sheets of mesh, needless to say the mesh and castle suppliers loved us.


The concete lorry arrived complete with conveyor ready to pour the slab.


A laser was used to continually check the levels whilst pouring the concrete.


Alan decided we needed a 'lucky penny' (pilfered from my purse) somewhere, so we placed it under the front entrance. This remains one of the cheapest materials of the build so far, though whether it will actually bring any luck is anyone's guess.


With the concrete having been smoothed off and levelled, all we need to do was wait for it to cure.
Hoorah! No more groundwork.