Showing posts with label Groundwork. Show all posts

Monday, 2 December 2013

Groundwork: Part 5 - Concrete floor slab

With the concrete lorries booked for the following morning, all we needed was approval from the building inspector before we went ahead with pouring the floor slab. We began laying out the radon membrane, but unfortunately our local building inspector took one look at the site and refused to pass it. (Click pics to expand)

Although he had no issue with the quality of the building work, the approved radon measures had not been implemented correctly. Normally it would be fine to just pour the concrete within the blockwork walls as we were about to do, however as we lived just within a designated radon area we were supposed to lay the slab on top of the blockwork walls. It was frustratingly arbitrary; if we lived a mile or so up the road none of these radon measures would be necessary.


With the groundwork already having dragged on longer than we'd have liked, this was a bit of a setback. The concrete delivery was cancelled and after some heated discussion about whose fault it was, we all set about trying to put it right.

The least painful option was to simply raise the level using yet more sand and stone. Though it cost us more time and money, on the plus side it would raise our finished floor level giving us a better view of the surrounding countryside and would also sort out the issue we had with the shallow drains.


Gahhhhhh! All our beautiful sand blinding work buried under yet another load of stone - that's 75 tonnes in total, needless to say the local quarry loved us.


After the stone was compacted another layer of sand was added - that's 8 tonnes in total, needless to say the local quarry loved us.


Getting the mini-digger onto the oversite caused some damage to the blocks. We repaired these once the sand was compacted.


One knock-on effect of laying the slab on top of the blocks was that it would be slightly bigger in area. This meant more materials were needed than originally planned (sigh), needless to say the radon membrane suppliers loved us.


With the radon membrane overlaid and taped, Alan helped Nick securely fix scaffolding boards around the perimeter to act as shuttering for the concrete slab.


Relief. The building inspector returned and approved all the work.


Sunrise on the morning of the concrete pour and Alan and I set out early to finish preparations for the slab.


Alan taped around the pipework so that the radon membrane was completely sealed.


Another radon requirement was that the floor slab be reinforced with steel mesh. In order for this to sit in the middle of the slab, I set out small concrete 'castles' to support the mesh - that's 165 castles and 14 sheets of mesh, needless to say the mesh and castle suppliers loved us.


The concete lorry arrived complete with conveyor ready to pour the slab.


A laser was used to continually check the levels whilst pouring the concrete.


Alan decided we needed a 'lucky penny' (pilfered from my purse) somewhere, so we placed it under the front entrance. This remains one of the cheapest materials of the build so far, though whether it will actually bring any luck is anyone's guess.


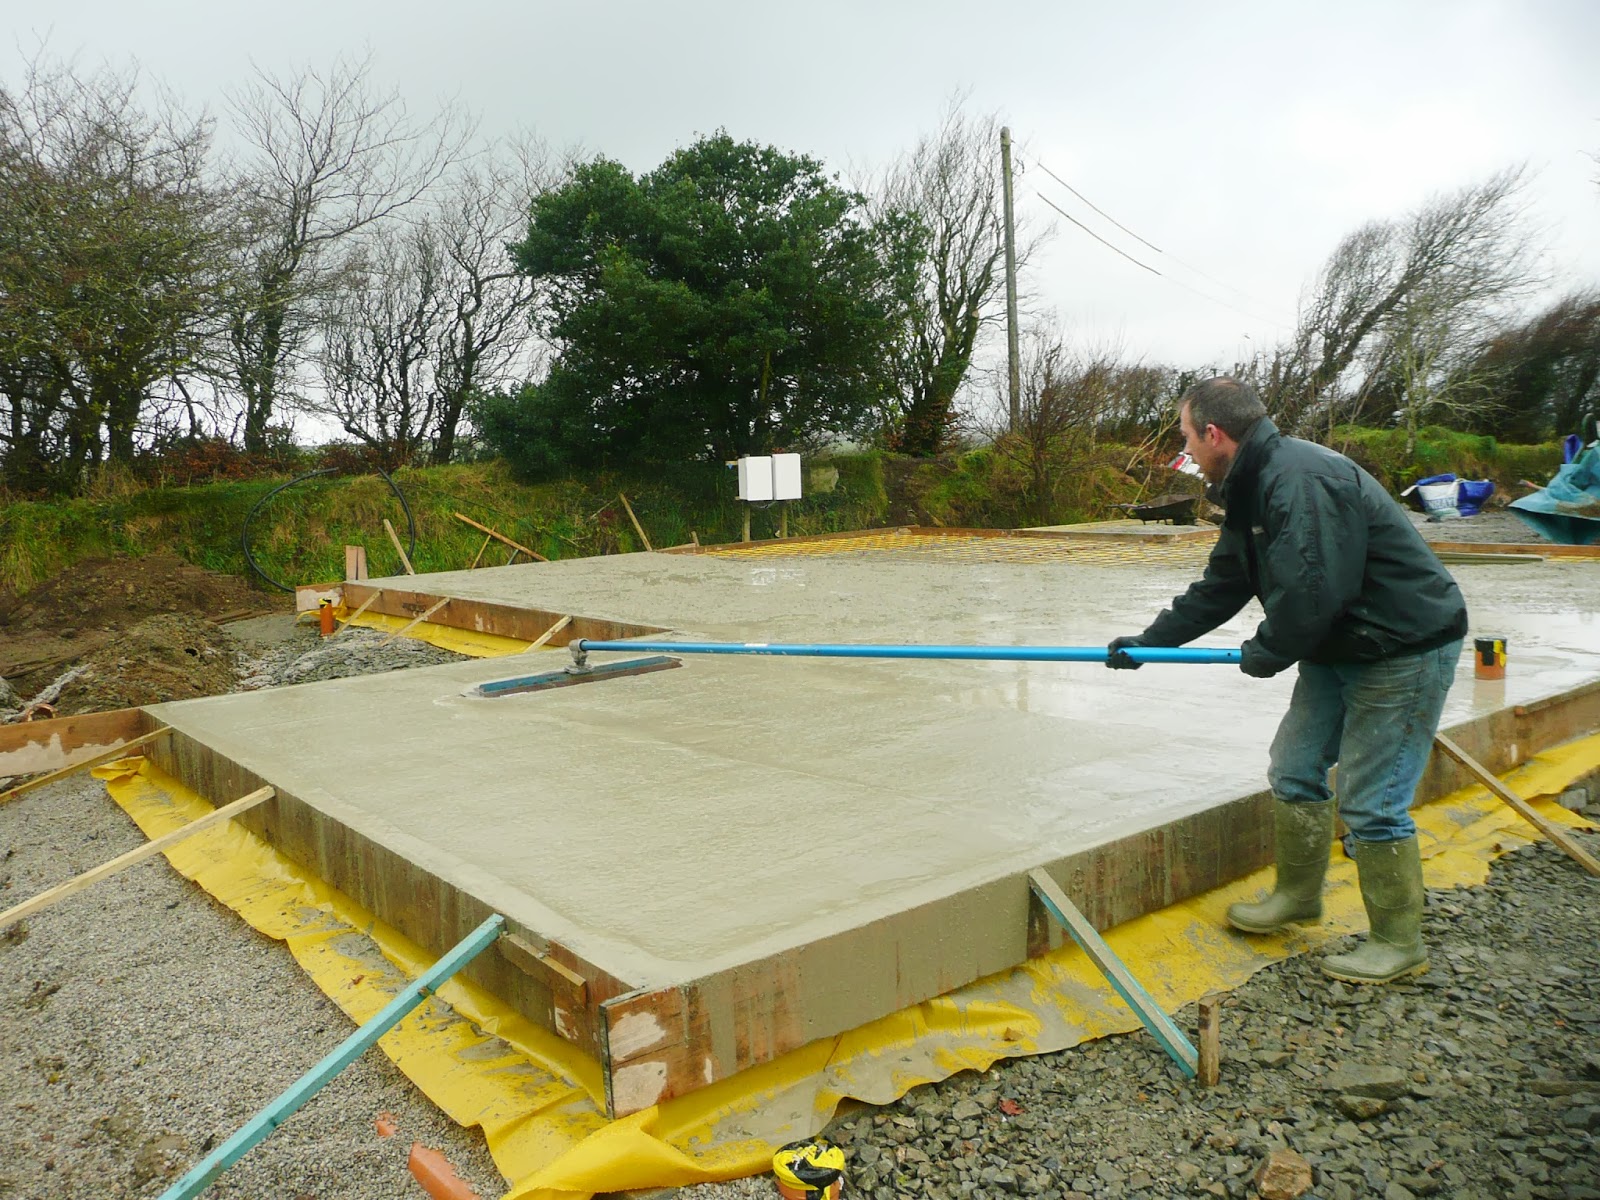
With the concrete having been smoothed off and levelled, all we need to do was wait for it to cure.
Hoorah! No more groundwork. 

Friday, 22 November 2013

Groundwork: Part 4 - Oversite and drainage

After a few days the foundation walls were strong enough to withstand the weight of a mini-digger which Kevin (Nick-the-blockie's brother) manoeuvred into position to start work on levelling and compacting the soil within the new house. (Click pics to expand)


The first of many stone deliveries that would arrive over the next few days.


All the loose soil was removed from the oversite and the underfloor void was then gradually built up using the freshly-delivered stone.


Alan and I smashed up the old patio tiles and garden paths and used them as hardcore to help backfill the trenches all the way around the house. 


A wacker plate was used to compact the stones in layers. Alan found it such good fun to use that the groundworkers had trouble prising it off him.


75 tonnes of stone and much wacking later, we'd finally reached the right level.


You don't get much drainage gear for £800. Even with our 80% 'trade' discount.


The mini-digger was small enough to fit round the side of the existing house which made digging the trench for the water supply a lot easier. We laid the pipe from the borehole through to the utility room of the new house where we will fit all the water filtering equipment.

Please Note: The tree in the background has formed a suspicious shape of its own choosing - nothing to do with us...


Trying to connect the new sewer pipes to the existing septic tank caused much head-scratching onsite. Remember those carefully-constructed drainage access points (see previous post) in the foundation wall? Well (cue Laurel & Hardy music) it turned out that these weren't actually built high enough. So in order to get the required fall, we needed to knock out several blocks from the wall and place the pipes directly on top of the lintels that were supposed to be above them. Grrr again.       


Pipes and chambers were laid on a bed of pea gravel and then adjusted to get the 1:40 fall required by the building regulations. 


Along with the sewer pipes, the stormwater pipes that will eventually connect to our roof guttering were also set out ready for inspection by Building Control. 


Alan and I covered the stone with a layer of sand blinding which is used to stop any sharp stones from puncturing the plastic damp-proof membrane that goes on top.  


As we live in a 'full radon' area, Alan constructed a radon sump to comply with the regulations. The sump (or pile-of-bricks-with-a-paving-slab-on-top) is connected to a pipe that runs from the centre of the house to an exit in the outside wall. If there are ever any dangerous radon gases building up under our floor, the sump can provide an easy way to get them extracted safely into the open air. 


After the sand was given a thorough going-over with the wacker, we were ready to lay down the damp-proof membrane and finally pour the concrete floor slab. Or so we thought...