Sadly, we could procrastinate no longer. The pumps around the water tank weren't loud, but a door would certainly block out any annoying humming noises we could hear at night. (With hindsight, we should never have sited the hot water tank under the stairs, as it caused no end of problems. It would have been better to have built a pump room, away from any living areas, to house all the mechanical and electrical equipment. Next time...)
We decided to try and keep the cupboard door as simple as possible. We bought a large sheet of MDF - 18mm thick and moisture-resistant, in an effort to stop any distortion due to the heat buildup around the hot water tank and pipes.

... then cut it down to size. This was done in stages using a plunge saw.

Testing and fine-tuning the door fit.

We used packers to ensure there was a consistent 2-3mm gap around the door.

Next, we needed to figure out how the shape of the door would affect the way it opened. Having a pointy, triangular-shape at the top of the door matched the angle of the stairs nicely, but also caused issues with it catching on the frame as it opened (hence why you often see under-stairs cupboards where the triangular shape has been replaced with a flat horizontal edge).
Using an MDF off-cut to simulate the top of the door, we mounted it on a hinge to test out where the door would get snagged.

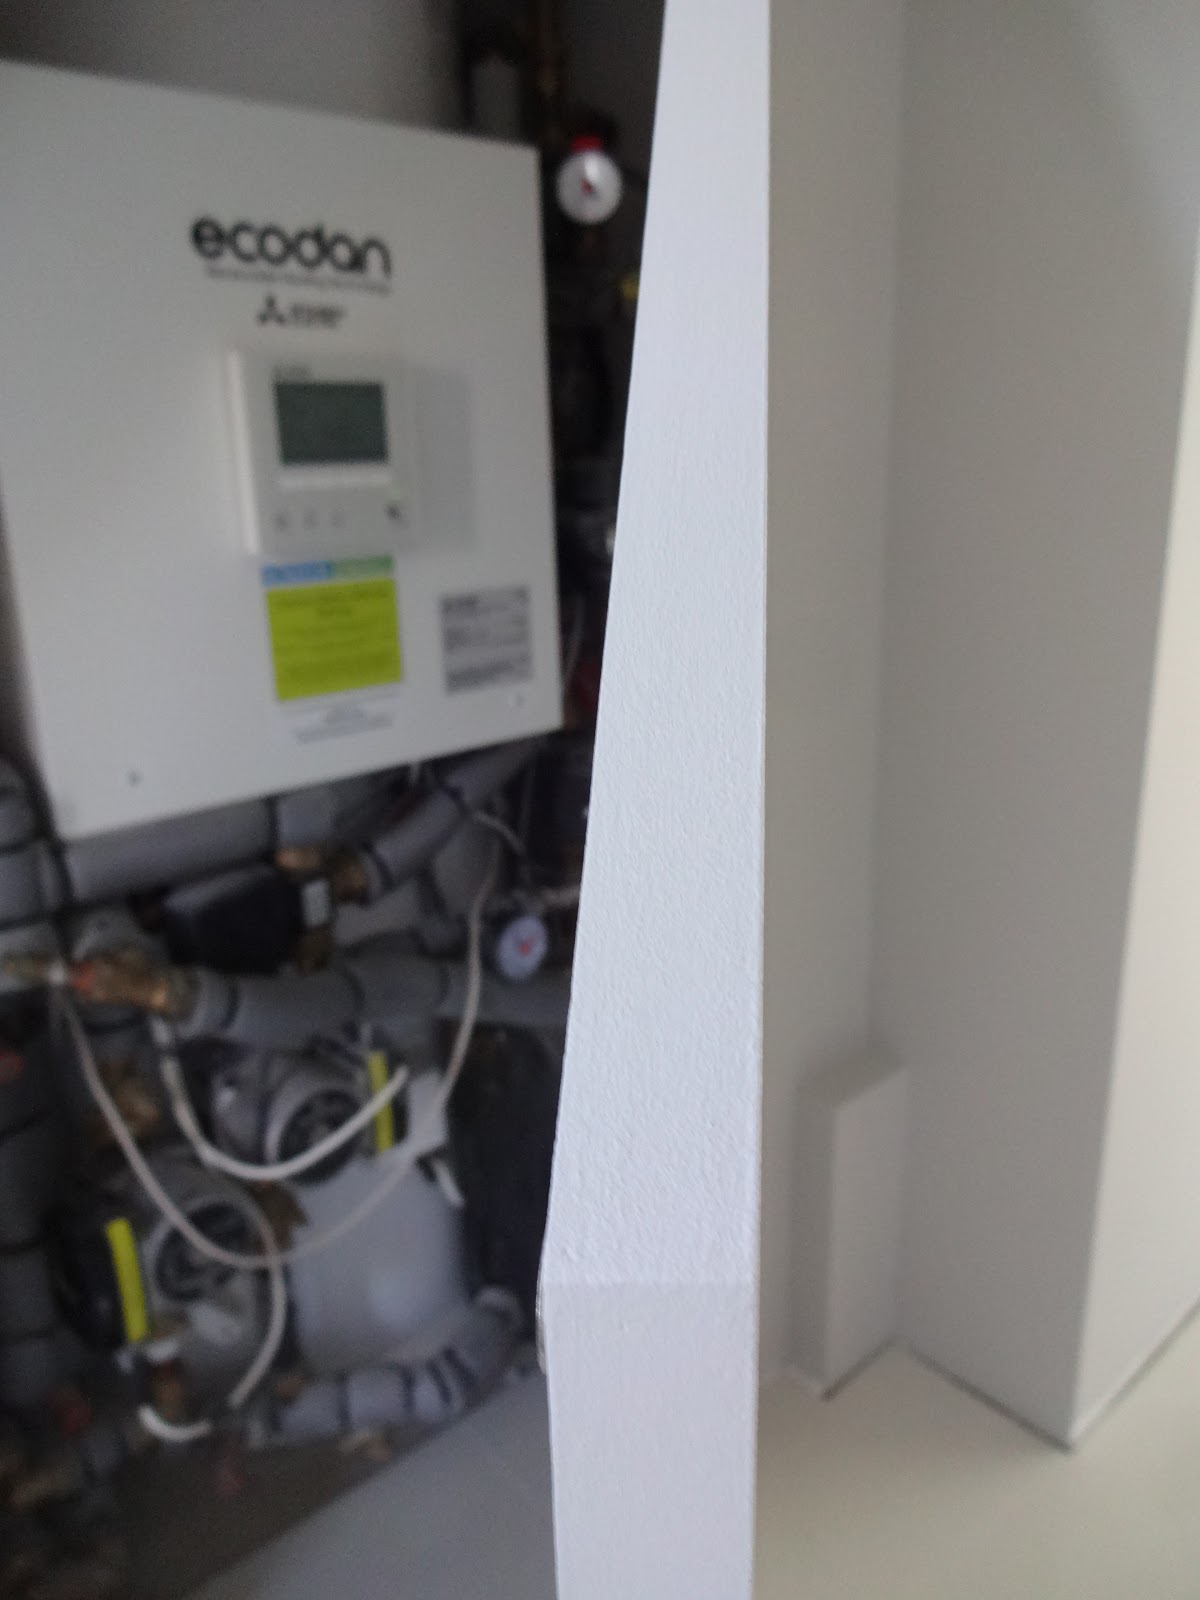
The solution was relatively simple; using a router, we shaved a short, chamfered angle on the inside of the door (as shown in the picture) and that was enough to allow free opening of our 'mini-door'. All we had to do was cut the same shape into the main door.

We wanted the cupboard door to blend into the surrounding walls as much as possible, so decided to use concealed hinges (like the kind you find in wardrobes and kitchen cupboards). These have the added advantage of being adjustable, so fitting them is not too tricky.
The hinge manufacturer has a handy website that allows you to work out how many hinges you will need - the size and weight of our door meant we would need 4 hinges. After working out where the 4 hinges would be sited on the frame, we used a 35mm hinge cutter to drill the sunken holes along the edge of the door.

Getting all 4 hinges aligned and adjusted was tricky, but we got there in the end.

The chamfered edge worked a treat and the door opened and closed perfectly.

The door was a good fit with a nice, even gap all the way around and it certainly shut out any residual noise from the heating.
The hot water cylinder and insulated pipes don't give out that much heat, but there was still a concern that having the door closed might lead to a cumulative build-up of hot air under the oak stairs. We'd previously insulated under all the wooden treads using Celotex, but if oak gets too dry, it can cause cracks and splits, so we decided it might be prudent to fit a couple of vents.

It was awkward to reach, but we managed to cut out a pair of large slots at the top of the cupboard wall.

The fridge freezer sits in an alcove on the other side of this wall, so the slots should allow hot air in the cupboard to be sucked out in tandem with the heat being expelled by the fridge compressor.

Even though it's on the inside of a cupboard, we just couldn't leave two large holes in the wall, so we fitted some simple louvered covers to make everything look a bit neater.

The next step was to paint the cupboard door to match the walls. Although the flat surfaces of MDF are smooth, the edges are prone to being a bit furry and uneven. We were going to use an iron-on edging strip to cover these, but really didn't want to take the door off again (fitting it was awkward) so decided to try using strong 2-part wood filler instead.
Here's the door edge before filling...

... and afterwards. The filler should just help the edges look a bit more even when painted.

Here are the filled edges after we'd painted on the undercoat...
... and finally after painting in French Grey to match the walls.
The Little Greene Intelligent Matt paint was perfect for this as it can be used on both plaster walls and woodwork, so the door should look identical to the rest of the paintwork.

We didn't want to fit any door handles, so we fitted one of those 'push to open' magnetic catches to the inside door frame.
Push and it opens...

... and push again to shut

As you can see, the site inspector could barely contain his excitement at seeing the new cupboard door.

No comments :
Post a Comment