The new stairs were a big hit with the site inspector.

He was probably relieved that he didn't have to climb that ladder anymore (any excuse to post this clip again).
Going up was never a problem, but getting down again was another matter...
Halfway up the stairs, is the stair where he sits (there wasn't any other stair, quite - like - it, etc)

While the glass bannisters were being manufactured, we still had a lot of work to do in order to get the stairs prepared.
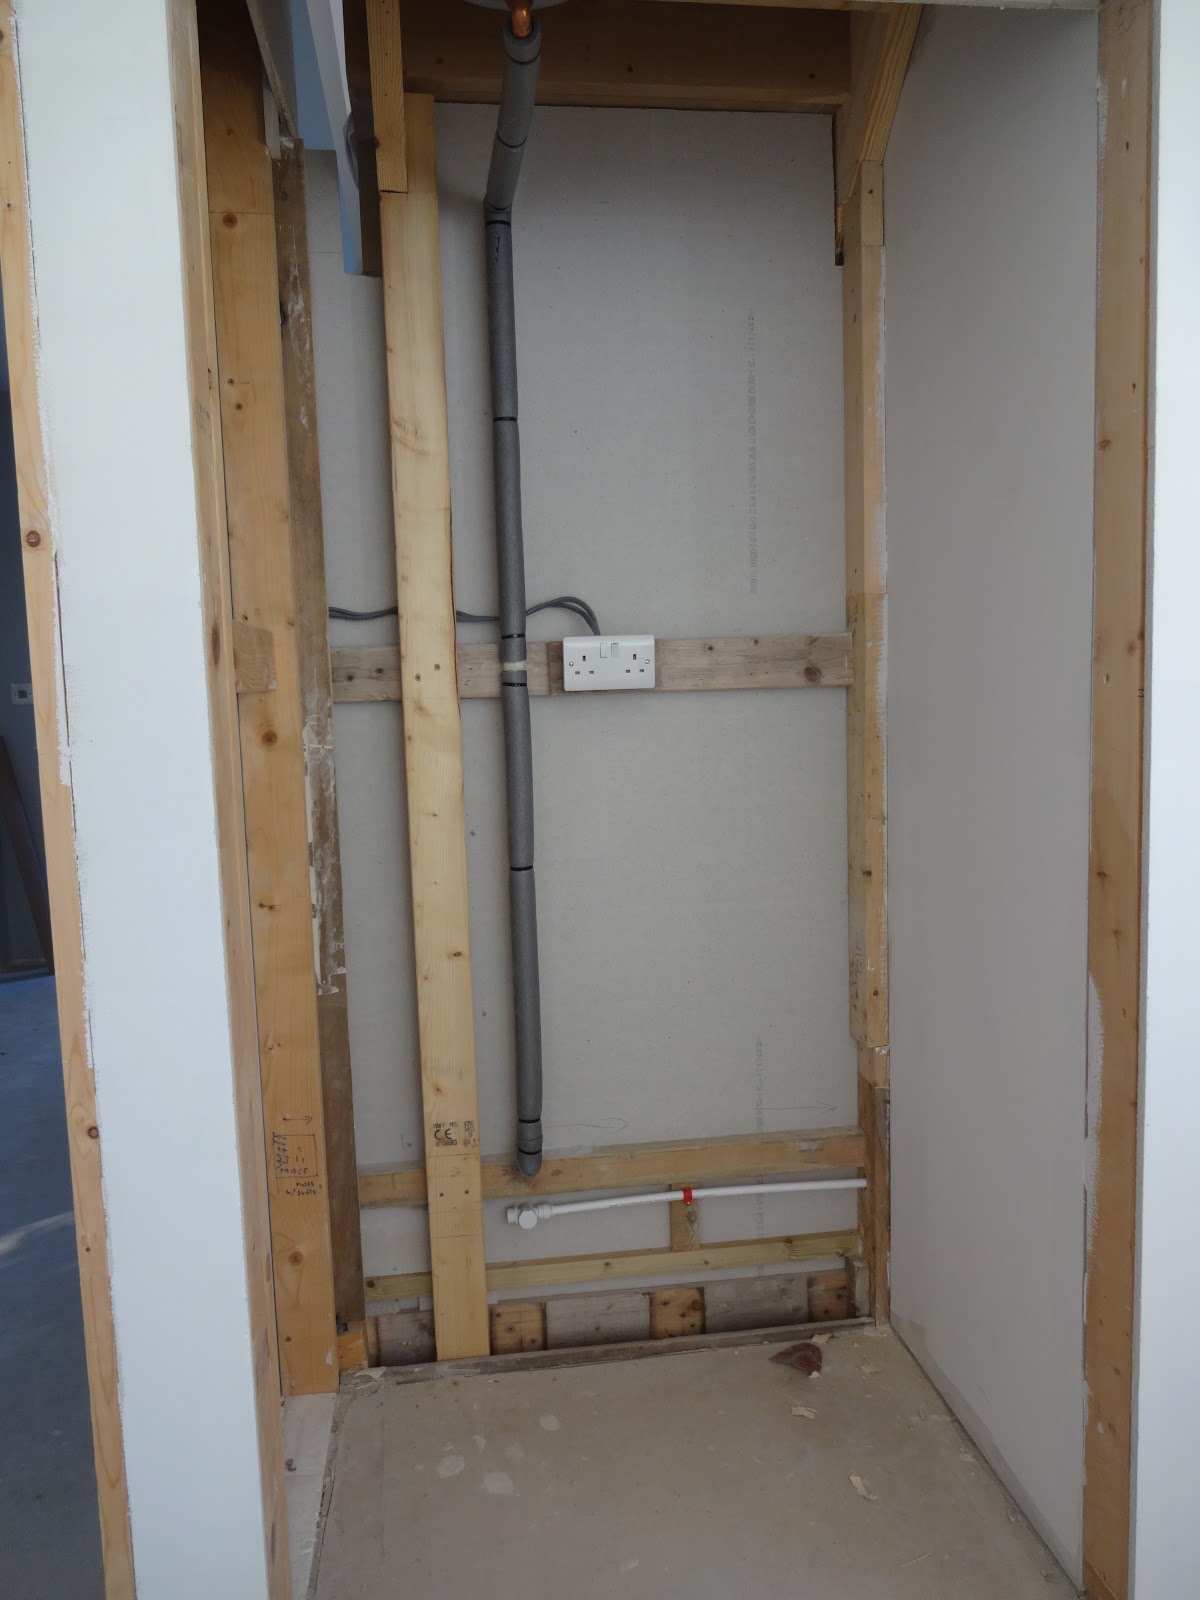
The first issue was that part of the hot water system (grey cylinder pictured below) was sticking out further than we'd have liked.

As the picture below shows, the grey pressure vessel and some of its pipework was protruding beyond the line of the stairs. Despite all the planning and design, house-building always throws up issues like this - jobs overlap, but tradesmen don't necessarily concern themselves with the job that follows their own.
Boxing around it would really spoil the clean lines of the stairs, so we decided to just bite the bullet and get it moved. We weren't allowed to move the pressure vessel ourselves; to qualify for grant payments, the heating system has to be commissioned by certified engineers, so they had to be called back to do the work (and paid for their trouble, of course).

It didn't take too long for the heating engineer to remove the pressure vessel. The pipes were relocated to go through the wall to the right of the water cylinder.

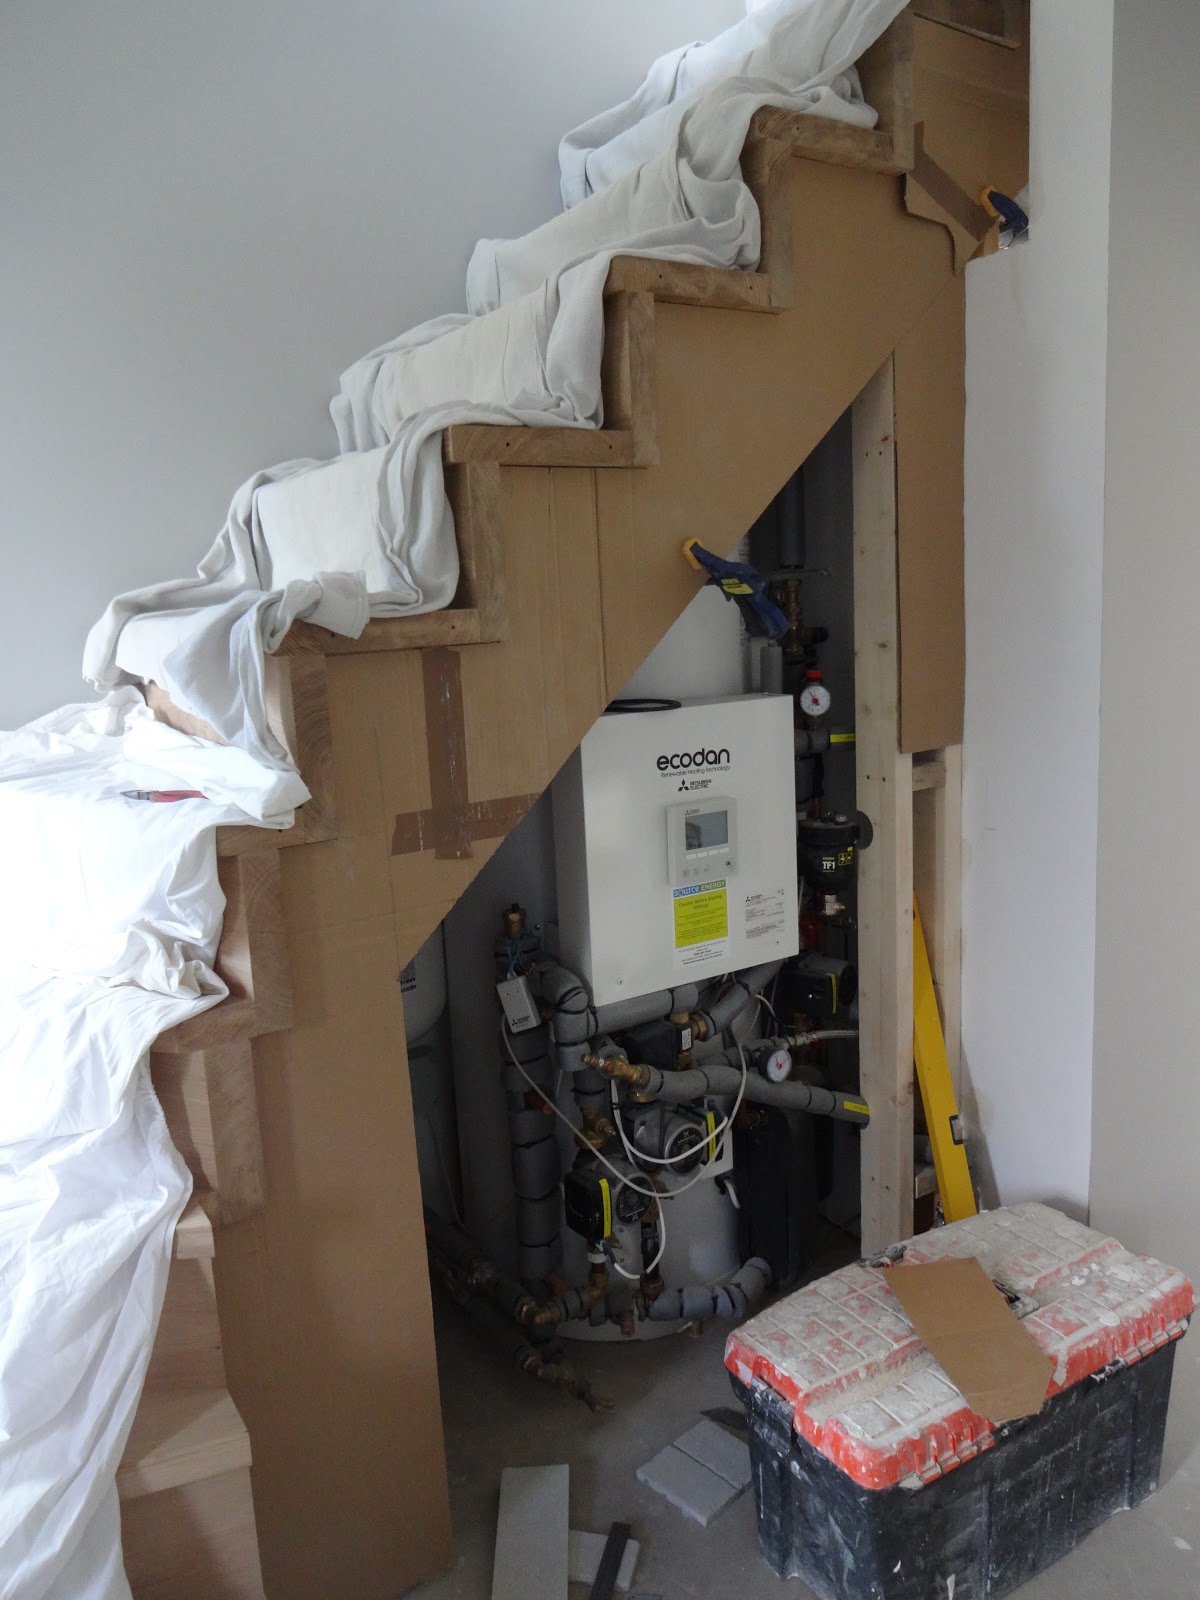
This is the alcove on the other side of the wall under the stairs. This area is where our fridge-freezer will be located, so the pressure vessel has to be positioned right up out of the way.
Looking up at the pressure vessel, now located under the top step of the staircase.

Once the work had been completed, we repaired all the holes and repainted.
With hindsight, we should have located the water cylinder in a more spacious location (despite being advised that it was fine by several heating engineers). Trying to squeeze it under the stairs had caused us a multitude of problems; if we ever build again, we'll be constructing a separate room to house this kind of equipment.

Solid oak is sensitive to changes in temperature and humidity and if allowed to dry out too much will start to crack. The water cylinder was well-insulated so only radiated a small amount of heat, but being situated in such an enclosed space there was a chance that temperatures could build up, so we felt it was prudent to insulate underneath all the stair treads.
We had a lot of Celotex left over from the roof insulation, so it was a great way to use up all those off-cuts.
Looking up at the bottom of the oak steps, with the first piece of insulation being wedged into place.

It was a pain cutting the Celotex to shape, with lots of odd angles and pipes to squeeze around, but it will be worth it if it prevents the steps from splitting or buckling in future.

Although the stairs had been designed to support a heavy weight, we noticed that the whole structure was flexing slightly when walking up or down, causing a few creaks and squeaks. Not unusual for a staircase, but too much movement could cause cracks in the Fermacell that we would be using to board around it.
Since we were building a frame to support a cupboard door, we decided to make it extra strong so that it doubled up as additional bracing for the whole staircase.

Alan cut notches out of the staircase framework and fitted a column of thick CLS studs underneath. One in the kitchen 'fridge cupboard' and two in the cupboard under the stairs.

The heating system will need to be serviced from time to time, so it was important to make sure that it was possible (if not exactly easy) to reach all the levers and bolts.

A few noggins and the triple stud arrangement was complete. The staircase felt solid as a rock after that, which was just as well because we also needed to cut away some of the support framework lower down.

We were not sure why the framework was cut at an angle, rather than straight down. It made access to the space under the stairs very awkward, plus was going to cause problems with the cupboard door, so it needed to be cut out.
Before removing the diagonal section (marked with the red arrow below) we contacted the stair designers to make sure it wasn't going to weaken the structure.

The stairs after we had cut away the diagonal section. We also added some extra supports inside the cupboard.

Finally, Alan made a timber frame around the whole aperture that will act as a liner for the cupboard door.

The glass bannister will be bolted to the side of the stair treads so all the boarding around the staircase will need to be completed before the glass is fitted.
This was a job which we really hadn't been looking forward to; cutting Fermacell to fit under all those stairs was going to be really awkward. The first step was to make a cardboard template.

Once the template was finished, the shape could be transferred onto a sheet of Fermacell. The site inspector supervised this job personally.

To avoid any cracks appearing in future, we tried to make the main area out of one continuous piece. Alan found it was best to cut the Fermacell steps using a handsaw; it was a slow process but accurate, hopefully meaning we would have fewer gaps to fill later.

The template worked well and the Fermacell fitted snugly under the stairs.

Access to the upper area was extremely limited so fitting the Fermacell under the top steps was tricky.

The Fermacell boarding screwed firmly into place around the stairs.
Unfortunately the pipe emerging from the floor (bottom right) could not easily be moved so we would need to find a creative solution to hide that.

Alan boxed in the pipe using Fermacell, but access to the lever valve was still possible by reaching around inside.
We might be able to disguise this pipe box further when we come to fit the skirting boards.

Next job was to fill all the joints, gaps and screw holes with Fermacell jointing compound.

Using a handsaw to cut around the steps had proved very accurate so we only had a very fine gap to fill. Traffic going up and down the stairs will naturally cause some movement, so we used flexible caulk for these gaps to reduce any chance of cracking.


Once the jointing compound had dried, we trowelled on an ultra-thin layer of FST (Fine Surface Treatment), Fermacell's alternative to plaster skimming. An hour later, we gave all the new boarding a light sanding and it was ready to be painted.

After painting with two coats of Little Greene's 'French Grey', it was a perfect match for the walls (hard to tell from the picture as the colour looked very similar to the unfinished Fermacell board!)

The end grain of the oak steps looked a lot better after cleaning and oiling. We needed to treat these areas before the glass bannister is fitted, as we won't be able to access them afterwards.


The metal channel that would hold the landing glass was made up of two pieces (we saved money on the staircase by using these off-cuts). In order to disguise the join, we would need to clad the whole thing in Fermacell board.

After cutting some Fermacell to size, we fixed it in place using strong adhesive.

After the joints had been filled, we used compound as a kind of skim coat to level out the surface. Alan used a lamp shining up at the face of the board in order to highlight any imperfections.

Problem areas marked out with pencil ready for further filling and smoothing.

Once painted, you would never know that it had been made up of several pieces. We will probably finish the top off with some kind of metal trim, after the glass has been fitted.

No comments :
Post a Comment