We did initially consider building the drawer boxes from scratch and just buying the drawer fronts from our kitchen supplier, but it was much more convenient (and cost-effective) to adapt some ready-made units if possible. Our supplier sold microwave housings in various sizes, so we bought 3 of them to use as the base of our homemade unit.
We were careful to choose drawers that were the right height for comfortable seating and by coincidence, that was exactly the same height as the bottom drawers in the island unit opposite, so it should all match nicely once completed.

We had specified that the units were to be supplied dry-assembled (i.e., dowelled, but unglued) which would allow us to dismantle them for easier cutting and re-configuring. Unfortunately despite being clearly labelled, someone in the factory still decided to go crazy-ape bonkers with their glue gun and the units were stuck fast, with no chance of prising them apart without damage.
The supplier offered to replace the units or alternatively knock a sum of money off the bill... so naturally we opted for the fat discount and decided to figure out a creative way to work around the issue. In these latter stages of the build when our finances are dwindling, any money we can save is very welcome.

Plan B: Alan managed to cut the side panels off the cabinets using just a handsaw. It was a little more laborious than just running the loose panels under a plunge saw, but was much more accurate than expected.

After the side panels had been cut from the 3 units, we sanded away any unevenness and adjusted the units for height and level. Once everything was lined up, we joined them together using concealed fixings.
One of the main reasons we had wanted to dismantle the units, was to strengthen them with additional timber bracing, but they had been so strongly assembled (by that demon glue merchant at the factory) that there really was no need.

Another stroke of luck. The suppliers had mistakenly sent us some small gloss blanking panels (free of charge - yay!). These were factory-finished and painted on all four sides - it seemed a shame not to make use of them, so we adopted them into our design. As ever, Alan planned how it would all fit together before we started, using a scale 3d drawing made in Google Sketchup.

The supports for the 'columns' on either side were made of scrap timber, using the small gloss panels as a kind of jig to gauge the size, so we would get a perfect fit when it was all assembled.

The 'columns' should help give the ends of the seating area a chunkier feel and also create a clean edge for the 'stainless steel' kickboard to fit within.

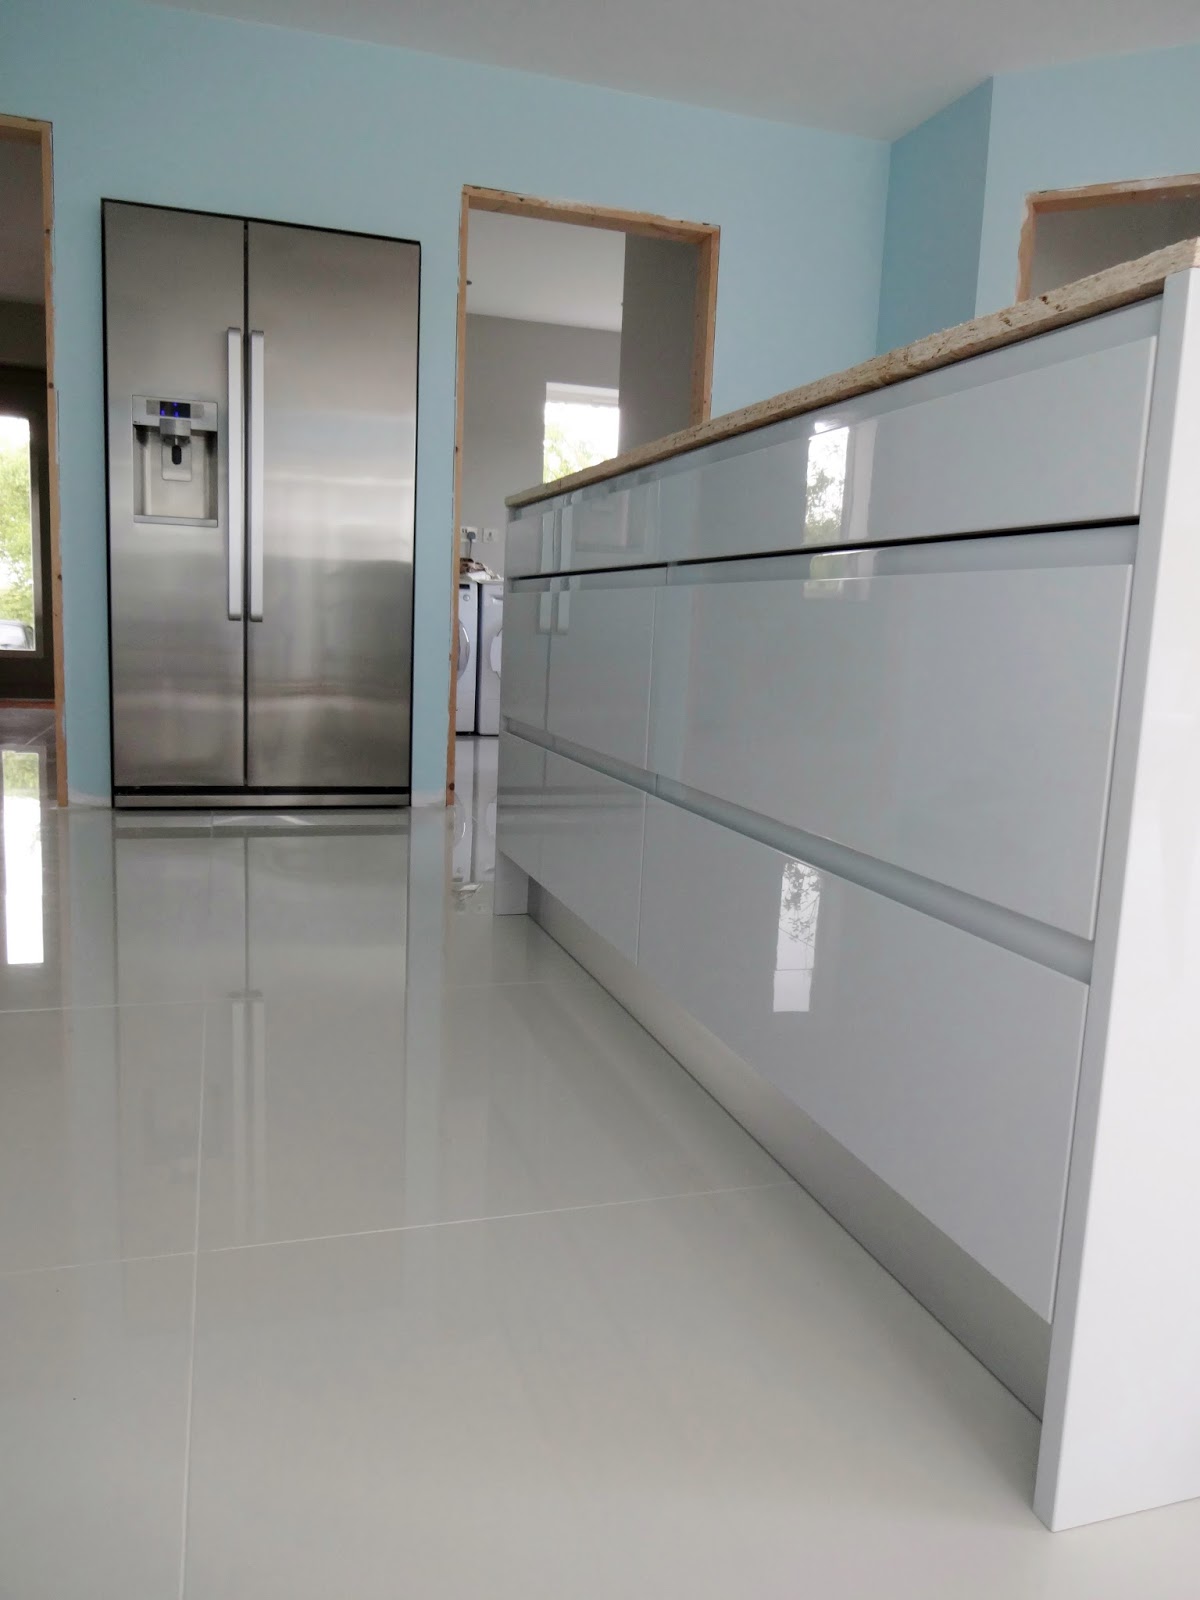
We wanted the homemade unit to match the factory-made cabinets that we had already installed. The drawers were the same design and height, but to tie-in with the other units, we also fitted the decorative end panels to either end of the unit. Because the unit is relatively low, we were able to make these mini end-panels out of off-cuts from the bigger ones we'd used elsewhere.

Cutting the end panel for the top was not going to be easy. We only had one large sheet and any mistakes would be expensive, so it was important to get it right first time. Gulp!

The top was cut from a large decorative panel, usually used for finishing the ends of full-height kitchen units. As before, we found the neatest way to trim this glossy coating without chipping, was to cut it slightly over-sized using the plunge saw (on rails), then sand down to match the contours of the wall.

Before fitting the top, we attached the final side panel. The top panel was then secured to the unit invisibly using short screws added from the carcass below.
We were quite pleased with the end result; a kind of kitchen bench seat, with tons of storage and soft-closing drawers, made for less than the cost of one of our basic kitchen drawer units.


As with the shed, drawing a 3d plan beforehand certainly made it much easier to work out how everything would fit together.

During the 1st fix electrics, we had installed aerial/CAT5 and power sockets up on the wall in preparation for a kitchen TV, though couldn't afford to buy one yet. So when Alan's mum told us that her elderly neighbour's old TV might be going spare, we were interested... though we were rather surprised when we later discovered it was a Bang & Olufsen! Although it was quite an old TV, the design and sound quality were much better than anything we could (ever) afford so we gratefully accepted the offer.
Unfortunately the TV didn't come with a wall-mounting bracket and as with anything Bang & Olufsen, these fittings cost an absolute fortune. Luckily a dealer on Ebay accepted our (very) speculative offer for one he'd been trying to sell for a while.
In preparation for fitting a heavy TV, we'd installed thick wooden supports prior to boarding the walls. Luckily we'd also kept detailed photographs with measurements so we knew exactly where the supports and studs were positioned.

Once we worked out exactly where the wooden supports were, it was easy to screw the wall-bracket firmly in position...

... allowing the TV to hang neatly and securely in place.

Having rigged up central libraries on our computer network for sharing music, films and TV shows around the house, it seemed a pity that the old Bang & Olufsen wasn't internet-enabled like modern TVs. To get around this issue, Alan made a mini-media PC out of a Raspberry Pi (a micro-sized, customizable computer).

The Raspberry Pi can be connected to our network wirelessly but we preferred to use an ethernet cable for better transfer rates. It was then connected to the TV via a standard HDMI cable.
Even in its natty case, there was enough room to fit the tiny Raspberry Pi behind the TV without compromising its flat-to-the-wall fitting.

A 'dumb' TV cheaply transformed into a Smart one; we now had access to the internet, as well as our central film and music libraries on the kitchen TV.

Back to the kitchen fitting and the next job was to install decorative end panels for the kitchen island.
Building our kitchen on a tight budget meant we didn't have the luxury of buying custom-sized end panels. Our supplier only made a very limited range of panels anyway, so we would have to make the end out of two panels.

Once the two end panels had been cut to size and any bare MDF waterproofed, we clamped them in position and carefully fixed them to the carcass using screws from the inside of the units.

The joint between the two end panels would have to be concealed later, possibly with a strip of brushed stainless steel to match the rest of the kitchen.

The 'oven' side of the island was slightly more difficult because there was no carcass to which we could fit the end panels.

The wooden plinth we'd made to support the oven doubled up as a support for the bottom of the end panel too. Once that had been lined up and secured, the top half was braced in position using timber supports.

It was fiddly, but eventually we got the end panels lined up properly and the oven back in place.

Once the decorative end panels were in place, it allowed us to fit the stainless steel kickboards to the island, which made the whole thing look a little more finished.
The kitchen was gradually taking shape. We just needed to replace our temporary OSB worktops with something a little more appropriate.


Next door in the utility room, there was a very important job that needed our attention; the site inspector had demanded his own private entrance...

... which meant Alan had to cut a hole in the aluminium door panel.

We invested in a good quality, site-inspector-flap to minimise any potential draughts or water leaks.

We also completed the fitting of the kitchen units in the utility room, adding the decorative end panels and kickboards.

In the past we'd had bad experiences with built-in appliances, so went for freestanding appliances throughout the new kitchen.

While finishing off the utility room, we had another visit from the large group of deer that live in the woods nearby.

They sometimes come right up to the house.

More deer gathering outside the kitchen window - it's quite surreal watching them while washing up!


After all our hard work, it was nice to see that someone enjoyed the new kitchen bench seat...

... apparently it's even comfortable when you're upside-down.

Once the site inspector had finished his power-nap, we could tackle the final job on the bench seat - fitting a mini-uplight.
We had originally planned to have a wall light in this corner, but re-routed the wiring some time ago to allow a dimmable uplight instead. This should add some variety to the kitchen lighting options.
We drilled a hole in the bench and retrieved the wiring that we'd left coiled below.

Alan fitted the LED mini-uplight. It's tiltable so the light can also be angled in any direction.

Ta-da! The uplight in action.

No comments :
Post a Comment