As with the upstairs ceilings, we took some time to plan exactly how we would lay out the boards in order to minimise the number of butt joints (these short joints are harder to conceal with filler than the tapered joints that run the lengths of the boards).
We decided to make a start in the entrance hall. The boards were too heavy and unwieldy for one person to carry, so as usual it needed both of us to heave each board onto the lifter. After that, it was relatively easy to wheel the lifter into position...

... and hoist the board up so it was pressed against the joists...

... then once the 30-40 screws had been driven in, the lifter could be lowered, leaving the board secured firmly in position.

More boards added. To avoid getting cracks between the joints later, it was important that the boards were laid in an overlapping pattern..

The hall completed.

Alan trimming a plasterboard sheet to size. The (one) good thing about plasterboard is that it can be cut fairly easily using just a straight-edge and a craft knife.

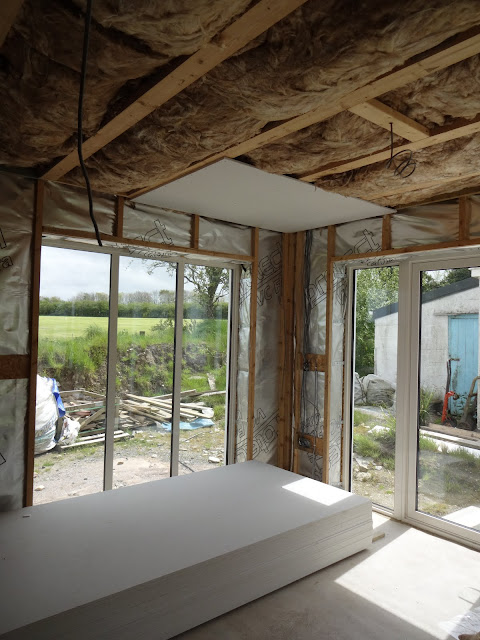
First sheet going up in the lounge. Moving the two-ton stack of Fermacell board (for the walls) wasn't practical so we had to work around (or in this case, on top of) it all.


As the picture shows, it's important that the joints between the boards sit directly under the middle of the wooden joists, so that screws can be attached to both sides of the joint and help prevent any movement.
With standard 12.5mm thick plasterboard the joints on the long sides are supposed to be supported, but to save ourselves having to put up hundreds more noggins, we chose to use the thicker 15mm plasterboard. This is rigid enough to be fitted straight onto the joists without any extra support.

The lounge ceiling taking shape.

Some minor adjustments to the last row in the lounge. This is where we find out how straight (or not) our walls really are.

The lounge fully boarded.

Next up was the utility room.

Alan nudging a corner piece into position.

The corner piece also needed a cutout for the ventilation duct, so accurate measurements were needed before we hauled it up to the joists, to ensure that everything lined up correctly.

The vent cutouts for both the utility room and the downstairs toilet.

You can get specialist tools for driving in plasterboard screws to the correct depth. We just used a cordless screwdriver with an adjustable clutch which was a bit slower but did the job.

The expansive ceiling in the kitchen/dining room was next. More stacks of Fermacell board made positioning the lifter rather tricky.

The site manager arrived and conducted his usual rigorous inspections.

The frame company had thoughtfully manufactured the internal stud walls with a gap above to allow us to slot a sheet of plasterboard straight over the top and thus avoid having to make so many plasterboard cuts. This would have saved us a lot of work but sadly the gap was designed for standard 12.5mm plasterboard not the thicker board we had later decided to use...
It wouldn't have mattered even if we had chosen the thinner board, because the nailgun-crazed frame erectors had shot dozens of nails through the timber and completely blocked the gaps! Boarding the awkward angles around the larder would have been much easier if we could have just slid a whole board over the top of the wall, but we had no choice but to cut around the walls - grrr.

First row up in the kitchen. It's amazing how much cleaner and lighter the whole room starts to feel once the boards go up.

Having so many wide posi-joists above the ground floor gave us plenty of fixing points for the plasterboard so laying out the sheets was much easier downstairs.

Lining up the vent for the kitchen extractor.


A homing pigeon had decided to stay at our house for a few weeks. The site manager kept a careful watch over our new guest for the duration of his stay.

The kitchen/dining room almost completed.

As ever, we only ordered just enough plasterboard to do the job with minimal allowance for wastage and mistakes. By the time we started the study, we only had a few full sheets left.

All the ceilings are complete and we only had one full sheet left over.

The ceiling inside the larder was going to be a pain to cut out in one piece, but wherever possible we tried to avoid making extra joints as it's the joints that can crack later.

A cardboard template was required...

... but we got one whole piece in there (in the end).

The site manager conducted a final examination of our work...

... before declaring the ceilings officially boarded.

No comments :
Post a Comment