The first job for screeders Rich and Jamie was to set the levels so that the screed would be poured to the correct depth. Getting this right was critical so Rich used a laser to accurately work out the levels required.

We'd originally planned to have a 50mm screed but Rich's laser measurements soon revealed a slight problem; the front door had been set too high. Due to regulations about wheelchair access, the only practical solution was to increase the screed level throughout the whole house to compensate, which meant that the screed would now be up to 75mm in some places.
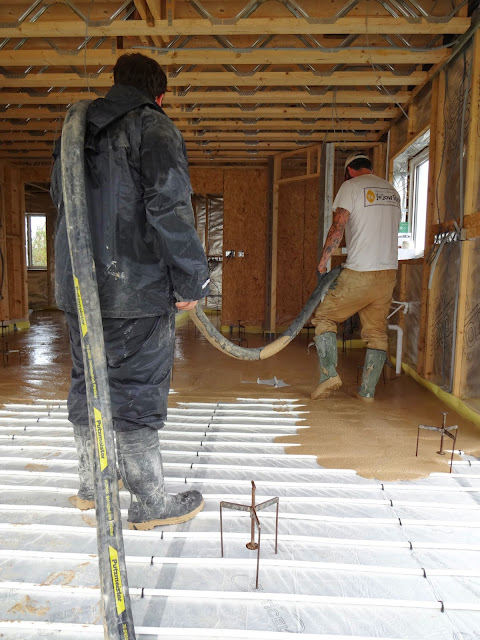
Metal 'spiders' were set out in every room and these were used as markers for the screed depth.

Although it is slightly more expensive, we chose to use liquid screed rather than the more traditional sand/cement screed for several reasons. It is less labour-intensive and therefore much quicker to install. It dries quicker, is less prone to cracking and has better thermal efficiency. It also meant avoiding using any more 'wet trades' (i.e plasterers, ground-workers, brickies etc.) who I've found to be completely and utterly off their trolleys.

The pre-mixed anhydrite screed was delivered on site. Once Rich was happy with the consistency, it could be pumped directly into the house.

This is the moment where you hope you have sealed the floor enough...

The pipe was extremely heavy even when empty. Once the screed was flowing through it, it needed two people to lift.


The last room to be screeded was the kitchen/diner. The whole of the ground floor had been poured in less than 20 minutes. A conventional screed would have taken at least a week (probably more knowing what plasterers are like!)


Jamie checked all the spiders to make sure the screed level was correct before removing them all.


The final stage was tamping to remove any air bubbles hiding in the screed.

Once the tamping was complete, the house was locked up for two days to allow the screed to cure. It is surprising how much heat this process generated and the windows steamed up with all the condensation.


After 48 hours the screed was dry enough to walk on. The site inspector wasted no time in conducting a thorough examination of the whole house.


He approves of the screed. Hooray for the site inspector!

No comments :
Post a Comment