Monday 18 August 2014

Electrics - 1st fix

The new shed would need power as it was going to contain the water filtration system, so we laid some heavy armoured cable all the way from the new house.


Finding a decent electrician in such a remote area had proven to be rather difficult. Luckily our nearest neighbour was able to recommend a young duo who had been working on his barn conversion. Coincidentally they were both called 'Aaron', so along with 'Alan' and later on our plumber named 'Ali', it all got very silly indeed.

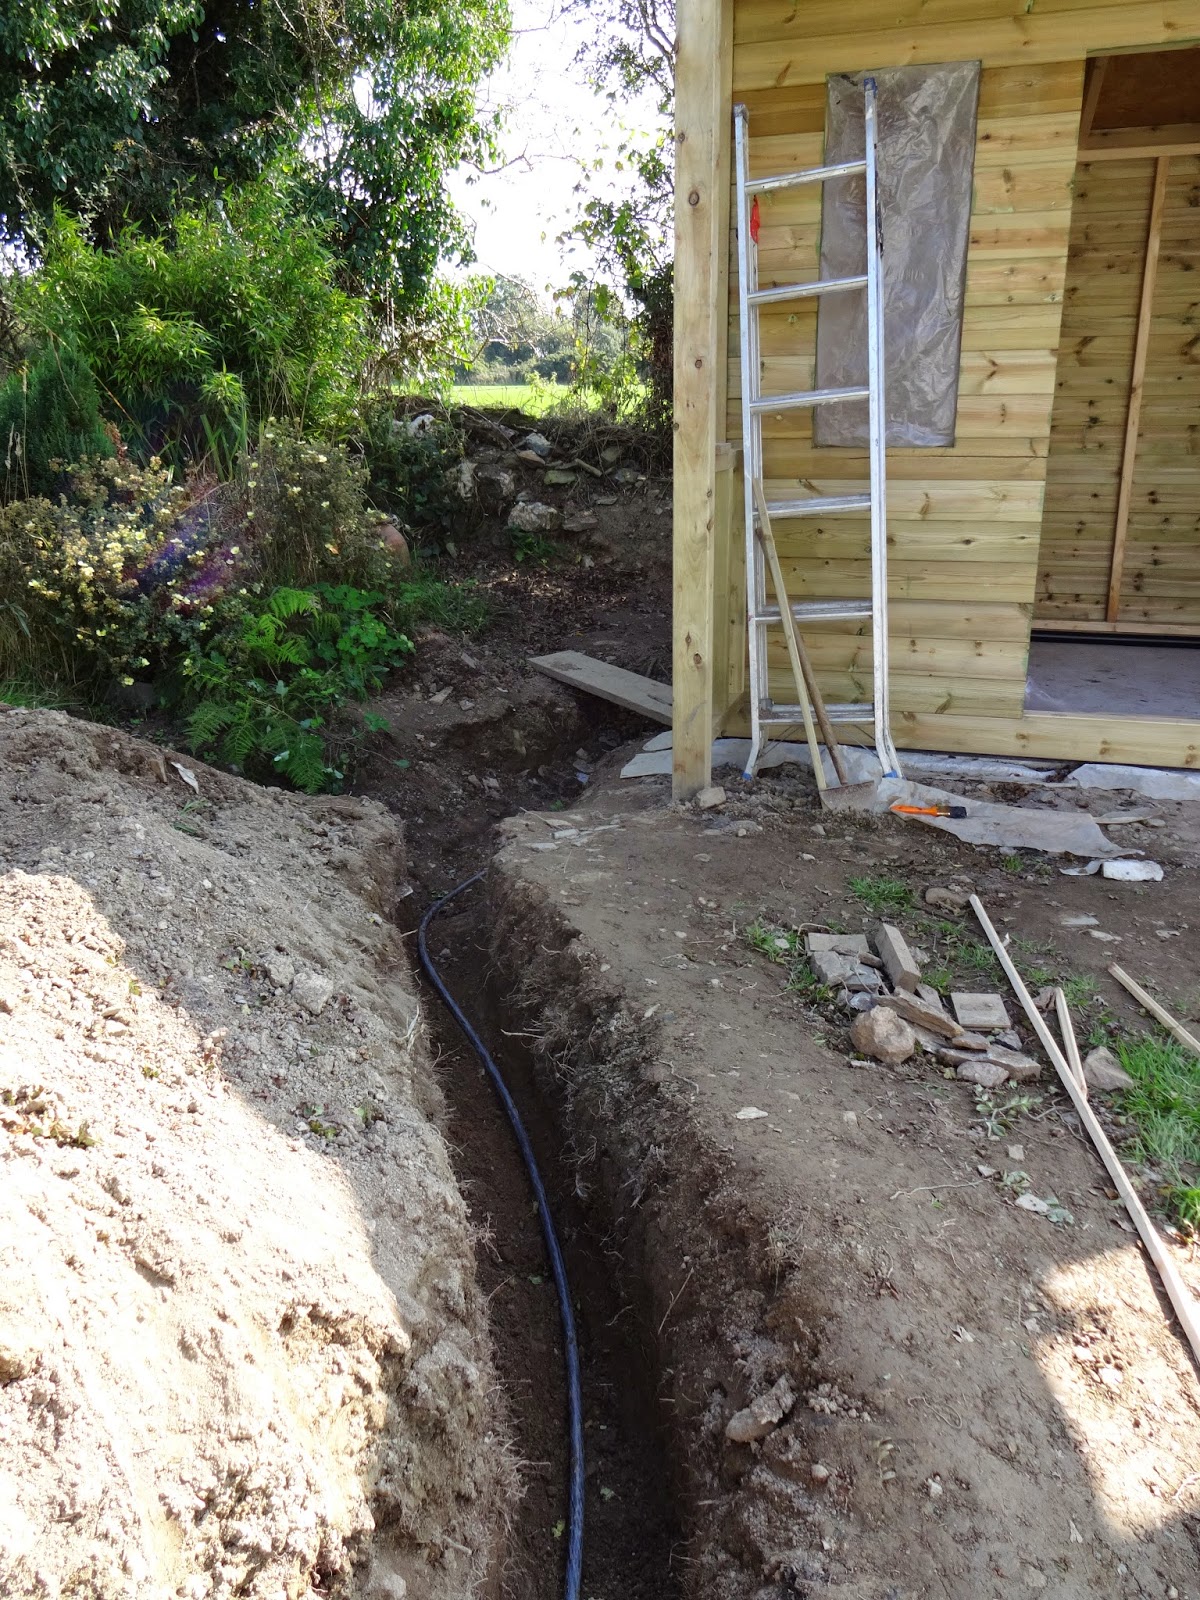
Arron and Alan threaded the armoured cable through the conduit that we'd set into the concrete floor slab of the shed.


We laid sand around the cable as an added precaution to protect it from sharp stones...


... and warning tape in case anyone decides to dig there in the future...


... and finally back-filled the trench.


While Alan spent time drawing up the shed design, I had been working on a plan for the electrics and lighting. Building regulations had to be taken into account as there are minimum requirements for the amount of sockets in each room.


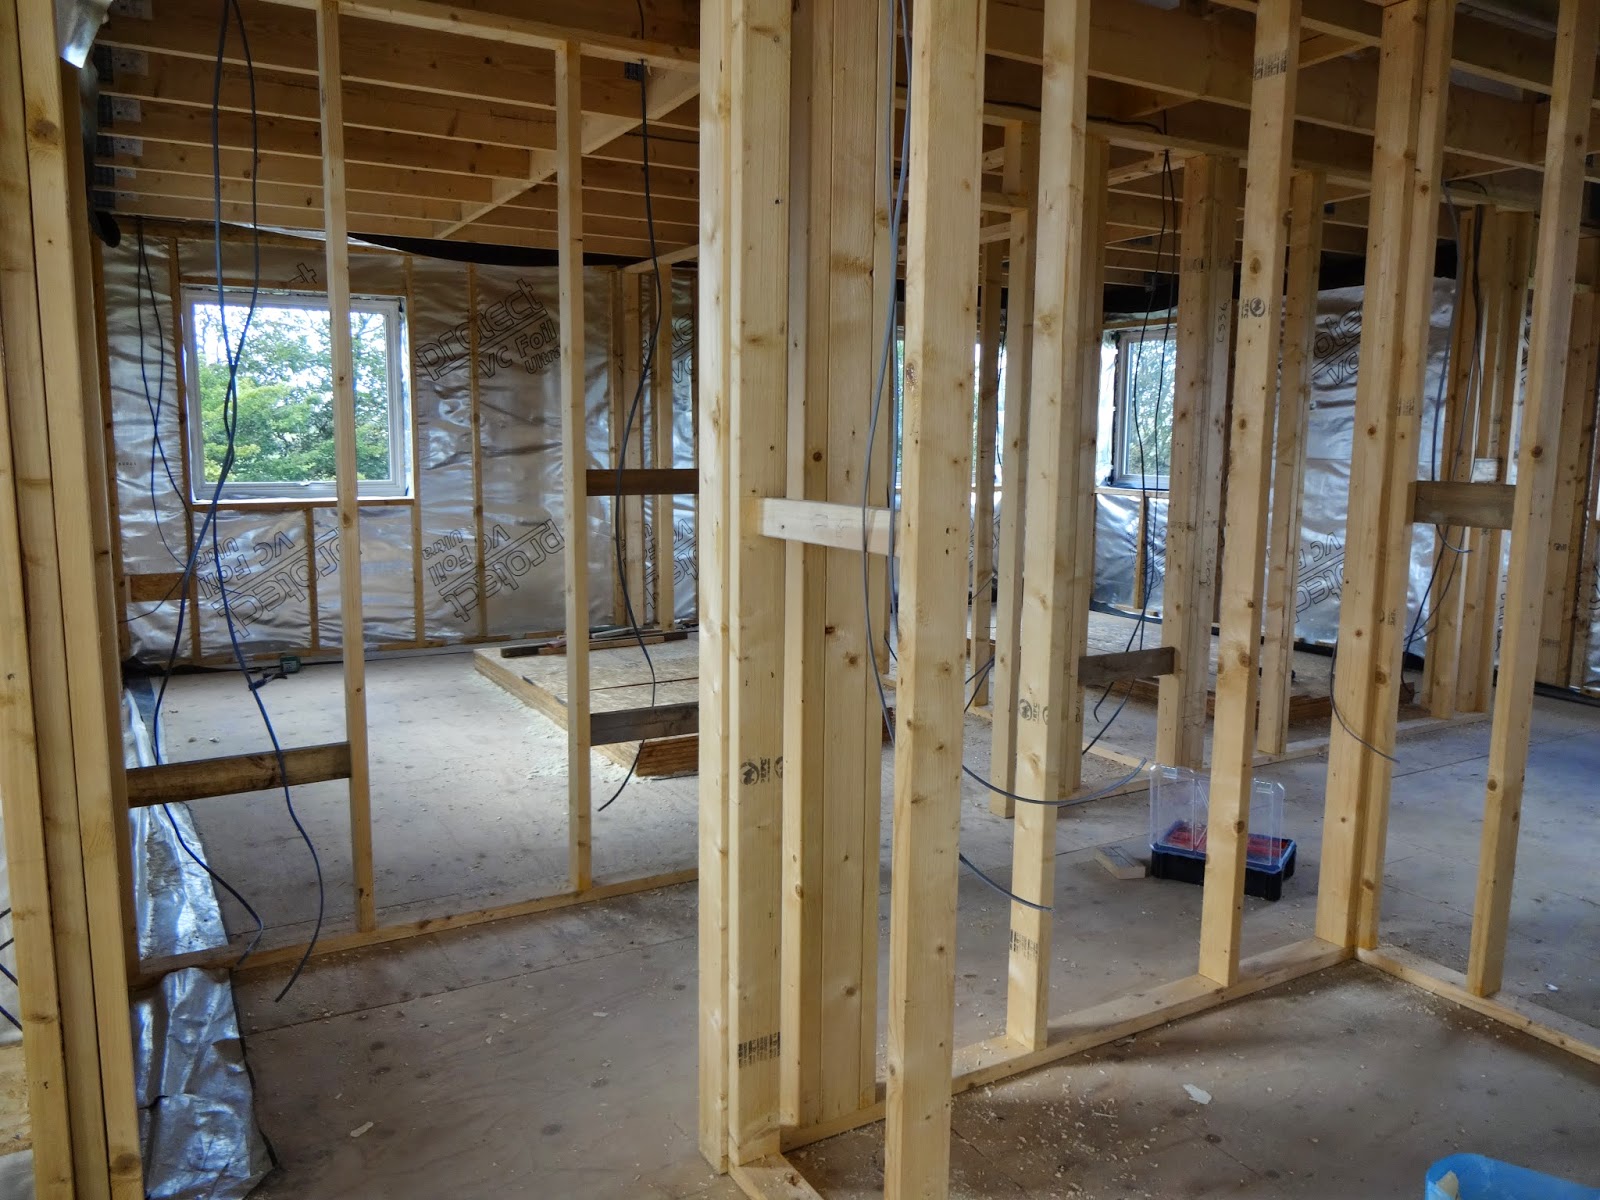
We walked through my wiring plan with Arron and Aaron, marking the positions of sockets and switches. One problem that arose was how we were going to secure the electrical back boxes to our timber frame panels - we didn't like the idea of cutting away the silver vapour barrier to fit noggins (it would compromise the air-tightness) nor did we fancy those flimsy-looking plastic plasterboard boxes. Alan came up with the idea of using OSB boards braced across the studs to avoid cutting holes in the vapour barrier.


The OSB panels were left over from the timber frame build. It was great once again to make use of materials that normally would just get thrown away.


While Alan went round fixing all his OSB panels (patent pending), I repaired holes and tears in the vapour barrier with aluminium tape.


Aaron and Arron started installing the 1st fix electrics, running cables along the walls and ceilings and fitting back boxes to Alan's OSB panels.


Meanwhile, the site inspector concentrated on measuring the heat efficiency of the feature window.


This took all morning...


... and all afternoon.


Dunno what this is. I think Alan got a bit carried away...
Just joking, this is actually a nifty way to fix the garden/patio light switch to the steel frame.


We often worked late in order to get everything prepared for Aaron and Arron the next morning.


Working at night gave us a chance to experiment with how we would position our lights. Our electrical suppliers lent us an LED light and we tried it out all over the house to give us a better idea of how the lighting could look.


I liked the idea of placing LED ceiling downlights close to the walls in order to create a wall light effect. We tested out various wall textures and colours to see how it might work.


The moon tried to get in on the act.


Our leftover wood pile was handy for all the stud work.


Alan attached noggins in the stud walls where needed for the electrical sockets and switches.


Lots of noggins going in - they also provided extra rigidity to the stud walls.


Arron, Aaron and Ali all at work.


As the cooker would be positioned in the kitchen island, the wiring had to go under the floor. Aaron fitted the cable in a conduit which would later be buried under thick insulation and liquid screed.


It was nice to see all the wiring installed around the house. For the first time it started to feel more like a home than a building site.


The final job for the 1st fix electrics was to run the meter tails from the consumer unit (fusebox) in the study to the external meter box.


Alan screwed the meter box into the wall...


... and sealed around it with silicone (left over from the window fitting!)


Saturday 16 August 2014

Services: Water - Shed 2

With the shed frame completed we began work on the cladding. We got a good deal for pressure-treated (tanalised) tongue and groove boards from a local timber yard. As neither of us had ever tried 'secret nailing' (i.e., where there are no visible fixings) we decided to start on the back of the shed in case of mistakes.


We did our 'secret nailing' using special ultra-thin 'tongue-tite' screws designed to go through the tongue of the boards without splitting the wood. They worked really well.


The cladding for the back of the shed went up very quickly.


The west side next to the Camelia shrub was awkward to get to but we were reluctant to prune it.


With the back and west side completed, we moved on to the front of the shed.


This took a bit longer as the cladding needed a lot of cuts around the door and windows.


With all the walls finally clad, we could get started on the roof.


The junior site inspector (Custard) wasn't put off by the noise of all the power tools.


We had plenty of 22mm OSB left over from building the house that was perfect to use for the shed roof. It was great to recycle all these materials as it saves time, saves on wastage & most importantly, saves money.


The OSB sheeting fixed in place.


The site inspector seemed to approve.


All that inspecting was tiring work...


...time for a snooze.


Alan used a chalk line to mark out straight lines along the roof for the felt.


The first strip of felt goes on. We used felt adhesive along with nails to strengthen the joints and hopefully avoid any leaks.


Typically for Alan he measured out every space between each nail to make sure they were all perfectly aligned - despite the fact that nobody would ever see the top of the roof unless they climbed up there with a ladder.


The perfect line of nails that nobody will ever see... except for this picture.


We built the verandah for the front part of the shed inside our cramped living room, partly because it was raining, though mostly because Spurs were playing. If you look very closely you can see that Spurs are up 4-0.


Lining up the verandah took a bit of time. We used clamps and temporary timber supports to hold it in place before screwing it all together.


Everything fitted together so well because of Alan's comprehensive plans. It took him ages but I'm sure that it saved us time and trouble in the long run.


We used tanalised wood for the balcony rails and large support posts.


Once we were happy that everything was level and lined up correctly...


... we could pour in a concrete post mix to hold it sturdily in place.


Once the verandah frame was in place, the roof was ready for cladding.


We used tongue and groove for the verandah roof rather than OSB as it would look nicer from underneath.


More recycling - we used breathable membrane left over from the roof of our house.


The last felt strip goes on, complete with Alan's OCD nail-spacing.


Hoorah! The roof is finally rainproof.


To stop water dripping off the roof onto the back wall, we fitted a mini gutter and drainpipe.


Gutter brackets in place.


Guttering and drainpipe ready for the winter downpours.


With the water filtration system due to be fitted soon, the last job was to dig some more trenches for pipes and power cables. Unfortunately these needed to be done by hand as the mini digger we'd hired had already been returned.


Building the shed from scratch was a slow process but it was nice to see it gradually coming together.