Tuesday, 30 June 2015

Boarding: Walls - Ground floor

Boarding, boarding, boarding; we were getting very bored of boarding. Thanks to the problems with wonky and warped studwork, coupled with the sheer difficulty in cutting and moving heavy Fermacell sheets, boarding out upstairs had already taken us weeks... and we hadn't even finished. We couldn't do any more boarding upstairs until the door liners had been fitted, so we moved downstairs and started boarding out the ground floor.

We started in the lounge. The load-bearing walls (pictured on the left) are lined with OSB panels to reinforce the studwork so that it can help support the weight of the floor above.


Unlike plasterboard, Fermacell boards have great racking strength and are sometimes used instead of OSB for load-bearing walls. So in a way, by boarding over the top of OSB, we were double-strengthening the walls and making them even more rigid. Hopefully that should mean we don't get any pesky cracks appearing in future.


The back wall of the lounge completed. The top boxes will have audio sockets for surround sound speakers.


The boarding going up around the lounge door.


Cutting out all the back boxes that will sit behind the TV was going to be 'fun'. 


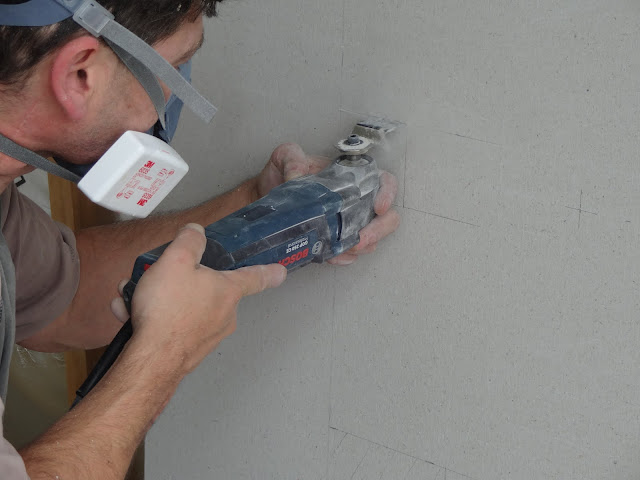
The Fermacell is really tough stuff so cutting out for sockets is best done with a multitool. Even then it takes quite a while to measure and cut out each slot, especially as the blades go blunt within a few minutes.


With so many cutouts so close together, we were worried that the board might crack during fitting but Fermacell really is very sturdy stuff and it all went up without a hitch.


The other load-bearing wall in the lounge. 


We used a string line and laser to try and ensure the boards were fitted as level as possible. As usual, the lack of door liners meant that we had to leave the boarding around the doorway until later.


The site inspector set up his temporary office in the kitchen so we continued boarding in there.


The stud walls often needed a lot of preparation before we could board. Here we've added an extra stud where the edge of the Fermacell boards will meet to give us a secure fixing.


We intend to hang a TV off the kitchen wall in future so Alan fitted a chunky wooden plank between the studs to help support any heavy weights. We also took measurements of the plank's position and photographed it as a reminder, so we can find it again once it's been boarded over.

Just the soundproofing to go in and we could start getting Fermacell onto the wall.


We carried on boarding around the kitchen. The dining area has lots of large windows to cut around which were fiddly.


The kitchen sink will be located under this window. We took extra care to mark the position of the pipes before boarding to avoid drilling or screwing into them accidentally. 


The study was next. It's going to be the central hub for the computer network, phone and electricity so there were quite a few wires to contend with.


As this room will be the entry-point for the new phone/broadband line, we thought it prudent to install some conduit while we still had the access. Phone engineers don't generally drill very neat holes through walls, nor worry too much where the cable is pushed through so it was better for us to do it ourselves.

After carefully working out the positions, we drilled a hole through both the block wall and timber frame. We used an offcut of underfloor heating pipe as a conduit, then sealed up all the gaps to make sure it was completely air and water-tight.


The conduit should allow BT to pass their new cables through the wall without any drilling and also ensures we end up with the cable entering the room exactly where we want it (i.e., in a cupboard). We will cut this pipe flush with the wall later & it will sit inside the phone cable box.


Soundproofing the back wall of the study.


We didn't board over all the electrical wiring in the corner, as we still hadn't decided exactly where we wanted our consumer unit to go.


Next up was the entrance hall.


Cracks usually develop in joins around windows and doors, so to avoid that we cut the windows out of one single sheet wherever possible. Measuring and cutting was pretty tricky though...


We found it worked better if we made the final cutout for the window, after the board was screwed in place. Once the board was lined up and secure, we just sawed off the 'tabs' in the corners and removed the cutout.


Same task for the window on the other side.


After several weeks of boarding, we were getting rather fed up with the daily routine of measuring walls, cutting shapes out of Fermacell and lugging those big, heavy sheets all around the house. Still, after so much practice we finally felt ready to start work on the dreaded stairwell...


We started boarding out down in the bottom corner. With no scaffold tower, we were going to have to come up with some creative ideas for how to support a 45 kilogram board high up on a wall long enough to screw it in place.


The solution we came up with... Alan made a grooved rail out of roofing battens which we fixed temporarily to the stud wall (see bottom right of the picture). The idea was to load a heavy Fermacell sheet from the relative safety of the landing floor, then simply slide it along the rail until it was directly above the sheet on the ground floor. After that, all we had to do was clamp the board in place, remove the grooved rail, add glue to the bottom and drop it down into place. What could possibly go wrong?  


Phew! The plan worked and the heavy sheet of Fermacell plopped neatly into position. With only a small clamp holding it in place, we needed to get it screwed permanently into the studs...


... so up the creaky ladder went Alan. It was at this point that we really wished we had bought a scaffold tower.


At last, the dreaded high stairwell board was in place. The rest of the boards should be easier...


The next board was a bit lower so we used the panel lifter to hoist it onto our guide rail, then as before, dropped it down into position after gluing.


Gluing the boards on two sides added extra difficulty as it meant that they needed to be perfectly square so that the next board would be correctly aligned.


The boards looked a lot neater after I'd scraped off the excess glue (usually the next day).     
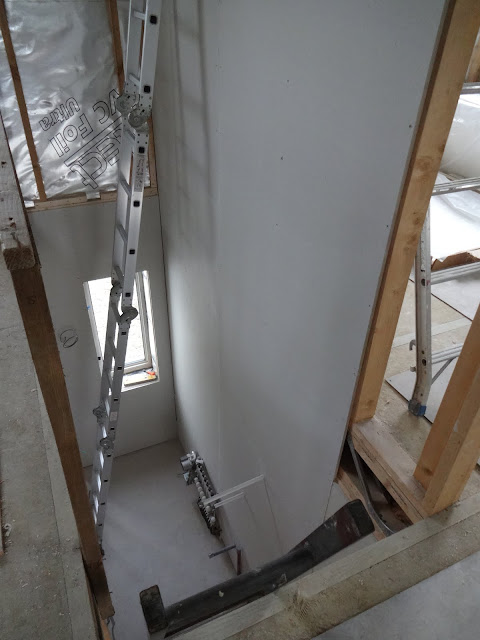


Hoorah! The last of the hard-to-reach stairwell boards screwed into place.


Saturday, 30 May 2015

Boarding: Walls - First floor

In preparation for the house build, Alan had undertaken a plastering course which proved very useful indeed. So useful in fact, that we decided that plastering was really something we should avoid! Plastering small walls at the local building college was one thing, but doing a whole house with 600-700 square metres began to look rather daunting. We got a few quotes from plasterers, but finding good ones locally was hard and living in such an isolated area meant that anyone travelling in put their rates up to account for long daily travelling.

Apart from the expense and mess, a 'wet trade' like plastering is not ideally suited to timber framed houses anyway; the amount of water spread over the fabric of the building (around 15 bathfulls in an average house) not only takes months to dry out, but can also cause expansion/contraction movement in the timber structure that leads to cracks developing in the plaster.

The alternative was to use a dry system and after much research (and even more price-haggling), we went for the German Fermacell boards. As a relatively unknown product, there wasn't much information available to guide us through the installation, so we were going to have to develop our own tips and tricks as we went along.

We chose a corner of the upstairs landing to try hanging our first board.


The Fermacell boards are made from compressed recycled materials and are very dense and heavy. Unlike plasterboard you don't have to worry about the screws being driven too deep as the Fermacell is much more robust.


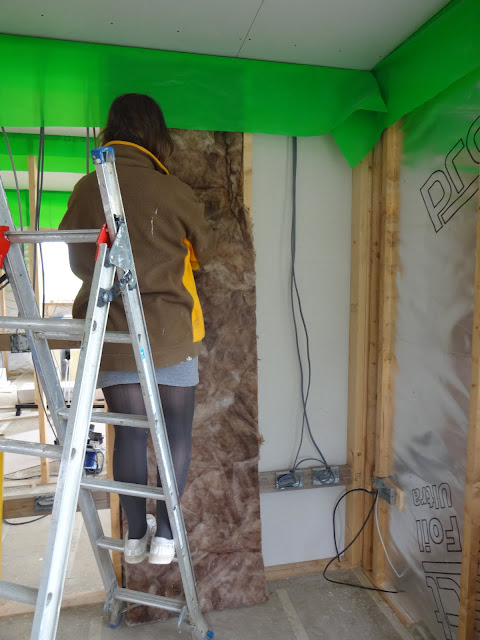
Fermacell has very good acoustic properties so would satisfy current building regulations for soundproofing without any additional insulation, however we decided to add acoustic insulation to all the internal walls as a matter of course. It wasn't that much more expensive and was easy to do now while all the studwork was exposed.


One again I landed the plum job of fitting all the acoustic insulation...


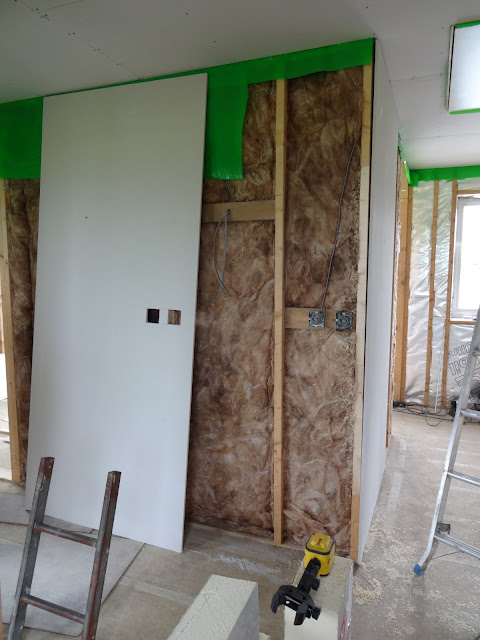
Once the insulation had been secured in place, we could fit a board over the top. Alan used a multitool to carefully cut out the slots for the electric sockets.


That's two boards in place. Only a few hundred to go...


The Fermacell boards are glued together with a special adhesive. As this was all new to us, we thought we'd better practice (and make any mistakes) in an area that wouldn't matter so much, so decided to use the main bedroom's walk-in wardrobe as our test zone.

We cut boards to size and fitted them to the studwork.


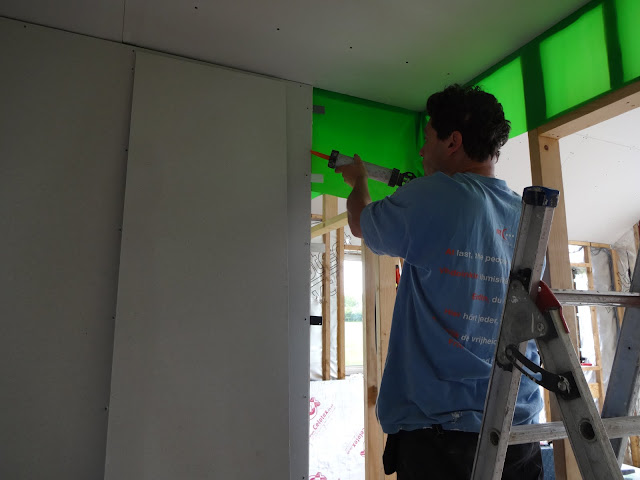
The Fermacell adhesive is applied along the whole length of the board.


The adhesive applicator has a notch on it that makes it easy to apply the glue so that it sits in exactly the right place on the edge of the board.


Once the glue was in place, the next section of board was pushed tightly against it, so that the adhesive squidged out. Then it was screwed into place.  


The glue expands a little as it dries. After several hours, it's hard enough that the excess 'squidge' (seen below) can easily be removed by running a scraper down the board.  


Having practised gluing the Fermacell boards together in the walk-in wardrobe, we felt confident enough to start working in more visible areas.


We moved to bedroom 3 as there was a large area where we could use full-size boards without having to make too many cuts. Cutting the boards to fit around the windows and doors looked like it was going to be quite tricky, so we wanted to be completely comfortable with fitting the boards before we took that on.


Fermacell advise not to glue internal corners (as the adhesive is hard to remove cleanly) but instead suggest leaving a small gap which can be filled later.


It was strange how much the rooms changed as each section of wall went up. Especially as we were used to seeing the house as one big empty shell for the last 18 months.


As the walls went up, we expected the rooms to get a lot darker, but it was surprising to find so much light reflecting in from the windows that really changed the character.


Fitting the acoustic insulation in the landing wall.


More acoustic insulation going in the other side of the landing. Although it looks just like a thin version of the loft insulation, it's much denser and designed specifically to block out noise rather than heat.


Another part of the landing wall insulated and ready for boarding. I stapled the insulation in place to prevent it from slumping down between the boards.


Time to tackle our first external corner. The first job was to make sure the studwork erected by the frame company was perfectly level... rather predictably it wasn't, so that meant messing around fitting additional battens to level everything out. Alan used a laser and a long spirit level to get everything lined up.


Unlike the internal corners, Fermacell recommend gluing the external corners together. That meant we really needed to get it right first time, so we cut the boards to size and made sure everything lined up as it should with a dry run before applying any glue.


It all went together well and is perfectly aligned according to the laser.


Deciding where to put the joints between boards also took some planning. The timber frame came supplied with battens spaced for standard plasterboard which were generally in the right place (but not always...)


Having practised cutting and gluing the boards across normal walls and corners, it was time to tackle our first window. We decided to start in bedroom 2 and it wasn't long before we hit a snag... some of the internal battens that the timber frame company had installed were warped. We weren't sure if the wood had become distorted because the frame had got soaked when it was first erected or if they'd just used crappy wood when it was built back in the factory, but either way it left us with a batten bent like a banana.

We were beginning to discover one of the drawbacks of using Fermacell; you really need to have perfectly flat, level stud walls because the Fermacell board is your finished wall surface. There would be no issues if we were using conventional plasterboard covered with plaster, because when the walls are skimmed, the plasterer can even out any imperfections in the board. Of course, the Fermacell board if fitted correctly, will be flatter than anything a plasterer could achieve with wet plaster, but getting to that stage looked like it was going to be a long, hard road...

The battens had been firmly nailed into place using a nailgun so our best option was to correct the banana shape using packers. Alan set up a string line to act as a guide.


After measuring the window, we carefully cut the board to shape. While plasterboard can be easily cut with a craft knife, Fermacell is so dense that it really needs to be cut with a circular saw. Alan bought a plunge saw that came with guide rails to ensure we got a perfectly straight cut. With hundreds of cuts to make, we'd have been sunk without it.


This was proving to be hard work. Getting the super-heavy boards lined up and glued correctly took lasers, string lines, packers and a lot of time.


The red packer shows how warped the wooden battens were.


Grrr! If they're all like that we will be boarding the walls forever. (Edit: We were.)


We found the best way to measure the windows was to draw around the frame with the board in place.


After marking out the board, we had to lay it down on blocks of wood so that it could be cut safely with the plunge saw (we really wanted to avoid slicing right through all our underfloor heating pipes).


Hurrah! That's the first window done. The next 26 will simply fly by. (Edit: They didn't.)


Inching our way around the walls.


The smaller windows were easier, but still took ages to measure, cut and fit.


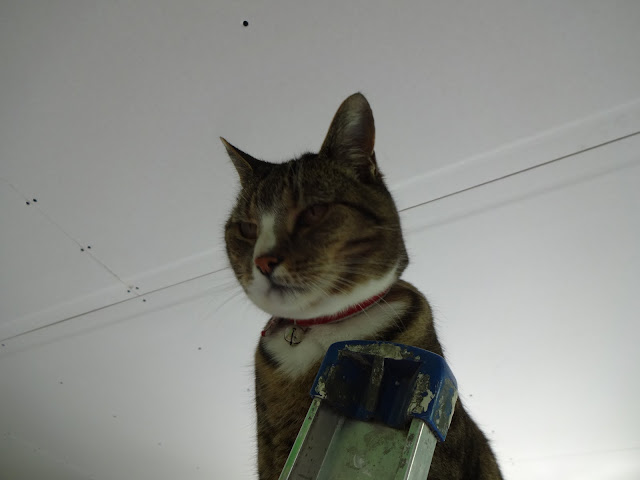
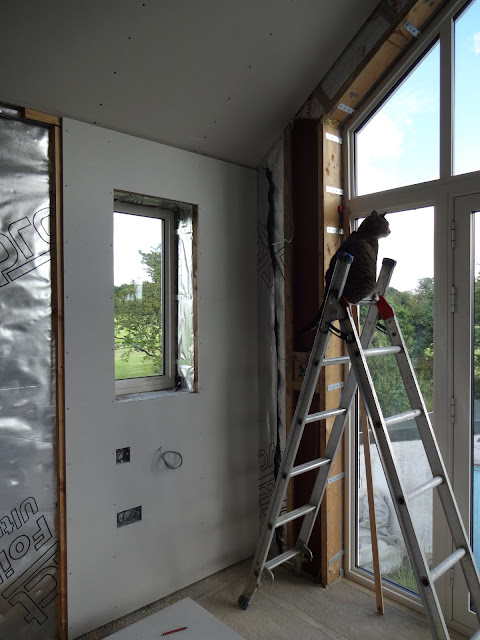
The site inspector arrived and watched our progress from his observation podium.


Mr Onion Head was not amused.


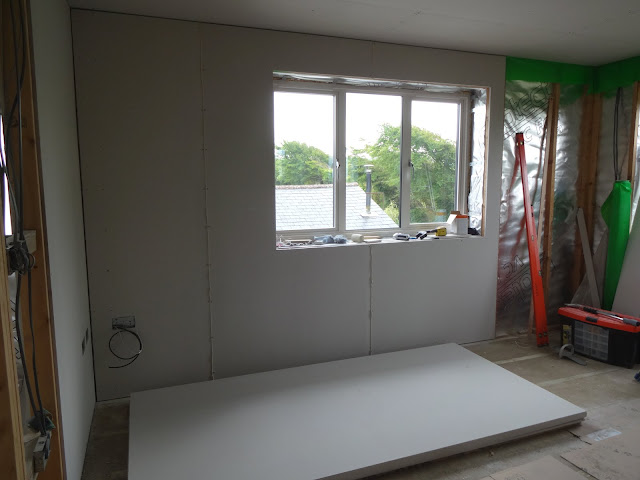
Bedroom 2 gradually taking shape.


We couldn't board around the doorways, including these cupboard doors, until the door liners had been fitted so rather frustratingly they had to wait until later.


The view through the cupboards that run between bedroom 2 and bedroom 3. Putting a 'mini-room' like this between the adjoining bedrooms allowed us to have two sets of soundproofed walls to block out any potential transfer of noise.

But where am I?


Here I am.


Closing off the cupboards put an end to that.


Working our way around bedroom 3.


Our 'rapid' progress ground to a halt when we reached the north wall which once again was noticeably out of line (do builders even know what a spirit level is?) By this time, we had been forced to arm ourselves with a large bucket filled with plastic packers... (note the line of packers poking out of the side of the board below)


With such large packers, it was just as well we'd bought extra long Fermacell screws. Every batten seemed to require work; some needed planing, some needed replacing and most needed packers. Every board was taking five times as long as it should and it was proving very frustrating.

To be fair to the timber frame company, if we had informed them that we were going to use Fermacell, they'd have built the frame to more exacting dimensions (but certainly charged more too). At the time, we thought we'd be using conventional plasterboard and plaster which would have been absolutely fine with these tolerances.


The troublesome north wall almost done. Note the ubiquitous stack of packers peeking out of the side.


With small windows (like the one pictured at the end of the landing), it was possible to cut the window out of one sheet. It was very tricky to do but meant there would be no joins to conceal later and certainly no possibility of cracking.


Preparing the wall in the main bedroom for boarding.


Although it was extremely dusty, we had to cut the boards indoors as taking them outside (not to mention carrying part-cut boards back upstairs again) was impossible. Our vacuum cleaner has a power tool attachment that helped reduce the amount of dust kicked up.


Many of the boards required multiple cuts. The one below was cut down in height, had a window cut out of it and as if that wasn't enough, needed more cutouts for power sockets.


Alan used a laser to mark where the sockets were positioned and then cut them out with a multitool. The Fermacell is so dense that it blunted the pricey multitool blades within a few minutes, so to save having to spend a fortune on new ones, Alan re-cut new teeth in the blunt blades using an angle grinder.


After spending so long cutting it out, it would have been soul-destroying if the board didn't fit. Luckily everything lined up as it should.


The next section was easy by comparison...


... just one cut for the height and glued straight into place. Wish they were all like that.


Ugh! Another tricky board that took ages.


At last.


Only one window on the other side of the room.


The landing cupboard needed boxing in.


We had one sheet of plasterboard left over from the ceilings so decided to make use of that in the landing cupboard. After cutting sections to size, we painted them before fitting to avoid the fiddly and messy job of painting around all the pipes and cables.


We had fitted the manifold with packers to allow for boarding, so it was easy to unscrew it, remove the packers and slide the board in place.


That's the back wall of the cupboard done. Next stop: boarding out the ground floor. How exciting. (Edit: It wasn't.)