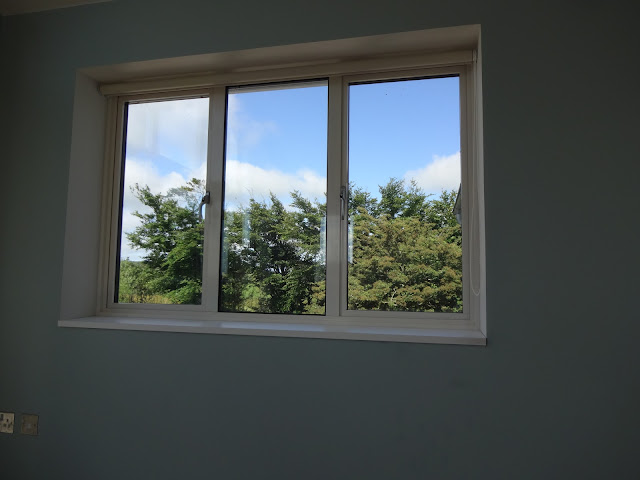
As with the blinds, we wanted the sills to match the window frame closely in colour and dimensions, in order to be as discrete and clean-looking as possible. Although sometimes derided, MDF would work perfectly for this modern look; unlike solid wood, MDF is very unlikely to suffer from warping or twisting and has a smooth, easily-paintable surface with no knots or wood grain.
To save time and money, we bought thick (25mm) MDF skirting boards, which are widely available online, to use as the basis for our sills. We chose to use the superior quality, high-density MDF (HDF) planks and also opted to have these factory-sprayed in primer, which should give us a better finish when painting.
The first step was to cut the MDF planks down to fit the width of each window. MDF dust is pretty unpleasant stuff, so all the cutting was done while wearing a mask outside.
The cut sills were tested out for size by placing them in their respective windows.
When completed they won't be sticking out this far; the idea was to make them as flush-fitting as possible with a minimal overhang, so they will all need to be trimmed further along their length.

Using MDF to create a (hopefully) uncluttered and modern treatment was also prudent financially... with 20 windows requiring sills, the cost of doing them all in say oak or granite would have been well out of our budget.
More sills test-fitted for width upstairs in bedroom 3...

... as well as in the main bedroom.

We measured the cuts carefully, so they would fit as tightly as possible against the window reveals.
The reveals are not at perfect right-angles to the window, so it was impossible to get the sills to fit without leaving a small gap either end. That will be filled and should be invisible once we install them permanently.
The next issue was the sill depth, but as usual with house-building, that wasn't going to be straightforward...
... and as the photo below demonstrates, that 'step' prevented the sill from being pushed back flat against the window, without leaving a large gap. So as well as being trimmed down for depth, the back edge of the sills would need to be shaped, with some kind of groove carved out to compensate for the step. Hmm.
Shop-bought sills come with this groove already cut out, but they were only available in traditional shapes (i.e., with rounded front edges and 'wings' that extend on either side of the window - not the look we were after).
It was a bit of a pain, but the only real solution was to cut a groove into the back of each of the twenty sills using a router. After cutting down the depth carefully using a plunge saw, the sills were clamped to our pallet-workbench outside and Alan routed out the back edge to the required depth.
Before routing...
...and after routing.
In order to maintain the same width at the bottom and sides of the window frame, only a very thin piece of material was left to bridge the gap. It was just as well we'd ordered the more robust, high-density MDF as the cheaper material might have cracked.
With the groove routed out at the back, the sills now slide right up against the window frame...

... leaving only a minimal overhang.

The same treatment in bedroom 2.
And in the main bedroom.
Once all the sills had been grooved out and test-fitted, we could finally paint them. They had been sprayed at the factory in white primer, but our window frames and blinds are an off-white/ivory shade, so we painted them to match using Little Greene's acrylic eggshell.
We also primed and painted all the cut edges (especially the grooved edges) to ensure they were sealed in case of any moisture created through condensation/spills.
When the paint had fully dried, it was just a matter of gluing each sill in place. Modern adhesives are incredibly strong so once the sills had been stuck down, there was no chance of them coming undone.
Thanks to the solid timber frame and Fermacell structure, the sills felt incredibly solid once the glue had dried, with no 'hollow' sound when you tap on the wood. All that was left to do was fill those gaps on either side...
... With the gaps filled, the reveals seemed to blend seamlessly into the sills.
As usual, the site inspector conducted a stress test to check whether the sills were firmly fixed in place. If they can support his weight, they can support anything. But what was he so interested in outside the window...?
... just our next door neighbours, the deer, out for a walk again - this time with some new arrivals.


No comments :
Post a Comment