Sunday 25 June 2017

Finishing bits - bedroom and lounge

There are so many small details to address during the house build.

In the main bedroom, rather than use bedside cabinets, we had planned to install floating drawers. We thought we might have to make these ourselves, but luckily managed to find a manufacturer who sold these in just the right size to fit the gap we had left below the bedside lights. 


The drawer unit used hidden fixings to allow it to be installed on the wall with no visible signs of support.


Unfortunately our dark mahogany sleigh bed doesn't match the 'contemporary' look of the rest of the house. We plan to change it for something more modern when our finances allow.    


The large 'glulam' (glue-laminated) beam that supports the roof above the main bedroom was also looking out of place. It had been clad in a pine skin that was a mismatch with the oak flooring below.  


Rather than trying to sand it down and stain it to match the oak, we decided to just paint it to match the ceiling colour, which would also give it a more modern look.


While painting the glulam beam, we noticed that the housemartins who usually live in the barn next door had started scoping out the roof apex in order to build a nest. Having it right above our bedroom balcony would mean a lot of noise and bird plop, but it's illegal (not to mention immoral) to destroy an active housemartin nest, so we decided to try and gently persuade them to find another location before they started building...

After a few experiments, we found the ideal solution. A plastic bag filled with crumpled up plastic bags was light enough to tape onto the apex and the constant swishing and rustling was enough to put the (very determined) housemartins off. 


The video shows our 'housemartin-dissuader' (patent pending) in action. It took several days before they eventually gave up trying to stick lumps of mud up on our wall.


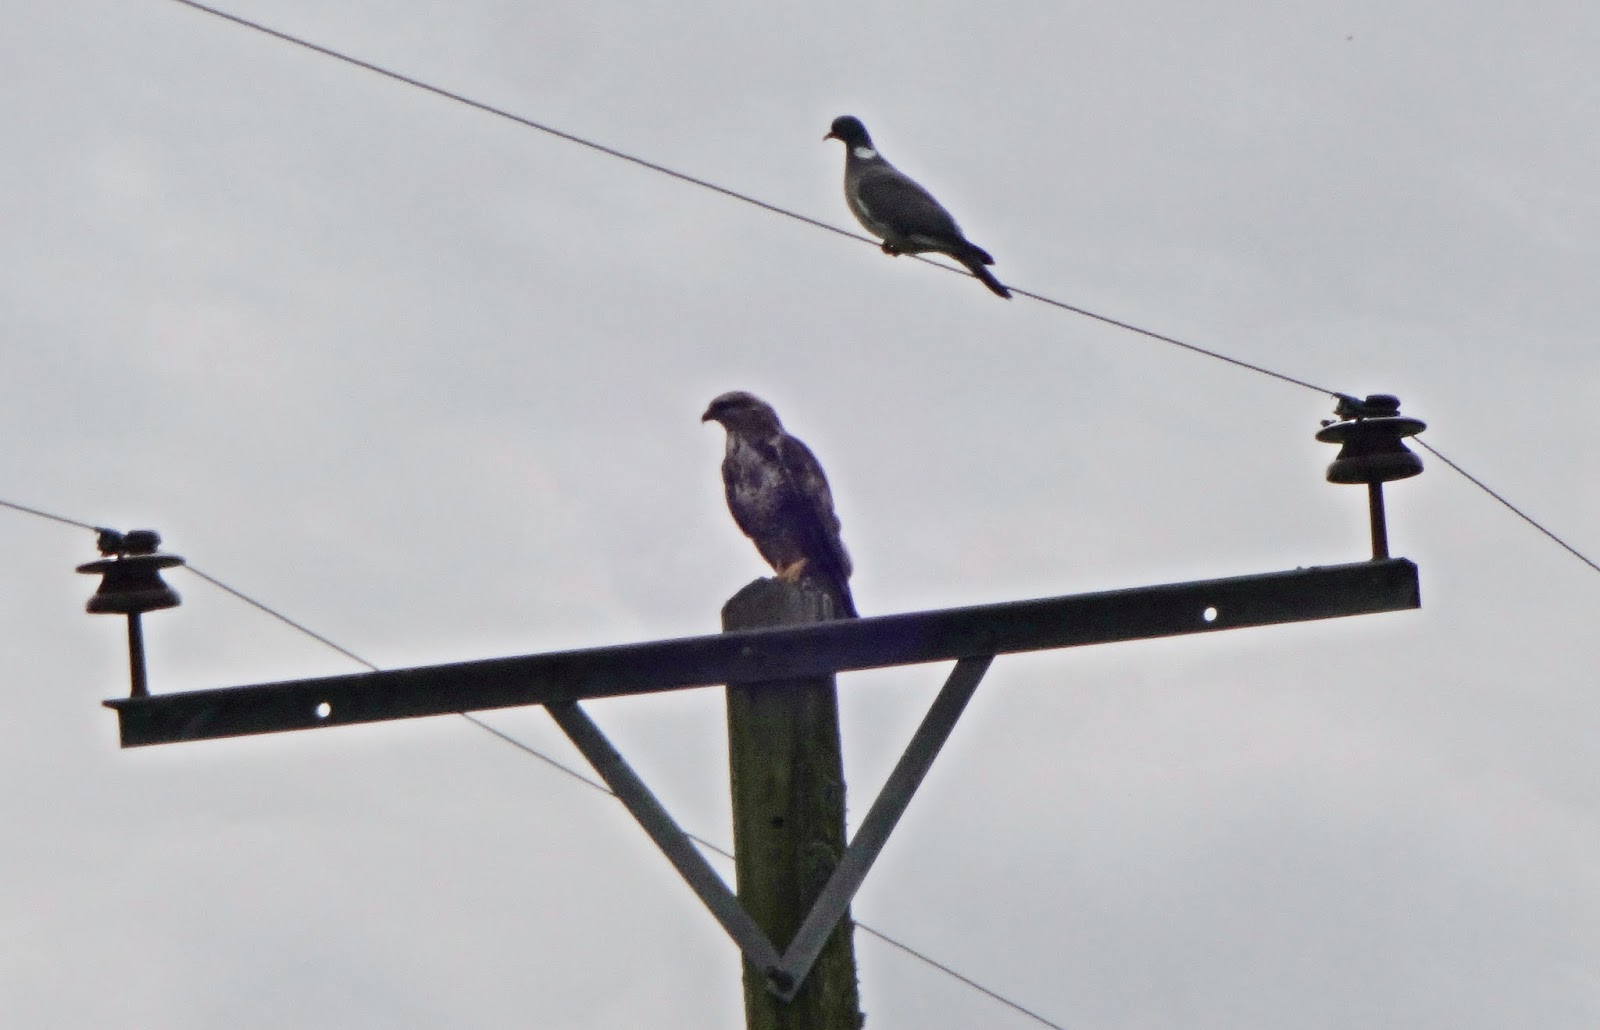
Some interested observers also arrived on the pole nearby. I'm not sure it's wise for a wood pigeon to try and make friends with a buzzard...


We'd been using a temporary clothes rail in the walk-in wardrobe, but needed to install something more permanent. We bought some chrome rails to span either side of the room; we cut these to size and fitted the mounting plates. 


The rails were installed on mounting plates at either end. We chose to buy a thick-gauge steel rail that should (hopefully) support the weight of all our clothes, without needing any mid-rail supports to prevent bending.   


To make the best use of the limited space in the walk-in wardrobe, we sited the rails high enough to allow drawers underneath. Posh walk-in wardrobes use bespoke cupboards built by carpenters, but we didn't have the money or time for that, so bought in some (still surprisingly expensive) drawer units from Ikea.

Putting together the flat-pack units didn't take too long.


We left a gap at the far end to leave space to hang longer clothes like coats and dresses on the rail.


Same process on the other side.


The rails and drawers in place on either side of the room. We will eventually be fitting a shelf above the rail, as well as shoe storage and a full length mirror on the far wall, but that will have to wait until later.


The lounge had been used as a storage room for tools for far too long - it was about time we started using it properly. 

We started by fitting shelves for the surround sound speakers. Once again these would be floating shelves and used small battens screwed into the wall as concealed supports.  


Once the battens were fitted, we painted the shelves in Little Greene's 'Slaked Lime Mid' to match the windows and sills...


... then fitted the shelves onto the battens.


We made up our own speaker cables using good quality speaker wire and banana plugs.


Once we'd fitted all the speakers and cleared out all the tools, we had a nice usable lounge, but unfortunately no sofa or chairs to sit on. After having spent so long building the house and living in such a mess, we decided to take the plunge and treat ourselves to some new furniture.


Having always had to make do with secondhand sofas and chairs in the past, owning brand-new furniture was a real treat for us (despite the longterm credit commitment...)


We tried a few different chair layouts before settling on a position that worked best. 


At certain times of day, sunlight from the window cast a golden glow right in the corner of the room.


Both sofa seats and the armchairs have controls for motors that recline the footrests and headrests independently so there shouldn't be any arguments about who sits where...  


... but naturally the site inspector demanded exclusive use of the sofa for himself.


Here we present the world's most expensive cat bed, along with its blissfully happy owner.


Wednesday 21 June 2017

Plumbing: 2nd Fix - Bathrooms (part 3)

The bathrooms had already taken up so much time and energy, but frustratingly were still some way off being completed. It probably would have been a lot simpler (and cheaper) to have just dropped in one of those posh pre-built, pre-plumbed bathroom pods during the construction stage.

There were still lots of small details to sort. First of all the gap between the bathroom tiles and the floorboards. We had tried hard to get the tiles at exactly the same level as the floor so there would be no step, but ultimately with so many unknown variables (i.e., finished depth of tile adhesive) it just wasn't possible. We weren't far off; the tiles were only about 5mm higher than the wood, so we just needed to make some kind of threshold to bridge the gap.   


A variety of different-sized oak thresholds are available online, but of course not in the precise height we needed. In order to get it perfectly level with the tiles, we used a piece of plywood screwed into the gap underneath to act as a packer... 


... then just glued the oak threshold into place...


... and filled the gap between the threshold and the tile edges using silicone. As the tiles and the grout were already brilliant white, it matched up perfectly.


Next job was to sort out some splashbacks for all the basins. We could have used tiles, but decided to try a more modern treatment instead. 

Lustrolite is a high gloss panel made from a tough acrylic that looks like glass, but can be cut easily using hand tools. It comes in a variety of colours but we decided to stick with the all-white look. 

Once the panel had been cut to size, we test-fitted it above the sink and marked out exactly where it would go. Pencil lines would be hard to remove from around the edges of the Lustrolite but we found Post-it notes worked well as markers.          


We applied super-sticky, double-sided tape to the back of the Lustrolite and then a line of adhesive. One of the drawbacks of Lustrolite is it doesn't react well to all glues and silicones, so you can only a limited range of specialised (i.e., expensive) products.


The Lustrolite panel stuck in place.


We'd always planned to have an illuminated mirror above the basin and had fitted an electrical feed during the first fix (literally years ago...) At last it was time to use it. 


As ever, we used a laser to get everything lined up. Wiring it up was relatively straightforward.


The mirror installed. Like many on the market now, this one has LED lights, a shaver socket and a heating switch to prevent it from misting up.


We chose the rectangular 'bar' design for the lights, rather than dots or stars, to complement the shape of our homemade alcove light above the bath.


Alcove light.


Lastly, it was the dreaded silicone. With hindsight, it would have been easier to do this before fitting the tap, to allow enough room to use the silicone shaping tool in one sweep.

We used a 10mm tool so laid on a bead of silicone approximately that size...


... then smoothed it off carefully with the shaping tool.


We'd spent some time researching and practising the best way to do this (previous attempts having been less than satisfactory), so were quite pleased with the end results. Especially compared to some of the appalling silicone work we'd had done by tradesmen in the past.


We also needed splashbacks in the downstairs toilet. As before, we cut Lustrolite to size and marked its position with post-it notes. 


One panel on...


... then two...


... then finally the silicone. 

Aesthetically, we reckoned the basin looked better without any splashbacks, but its compact size meant that it was very hard to wash your hands without getting water on the wall, so the splashbacks were necessary as a practical solution.


In the en-suite bathroom, it would have been easier to have done the splashback before fitting the basin. Getting the splashback done required extensive surgery, including temporary removal of the basin and cabinet drawers.


Once the basin was out of the way, the Lustrolite panel could be glued into place...


... before re-plumbing the basin once more.

The site inspector was on hand to witness the progress and could barely contain his excitement.


As in the main bathroom, we'd bought a LED mirror light to install above the basin and drawer unit.


Back panel of the mirror went on first...


... then the mirror simply screwed onto the frame.


The mirror light illuminates the en-suite really well - so much so, that we rarely use the main LED ceiling lights.


Finally the not-so-dreaded-anymore siliconing. It definitely would be much easier and neater to do this without the taps in the way, but removing them would have been extremely tricky, so we decided to work around them.


Using thin beads of silicone or smoothing with a wet finger do not give very good longterm results (thin beads can break away easily through movement/shrinkage and fingers can add bacteria that causes mould - see more at Charlie DIYte's excellent vid)

As before, we applied a thick 10mm bead of silicone...


... then smoothed it off in one sweep, using a plastic 45 degree shaping tool.


This method does give a very quick and strong result and doesn't require any messing about with masking tapes in order to get nice, clean lines.


The en-suite basin sealed against the splashback.

Just the small matter of fitting the shower enclosures, soap dishes, towel rails, etc, etc [deep sigh]. Bathrooms really are a pain.


We will close this chapter with a final word from the site inspector...


"..."