One particularly important bit of red tape for us was the air tightness test. Like any new building in the UK, we needed to pass it to satisfy Building Regs, but we also needed to score well to qualify for the RHI payments. This subsidy (essentially for being 'green') should pretty much cover the cost of all our heating and hot water for the next 7 years, so was not to be sniffed at. The only problem was we were running out of time; if you don't apply for the RHI within a year of getting the heat pump commissioned, you lose the entitlement to any payments... and we only had 3 months left to get it all sorted.
Getting the air test arranged was relatively simple (and relatively expensive). Our main concern was the fact that the house was still not finished - for example, we hadn't fitted any skirting boards and there were no finished floors downstairs, both issues that could make the house considerably less airtight. But we needed to ensure we didn't miss the deadline for those RHI payments, so we went round sealing any obvious gaps we could see and called in the tester.
The test measures how much air is leaking from the building. A big fan was fitted to the front door frame and air was pumped into the house. Then, pressure sensors connected to a laptop recorded exactly how much air was being lost through any unintended gaps or cracks in the building fabric (ventilation is all blocked during the test).
Being first-time builders, we didn't know how airtight we had made our house - our approach had been based more on common sense than established building practices. If we'd made a major mistake somewhere and there was a serious air leak, the remedial work might cost a fortune (not to mention having to pay for another air test) and cause us to miss the RHI deadline (seriously costly), so we hovered anxiously around the laptop waiting for the result.
To pass the UK building regulations, our air test needed to score above 10 (m3 hr/m2).
To qualify for the RHI, we needed to score better than 7.
'Good Practice' is regarded as 5.
'Best Practice' is 3.
We scored an amazing 2.4 (and we hadn't even sealed the floors yet!)
The tester was pretty surprised with the result and praised our attention to detail in the build. He joked that it was so airtight that he was glad we'd we fitted the constant extract ventilation system, as otherwise we'd 'virtually suffocate'. Of course, many upmarket eco-houses score much better than ours, but they are spending a lot of money to achieve it. Having a relatively airtight home on our budget was certainly going to help with the bills, as any heating we put into the house was going to stay there. It was great news.
Completing the air test was the final hurdle to submitting our SAP calculations (Standard Assessment Procedure), which in turn would give us an EPC (Energy Performance Certificate). And the EPC was what we needed, along with an MCS certificate (Microgeneration Certification Scheme) in order to apply for the RHI (Renewable Heat Incentive). Phew! They do like their abbreviations.
The EPC arrived a couple of weeks later and we were pleased to find that we'd achieved our target of a 'B' rating.
Only around 8% of newly-built UK homes manage a 'B' or higher, so to get that with our relatively tiny budget was a very good result. And of those, just 0.09% get an 'A', which demonstrates how much harder (and costlier) it is to improve on what we had.
The energy performance summary was also a glowing 5-star report, with the only suggested improvement being to employ solar power to heat the hot water. Although we had laughed when locals referred to it as the 'eco-house', it did seem as if our home was going to be very efficient after all.
Although the heating had been commissioned back in April 2016, we weren't in a position to apply for the RHI payments until early 2017. Taking so long on the build inadvertently helped us out, because during that time the government decided to increase the RHI payments significantly for any application made after 14 December 2016... all those delays meant we were now eligible for a 30% uplift in payments! The tortoise beats the hare again.
With the RHI wrapped up, we could get on with finishing the house. When we ordered the kitchen units, we also ordered some kitchen top-boxes that we thought could be adapted for use in Alan's office. Before fitting any cupboards on the wall though, we needed to paint the room. Yet again, the faulty Fermacell boards meant late nights redoing the 'plastering' and sanding the walls.
We were going to use the kitchen top-boxes to conceal the consumer unit and all the AV (audio visual) and internet cabling. This was a change from our original plan, so meant a lot of wires had to be fished out of the wall and re-routed, leaving holes in the wall that we needed to patch.
Having ignored my advice, Alan thought it was a good idea to go for a dark shade of blue ('Hick's Blue') in his office. A small room, north-facing and heavily shaded by trees - could this be a decision he would later regret? (YES!)
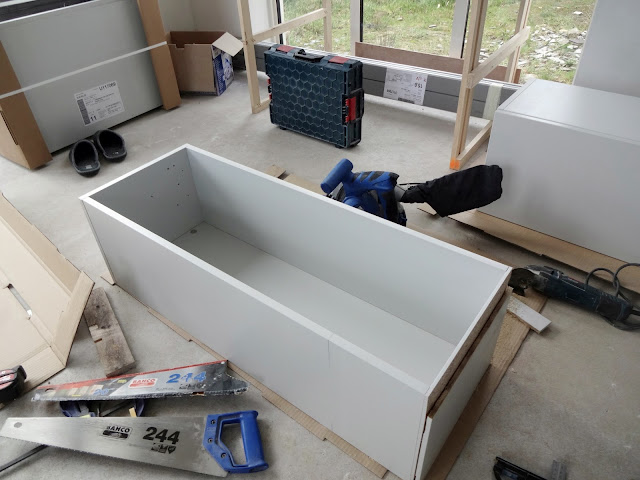
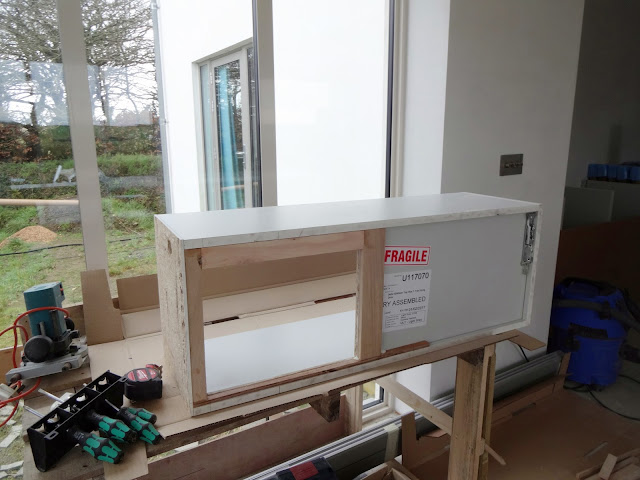
The idea was to have the kitchen top-boxes fitted all the way along the wall. Luckily our room was exactly the right length to fit 3 cabinets in place; unluckily when the boxes arrived they were slightly bigger than the stated dimensions - tut! Having just painted the room, we didn't fancy chiselling chunks out of the wall in order to get the cabinets in, so decided to trim down one of the end cabinets instead.
We didn't mind butchering the side of this cabinet, as it was also having chunks cut out of it in order to accommodate the consumer unit.
Having cut away large sections of the carcass, Alan glued in some pieces of scrap timber at the back to strengthen the whole thing.
After all that cutting and trimming, it was a relief to find that it fitted neatly over the consumer unit.
The other two cupboards should be a lot easier to fit.
We needed to install a power socket inside the cabinets for all the AV/internet bits, so Alan had taken a cable spur inside the wall from the socket below.
A tight fit but we just about squeezed the cabinets in. It was nice to get the consumer unit hidden away as it always looked rather unsightly in the corner of the room (because of electrical regs, fitting it under the stairs would have cost us a couple of hundred pounds extra, hence why it ended up in the office).
For some reason, office top-boxes like these cost a fortune, but these soft-closing 'kitchen' boxes were only a fraction of the price. Even better, self-builders can't claim back the VAT on office furniture, but they can for kitchen units... so these should work out even cheaper.
One unintended consequence was that the LED downlights in the ceiling reflected off the top of the cabinets, creating a rather nice 'uplit' glow effect.
The next job was to sort out all the AV/internet/phone cabling. Alan installed a power socket and built a backplate (out of an old piece of PVC board left over from the roofing fascias).
When we originally laid all the AV wiring, we'd labelled all the ends, but it had been so long since we'd done it, that all the writing had completely faded. Fortunately, Alan had invested in a cheap cable tester, so it was relatively easy to find what each wire was used for. It was just a matter of sending the test signal down the wire at one end...
... then plugging the other half of the tester in to each socket in the house until it found the signal. Not only did it identify which cable went where, but it also tested that there were no breaks anywhere in the wiring.
Once all the cabling ends had been made up and routed behind the fascia board into the patch bay, it all looked a bit neater. It's a work in progress, as there are still a few more gizmos to be installed, but for now at least we can route phone or internet signals to any socket in the house. Obviously a lot of this can be achieved wirelessly nowadays, but wired connections are still much faster and better suited to our purposes (i.e., mainly computer gaming and media/movie networking).
We are planning to install the internet router in the cupboard too, so we left a wire pull-cord in place which should allow us to attach the internet cable from outside and pull it directly into the cupboard at a later date.


No comments :
Post a Comment