For over two years, this rusty metal ladder ('liberated' from the scaffolders) had been our only way of accessing the first floor. There had been a few near-misses during that time, with one visitor almost tumbling head-first down onto the concrete and on another occasion a three year old found balancing precariously on the top rungs - so we were relieved to finally be getting rid of it!

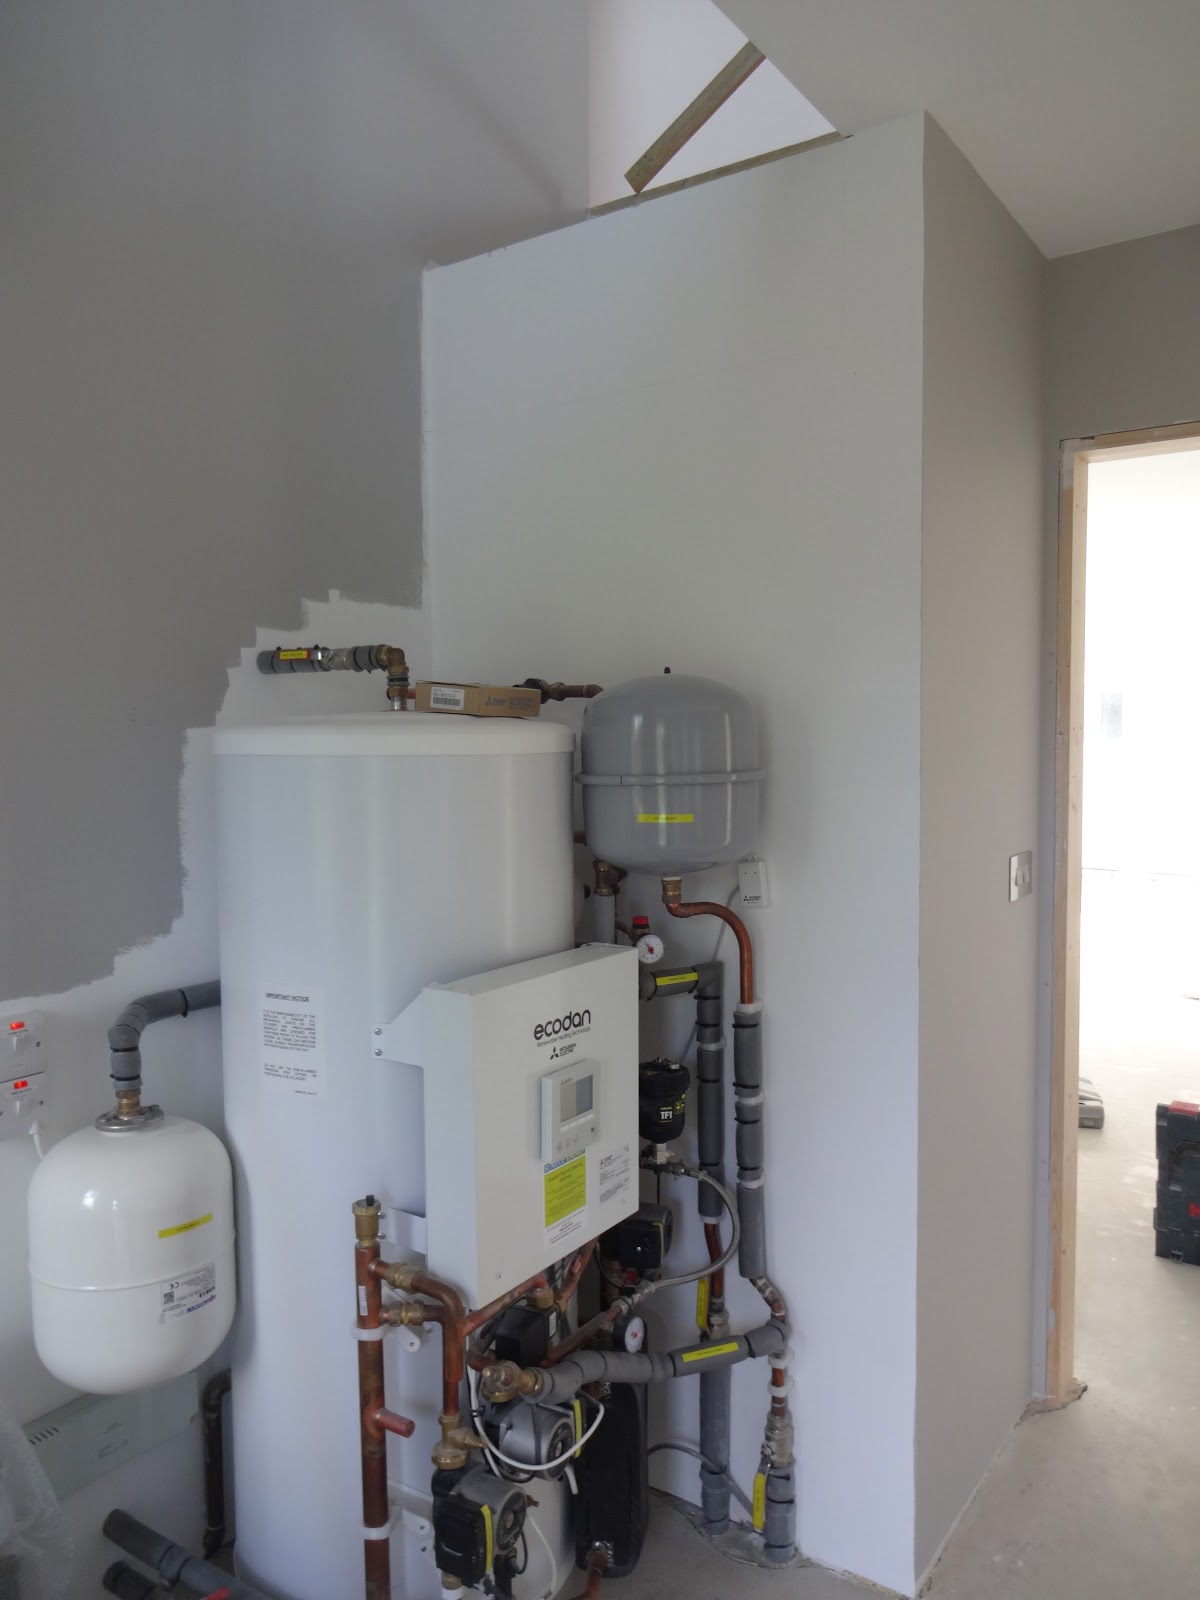
The design process for the stairs had become extremely troublesome. Early on in the build we had some standard staircase plans drawn up by Jeld-Wen, but since that date there had been a few unanticipated changes. The floor height had come up slightly (issue with the wheelchair access) and the hot water cylinder was taking up more room than expected (didn't account for pipework); small factors that combined to make a big problem... the stairs now didn't fit.
We spoke to several traditional staircase designers and they all said that it couldn't be done, that we simply hadn't left enough room. We invited the Jeld-Wen rep back to re-measure and when he saw the changes he became incredibly rude, refusing to discuss possible solutions and eventually storming out of the house in an almighty huff. (Well done, Jeld-Wen - we certainly won't be using you for anything in future).
It looked increasingly like we would have to pay (a lot) to get the water cylinder moved, however Cornwall Stairs, a company specialising in computerised design and manufacture, seemed a good deal more encouraging; yes, it was very tight, but according to their accurate software it should just about be possible to squeeze a set of stairs in... After encountering so many teeth-sucking, nay-sayers, it was such a breath of fresh air to meet a company with an optimistic attitude.

The design of the stairs was dictated by the limited space we had available. In order to comply with building regulations, the stair width had to be narrowed which would have made it feel rather confined. But using cut strings in place of traditional stringers (the wooden planks that usually run diagonally up either side of the stairs) and a glass bannister bolted to the outside of the stairs (in place of thick timber posts and handrails) allowed us to widen the space on the steps and make the whole staircase feel more open and generous.
We had originally wanted to use a staircase that turned back on itself (as pictured above) but the space restrictions once again proved an obstacle, so we eventually opted for a simpler design; one set of turns (winders) at the bottom of the stairs, then a straight run of steps up to the top.

Once the wall was lowered and the paintwork repaired, we had to attend to the next issue; the straight staircase would expose an unfinished section of wall at the top of the stairs that would previously have been covered.

This bit of wall was originally hidden under the second set of turns, but the straight staircase meant it would now be visible.

Back to gluing in sheets of Fermacell.

Once the adhesive had dried, Alan filled the joints and skimmed the area with several applications of compound and Fine Surface Treatment.

After the area had been sanded smooth, we were finally able to paint it.

We finished the alterations just in time; the staircase frame had been delivered and was due to be fitted the following day.

Of course, nothing gets installed until the site inspector has conducted a thorough investigation.

All timber has to pass the 'sniff test'.

After much careful consideration, the framework was eventually approved for use.

The oak stair treads didn't look all that impressive when piled up in a heap. The staircase was assembled unfinished and to keep costs down (as ever) we would be treating the wood ourselves.

The support framework had been designed to fit in our stairwell, however nothing in house-building ever goes quite that smoothly... a hot water pipe and some electrical boxes were in the way so would need to be moved.

The pipe should really have been spotted during the design stage, but throughout the build process, things like this seem to have a way of being overlooked.
With the carpenters keen to get on with fitting the stairs, we didn't have long to sort it out. Alan quickly disconnected the hot water and cut a section from the pipe.

We didn't have any compression fittings on hand, so a compression valve would have to suffice.

Luckily we had some spare copper pipe, so it wasn't long before Alan had the pipe rerouted. Although under the stairs, the new hole in the wall would still have to be patched up (no spiders, thanks).

With the hot water pipe shifted and the electrical switch boxes removed, the framework finally slotted into place. Some time was spent making sure everything was level before screwing the frame to the wall studs (to make it easier for the carpenters, we had marked out the position of all the studwork before they arrived).

Alan worked overnight to seamlessly patch up the hole we had cut for the pipe under the stairs.

The following day, the carpenters began fitting the stair treads to the frame, one step at a time (pun alert). Each step was made from 40mm thick solid oak, so they were very heavy.


This was the 'pinch-point' that had caused so much trouble.

The stair treads were another feature whose design had been dictated by circumstance; the 40mm thickness allowed for the steps to be carved to shape around the water cylinder.

The carved-out section will be hidden once the next step is fixed in place.

The bottom of the next step had to be scalloped out using a router in order to fit over the remaining part of the cylinder.

While the carpenters fitted the stair treads, Alan rerouted the electrical switch boxes and once again patched up any holes that had been left behind.


The winder treads being installed.


Sadly, once the stairs had been fitted, we couldn't get the poor guy out, but we do throw him a few scraps of food from time to time.

What a relief. We finally have stairs. Hurrah!


Of course, the stairs had to be signed off by the site inspector...


With his 'extensive' inspection completed, the stairs were declared safe for use.
Hurrah for the site inspector!

Until the unfinished oak had been treated, the stairs were vulnerable to scuffs and stains, so we kept it covered with dustsheets while work was still progressing.

The carpenters had to make a plywood template for the glass bannister.

It was critical to make sure that the template fitted in exactly the right place as the glass cannot be modified once it's been cut to shape.


In addition to the bannister, we were also having glass fitted along the landing. This will be secured within a tough aluminium channel that was screwed down through the plywood floor and into the joist below for maximum strength and stability.
The glass has to be custom-made so it will be several weeks before it is ready to be fitted. This would give us enough time to get the staircase treated and the under-stairs area prepared and painted.