The new house was half-built and the old house next door was half-falling down. Since the old house will eventually be demolished there was no point spending any money on it, but for the time being at least, we still had to live in it. And that was beginning to get difficult...
The hot water system in the old house had pretty much given up the ghost, but since we now had a shiny, new heat pump whirring away in the new house, we decided to rig up a low-tech solution to the problem of how to get washed.
We temporarily installed a garden tap to one of the hot water supply pipes in the new house and hooked it up to a garden hose. Out of the window it went...

... and off down the garden...

... then eventually up into the bathroom window of the old house and down into the bath! Running a bath meant dashing between the two houses half-dressed to grapple with the garden tap, but it was worth it just to bathe in hot, clean water again.

The old house, perhaps suspecting that its demolition was looming, was rapidly coming apart at the seams. No heating or hot water, rising damp, toxic radon (the equivalent of 100 chest x-rays a year...) and now something had gone seriously awry with the toilet waste pipe. It meant that we needed to get a working WC in the new house as soon as possible.
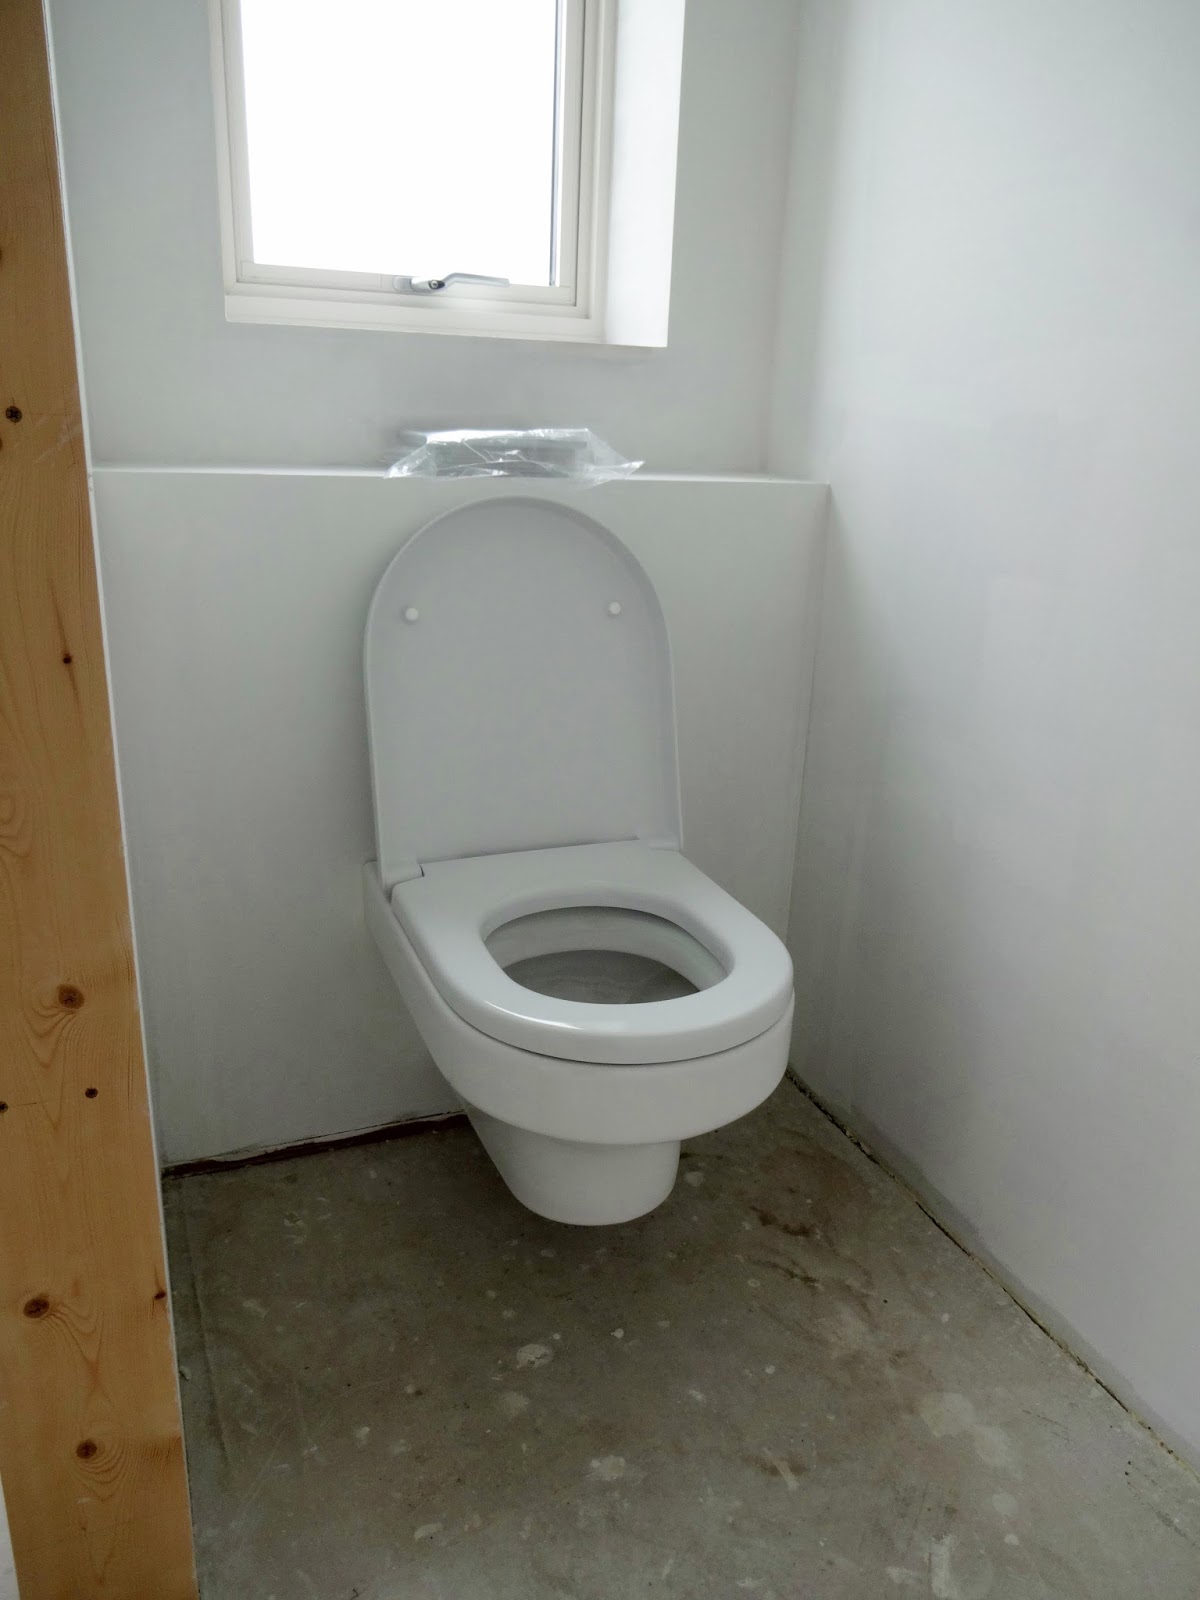
The bathrooms upstairs were both some way from being finished, so the WC downstairs was our best option. We'd already installed the frame and cistern for the wall-hung toilet, so the first job was to get the pan fitted in place.


Lifting a heavy toilet bowl onto just those two bolts is a leap of faith... but after tightening everything up, it seemed firmly fixed in place. Sitting down on it for the first time did cause a moment of panic though; wondering if we fixed the frame tightly enough to the wall all those months ago!

Burying the cistern behind a wall is reasonably safe with these frames, as every serviceable part of it can be accessed from the top by removing the flush switch.
With the new seat and lid fitted, the toilet might have looked ready for action, but unfortunately we still had a lot more work to do as the main waste pipe from the new house didn't actually go anywhere yet...

The initial run of drainage pipes had been laid, back when we first started building the house in late 2013 (!) but issues with the groundworkers back then (the usual mix of money and incompetence) meant that the pipework had never been connected to the existing septic tank... and ended some way short of its target.
Since we'd already finished all the rainwater drainage ourselves, we felt reasonably confident taking on the challenge of completing all the sewage pipes. The first job was to find and unearth the end of the pipework from the new house.
The 'new' pipework runs alongside the existing sewage pipe from the old house but once we started digging it out, brown, stinking water started oozing from the earth above and filling the new trench. Now we could see (and smell) why the toilets in the old house had been malfunctioning...

... the waste pipe from the old house must have been partially blocked and to make matters worse, must have cracked somewhere and was now leaking raw sewage into the soil around the trench. Ewww!

Look at that face. Even the site inspector found the pong unbearable (and he licks his own backside).

After some time spent clearing the blockage from the broken pipe (we'll spare you the photos of that particular task...) we washed out the trench and could finally resume work fitting the new waste pipe.
The pipe run had to be worked out carefully so that it reached the existing waste pipe at precisely the right location and height. Not easy when all we had to work with was a spirit level and an old shovel - still, at least it didn't stink quite so much anymore!
The first length of new pipe laid in place.

The plan was for the new pipework to join the existing sewage pipe at the boundary edge of our property. From there the existing pipe drops under the farm track and runs to the septic tank in the adjacent field.
But before we could proceed any further with the new pipework, we needed to excavate the old pipe and work out where (and how) we would make the connection.
And that meant more digging. With just that crummy old shovel. Oh what fun.


Its good practice to use an inspection chamber wherever the drainage makes a sharp turn or at intersections, as it allows access to any blockages that might occur in future.
Once the chamber was in place, we could complete the rest of the pipe run, making sure that the water always runs downhill at the correct angle. We also designed the run to use shallow 45 degree turns rather than 90 degree elbows, to hopefully reduce the chance of any blockages in future.

After the pipes had been connected, we back-filled around them using gravel. This protects the pipe from getting damaged by sharp stones when the trench is refilled, as well as helping to maintain the proper pipe levels.

An overhead view of the chamber showing the connections from the old house (top left), the new house (bottom left) and the pipe run out to the septic tank (right). Where the modern plastic pipes needed to be connected to the wider pitch fibre type, we used flexible rubber connectors that simply clamp down to the required size using jubilee clips.
When the old house is demolished, we can just remove its waste connection at the chamber and seal it up using a plastic cap.

After some tests to make sure the water was flowing freely from both houses, all that was left to do was drop in the rest of the chamber sections. These will eventually be cut down so that the access cover sits at ground level, but since we still needed to raise the area around the new house, that can be done at a later date.

It was a mucky job, but so important in order to progress the build.
Hooking up the drainage pipes meant that not only could we use the newly-fitted toilet, but we could now push ahead with installation of the showers, sinks, dishwasher and washing machine.


... and off down the garden...

... then eventually up into the bathroom window of the old house and down into the bath! Running a bath meant dashing between the two houses half-dressed to grapple with the garden tap, but it was worth it just to bathe in hot, clean water again.

The old house, perhaps suspecting that its demolition was looming, was rapidly coming apart at the seams. No heating or hot water, rising damp, toxic radon (the equivalent of 100 chest x-rays a year...) and now something had gone seriously awry with the toilet waste pipe. It meant that we needed to get a working WC in the new house as soon as possible.
The bathrooms upstairs were both some way from being finished, so the WC downstairs was our best option. We'd already installed the frame and cistern for the wall-hung toilet, so the first job was to get the pan fitted in place.

After carefully measuring the waste pipes against the toilet pan, we cut them to length and installed them into the wall.

Lifting a heavy toilet bowl onto just those two bolts is a leap of faith... but after tightening everything up, it seemed firmly fixed in place. Sitting down on it for the first time did cause a moment of panic though; wondering if we fixed the frame tightly enough to the wall all those months ago!

Burying the cistern behind a wall is reasonably safe with these frames, as every serviceable part of it can be accessed from the top by removing the flush switch.
With the new seat and lid fitted, the toilet might have looked ready for action, but unfortunately we still had a lot more work to do as the main waste pipe from the new house didn't actually go anywhere yet...
The initial run of drainage pipes had been laid, back when we first started building the house in late 2013 (!) but issues with the groundworkers back then (the usual mix of money and incompetence) meant that the pipework had never been connected to the existing septic tank... and ended some way short of its target.
Since we'd already finished all the rainwater drainage ourselves, we felt reasonably confident taking on the challenge of completing all the sewage pipes. The first job was to find and unearth the end of the pipework from the new house.
The 'new' pipework runs alongside the existing sewage pipe from the old house but once we started digging it out, brown, stinking water started oozing from the earth above and filling the new trench. Now we could see (and smell) why the toilets in the old house had been malfunctioning...

... the waste pipe from the old house must have been partially blocked and to make matters worse, must have cracked somewhere and was now leaking raw sewage into the soil around the trench. Ewww!

Look at that face. Even the site inspector found the pong unbearable (and he licks his own backside).

After some time spent clearing the blockage from the broken pipe (we'll spare you the photos of that particular task...) we washed out the trench and could finally resume work fitting the new waste pipe.
The pipe run had to be worked out carefully so that it reached the existing waste pipe at precisely the right location and height. Not easy when all we had to work with was a spirit level and an old shovel - still, at least it didn't stink quite so much anymore!
The first length of new pipe laid in place.

The plan was for the new pipework to join the existing sewage pipe at the boundary edge of our property. From there the existing pipe drops under the farm track and runs to the septic tank in the adjacent field.
But before we could proceed any further with the new pipework, we needed to excavate the old pipe and work out where (and how) we would make the connection.
And that meant more digging. With just that crummy old shovel. Oh what fun.

And there it is. Considering all the issues we'd been having with the sewage pipes in the old house, it wasn't too much of a surprise to discover that the existing pipe was made of the dreaded pitch fibre; a 1950s monstrosity that tried (and failed) to make cheap waterproof pipes out of a glorified papier mache... the drainage equivalent of an ashtray on a motorbike.

Once the old pitch fibre pipe was fully unearthed, we cut a section out of it using an angle grinder.
The new pipework will be connected there using an inspection chamber, so that, of course, meant widening and deepening the trench. More digging...

The new house was still some way from being habitable, so for the time being we would need to ensure both houses had working drainage systems. It was a bit tricky getting the chamber to sit at the optimal height for both sets of pipes but after some messing around, we managed to get a decent compromise and laid a thick gravel bed to ensure the chamber wouldn't later sink down into the mud.

Its good practice to use an inspection chamber wherever the drainage makes a sharp turn or at intersections, as it allows access to any blockages that might occur in future.
Once the chamber was in place, we could complete the rest of the pipe run, making sure that the water always runs downhill at the correct angle. We also designed the run to use shallow 45 degree turns rather than 90 degree elbows, to hopefully reduce the chance of any blockages in future.

After the pipes had been connected, we back-filled around them using gravel. This protects the pipe from getting damaged by sharp stones when the trench is refilled, as well as helping to maintain the proper pipe levels.

An overhead view of the chamber showing the connections from the old house (top left), the new house (bottom left) and the pipe run out to the septic tank (right). Where the modern plastic pipes needed to be connected to the wider pitch fibre type, we used flexible rubber connectors that simply clamp down to the required size using jubilee clips.
When the old house is demolished, we can just remove its waste connection at the chamber and seal it up using a plastic cap.

After some tests to make sure the water was flowing freely from both houses, all that was left to do was drop in the rest of the chamber sections. These will eventually be cut down so that the access cover sits at ground level, but since we still needed to raise the area around the new house, that can be done at a later date.

It was a mucky job, but so important in order to progress the build.
Hooking up the drainage pipes meant that not only could we use the newly-fitted toilet, but we could now push ahead with installation of the showers, sinks, dishwasher and washing machine.

No comments :
Post a Comment