Thursday 3 December 2015

Bathrooms: carpentry, plumbing and boarding

Boarding.


More boarding.


With hindsight, had we known how long the boarding was going to take using Fermacell, we'd never have chosen to use it. Boarding all the ceilings in the house using conventional plasterboard had only taken us a couple of weeks, but to board the walls using unconventional Fermacell had already taken us months.

And we still hadn't finished...


The last rooms to be tackled were the bathrooms. We couldn't board them until all the pipework had been completed, but having been less-than-impressed with the local plumbers, we'd ended up doing all the plumbing ourselves. That was saving us a lot of money but of course meant that everything was taking much longer.

Before sealing any pipework in the wall forever, it was obviously a good idea to be certain that it didn't have any leaks. Since we didn't have any testing equipment, the easiest (and cheapest) way for us to test the pipework was just to connect it up to the pressurised water supply (remembering to cap off all the open pipe outlets first!) and see what happened. If there were no leaks after being under pressure for a day or two, then we could be reasonably confident it would be OK (famous last words).


After testing out the main bathroom shower, it all seemed to be leak-free so it could finally be buried in the wall.


Alan also connected the concealed toilet cistern to the water supply so we could finally board around that.   


As ever, we used a laser to accurately mark out the board and ensure that the cutouts for the toilet pipes and supports were in exactly the right place.


As you can see, months spent boarding has slowly driven us mad.


The back of the toilet cistern sits inside the landing cupboard. We shouldn't ever need to access it as the clever design of these toilet frames mean that all the serviceable parts can be reached via a front panel that sits under the flush buttons. So to keep everything neat in the cupboard, we boxed it in.


The back of the cistern boxed in.


Back in the main bathroom, we had always planned to have a decorative light around the bath so began work on what would be an illuminated mini-alcove. 


Once we'd established the centre of the window, Alan made a wooden frame that would support the alcove boards.


We lined the inside of the alcove, then began boarding around the outside. We left a lip at the top as we wanted to conceal the LED striplight and create more of a glow than a direct light.


Before we could finish boarding around the alcove, we needed to complete the pipework for the bath taps and spout. We preferred them in the centre of the window, so Alan fitted a noggin behind the silver membrane that would hold them in position.


To ensure the bath would fill extra quickly, we'd used the wider diameter 22mm pipes all the way from the water cylinder. Annoyingly, most of the bath taps we looked at were now designed for 15mm pipes which would have acted as something of a bottleneck and restricted the flow.

After much internet searching, we did find a suitable set of taps and our 22mm pipes fitted directly into place.


The side of the bath will conceal much of the wall, so it was another good opportunity to use up some more of the Fermacell offcuts. Once the excess glue has been removed and the joints covered with compound the panels won't be visible anyway.


How the bath will look under the alcove.


While doing the bathroom, we also took the opportunity to board the window reveals (more on the delights of doing them later...)


Once the bathroom was finished, we moved on to the en-suite. The first job was to run a pipe down from the ventilation system. As per building regs, we'd fitted a condensation trap in the loft that is designed to catch any water that might form in the ventilation pipes and this needed to be drained to a waste pipe somewhere.

We could have connected it to the main soil stack (via a P-trap to stop any stink coming back through the extraction ducts) but preferred to run the pipe directly through down from the loft to the en-suite bathroom.

The small white pipe on the right runs from the grey condensation trap...


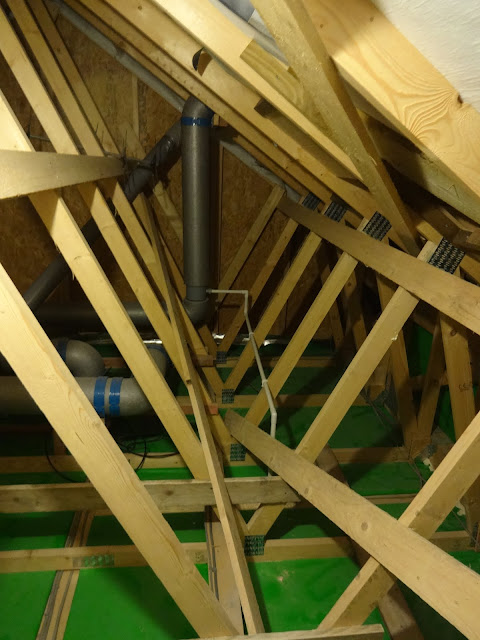
... down to where the basin u-bend will be located.


We had made the landing cupboard a central conduit for all the pipes and cables that run from the first floor down to the ground floor. Since the en-suite backed onto the landing cupboard, we needed to get any pipes and cables properly sorted before boarding. The black cabling in the picture below is the coaxial cable that goes to all the TV aerial sockets.


Inside the cupboard, we trimmed all the coaxial cables and attached plugs to them. We'll be joining them together via a splitter (and possibly a signal booster, if needed) at a later date.


More soundproofing went in...


... then on with the boards.


The walls of the en-suite shower needed to be brought in a bit closer to match the size of the shower tray.  


As ever, the studwork walls were not very straight (grr) so Alan built out a set of timber supports that aligned with a laser.


We fine-tuned the position of the wall using packers.


After much struggle, the walls of the shower were in. 


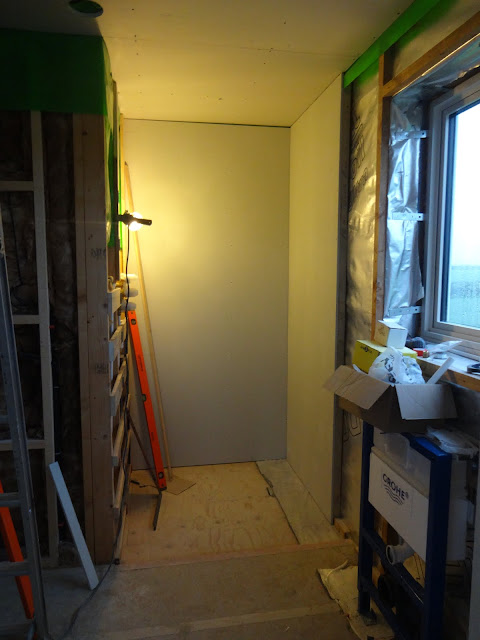
With the shower wall perfectly level, this picture shows how wonky the studwork originally was. The rest of the room could now be boarded.


Beginning to get an idea what the shower will look like when finished.


The last bit of boarding in the en-suite was around the toilet frame.


First we fitted the window reveal above the toilet.


Although it's possible to attach boards directly to the face of the metal frame, we needed to construct a wooden support to hold the boards firmly in position all the way around.


A sheet of Fermacell cut and drilled to size for the toilet frame.


Still plenty of finishing to do (whoopee), but at least that's the boarding for the en-suite finally done.


The ground floor WC was the last toilet to be boxed in so Alan made another wooden frame. The pipes for the heat pump (just visible at bottom left) also sit neatly behind.  


Boarded.


Monday 12 October 2015

Boarding: Walls - finishing (almost)

With all the door liners installed, we could finally finish boarding the walls around the doorways.

In the hallway, we were originally going to put a standard wall light in the space between the kitchen and living room doors, but then had the idea to build a small alcove in the space instead.


Alan built a sturdy wooden frame to support the boards.


We re-routed the electrical wiring and also drilled a hole in the timber that would allow a mini-LED spotlight to be installed at a later date.


Next we lined the inside of the alcove with Fermacell.


We weren't sure whether to install a downlighter or an uplighter in the alcove, so decided to test it out once it got dark using a wander lead.  


Once we'd decided to go for the uplighter, we made sure all the wiring was left accessible in the bottom of the alcove so we could reach it later when fitting the spotlight. 


The board that frames the alcove and fits between the two doors needed to be very accurate. Measuring it and cutting it out using a circular (plunge) saw was a time-consuming business (as usual).  


Hurrah! It fits. Boarding around the rest of the door frame would be much more straightforward.


The fully-boarded alcove. It looks a bit more interesting than the plain wall we were going to have and should look even better, once we have installed a light inside it. 


Next was the kitchen and we began by boarding around the larder door. Another tricky job as it required the board edges to be bevelled at the correct angle to ensure a really neat fit. 


Looking up at the freshly-installed boards inside the larder.  


One advantage of using Fermacell over conventional plasterboard is that no angle beads are needed on outside corners; the edges of the board are held solidly in place using adhesive.  


With the boards fitted inside and out, the larder is finally beginning to take shape. 


Next we started boarding around the door that leads to the utility room. 


Before we could complete the boarding around the doors, we needed to make up a bit of extra studwork to form a cupboard for the fridge.


The studwork is not structural so we could use up some more wood off-cuts from the scrap pile. 


As ever, we used a laser line to make sure everything was perfectly level and square.


After so long spent boarding day after day, it's a relief to finally see the rooms coming together. 


The site inspector dropped by to conduct a stock check.


Another tricky job that we left until last... sorting out the huge mess of wiring that will terminate at the consumer unit (or fusebox as they used to be called) in the office. 


There are official guidelines for where a consumer unit should be positioned in a new house (i.e., not too high or low on the wall). We tidied up all the cabling inside the wall, but didn't trim any excess wiring on the outside just in case the electricians needed to move anything around.


As with all the doorways in the house, the office also required boarding inside and out. 


Soundproofing on the inside of the office. 


Light switches and thermostats are usually located right by the door so boarding those walls usually meant lots of extra cutouts. Quick to do with plasterboard, but much slower using Fermacell which required the use of a multitool.


Ground floor WC.


The living room was awkward because the OSB that had been fitted during the timber frame construction was not quite level. Not a problem if you're employing a plasterer as they can level it out when they skim the walls, but our Fermacell boards are pretty much the finished wall surface, so needed to be fitted as perfectly as possible.

We used a laser to mark a line where the board needed to sit if it was level...


... and used packers (different colours represent different thicknesses) to make sure the board will follow that line once it is screwed in.


Another late night messing around with these pesky boards. The Fermacell sheets do give very good results, but if we'd known it was going to be this much time and trouble to fit them, then we'd have just stuck with conventional plasterboard covered with plaster.


Boarding began to feel like a never-ending story and no matter how much we did, there always seemed to be more areas waiting to be done... Upstairs we decided to tackle the big bedroom wall.


Once again, we needed to mess around with dozens of packers to level out a wall that hadn't been built straight enough.


We worked out the arrangement of the boards carefully using a staggered pattern to reduce the possibility of any cracks developing in future.


With no proper platform to work on, we also made sure that the top panel wasn't going to be too large. A smaller shape would be much lighter and hopefully allow us to lift it into place using two ladders.


Alan made a template of the top panel to ensure it would fit perfectly (though he does look a bit confused about the part he's just cut out!)


Once the big wall was complete, we lined the inside of the walk-in wardrobe.


We tried to use up all the leftover offcuts of Fermacell inside cupboards. 


A patchwork of offcuts glued together; it took a bit longer to do than using full sheets, but it was a good way to use up all the odd bits we had left over (especially as we were running low on materials). The joints will all be covered using special compound and as they are in a cupboard, any lines will be a lot less noticeable than if they were on the wall of one of the rooms. 


Upstairs landing.


The entrance to the main bedroom was another troublesome wall that needed our now-ubiquitous collection of packers to straighten it out.


Inside bedroom 2. Yep, more boarding.


The built-in cupboards in bedroom 2 and 3 both needed boarding... inside and out. Oh, goody.


We put acoustic insulation in the cupboards so that there were effectively two soundproofed walls between the two 'adjoining' bedrooms.


Another late night spent finishing the bedroom 2 cupboard...


... and up early the next day to do exactly the same again for bedroom 3. OH, GOODY!


Boards going up inside the cupboard...


... then acoustic insulation and sorting out the wiring...


... before finally boarding around the doorway.


The heating system can't be commissioned until the electrics are completed. But the electrics can't be completed until we finish the boarding... The pressure to get this job finished was really getting us down and to make matters worse, it was starting to get bloody cold in there too!


Cutting out holes for the bathroom light switch and thermostat.


The doorways to the bathroom and the landing cupboard.


The last doorway almost done. Sadly, that's not quite the last of the boarding...