This picture shows the fascia vent from the inside - it runs around the roof under the bottom tile and helps keep fresh air circulating around the roof space.

Same view after the rafter tray (i.e., fancy name for an overpriced bit of recycled plastic packaging - grrrrr) has been fitted.

The tray has plastic spacers that ensure the air can continue to circulate after the loft insulation has been piled in. Modern building regulations mean we will need to fit rather a huge amount of loft insulation so using these trays made a lot of sense.

Despite the ceilings not being up, some parts of the roof were still not very accessible so we had to come up with a few interesting solutions in order to reach them. Alan decided he didn't much fancy standing on the creaky 'Bridge of Death' so kindly suggested I might like to fit all the rafter trays while he did, 'something else'.

Note the flimsy attempt at Health and Safety by the placement of a thin piece of particle board about halfway down. This wouldn't prevent me falling to my doom, but was strategically placed just so I couldn't see how far below the ground actually was...

Once all the rafter trays were in (you can just see the tops of them in the picture below) we could finally start boarding out the ceilings. We decided to start in Bedroom 3.

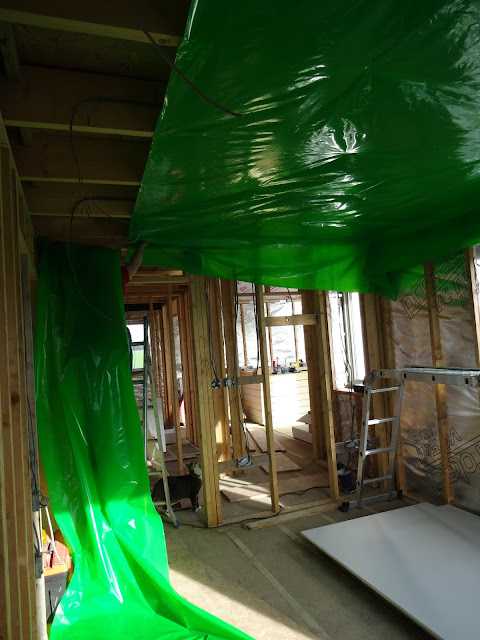
All the upstairs ceilings would first need a vapour barrier fitted, once again to prevent condensation forming if warm air from the rooms below reached the cold, unheated loft space. Grappling with this heavy polythene sheeting and getting it stretched out tightly above our heads was a bit of a battle.

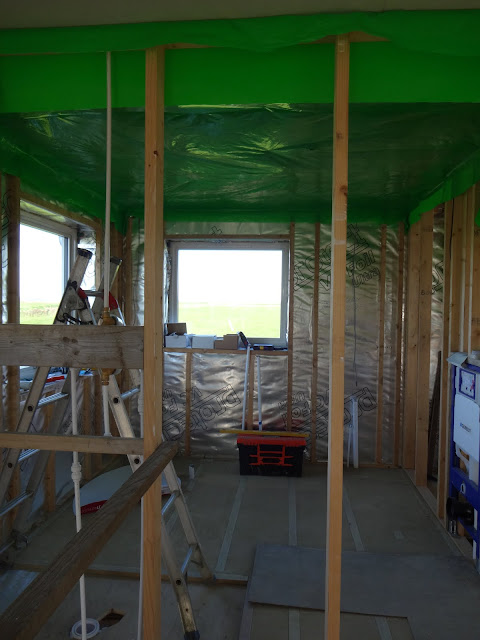
Bedroom 3 with the vapour barrier in place.

'Talk to the paw'. The site manager was less than impressed with progress on the ceilings.

The first proper test for the newly-purchased panel lifter (this worked out cheaper to buy online than it was to rent for just a couple of days from a tool-hire shop). We'd lifted a few boards by hand at our last house and it was back-breaking work, so with a whole house to do we were hopeful this would make the job much easier.

Using the lifter, it was simple to roll the board into exactly the right position under the joists, holding it securely until we'd finished adding all the screws.
That's the first board up, just another 170 square meters to go...

We really wanted to use Fermacell boards for the ceilings as well as the walls, but the sheer weight of those boards (coupled with a general lack of understanding about them from both the local planning authority and the UK building regs) meant that we had no choice but to use plasterboard. We bought the heavier-grade 15mm plasterboard though, as this required far fewer noggins and should hopefully be less prone to movement and cracking.
Bedroom 3 ceiling completed. As we would be taping and jointing the gaps between the boards (rather than skimming the whole ceilings with plaster) we planned the layout carefully to minimise the number of butt joints that are harder to conceal.

Next up were the fitted cupboards that run between Bedroom 2 and Bedroom 3.


Bedroom 2 getting its vapour barrier installed. Note the site manager casting his beady eyes over proceedings from the doorway.
Bedroom 2 ceiling done.

The landing, with its awkward T-shaped layout and new loft hatch proved to be somewhat more challenging than the nice rectangular rooms we'd done so far.


Using the loft hatch and its ladder will naturally cause some movement, so as with cutting plasterboard around any doors or windows, you really want to avoid putting any joints at stress points like corners to avoid getting nasty cracks in future. This also means you end up spending ages cutting out some weird and wonderful shapes like our 'U' (or 'C') below.

The 'U' (or 'C') screwed in place around the loft hatch.


Next up was an 'F'...

Raising the 'F' up into position. We couldn't have done it without the panel lifter.

Almost in place...

Ta-da!

The last bit of the landing above the stairwell once again proved awkward to get to, so the 'Bridge of Death' was employed once again.

This was a tricky board to fit. Note the strategically-placed plank of wood dumped in front of the lifter to avert the calamitous prospect of one of its wheels dropping off the edge of the precipice.

The landing taking shape.

The site manager hard at work as usual.


After the landing, we decided to tackle the main bathroom. As usual, the first thing was my obligatory fight with the evil green vapour barrier.

Any joints in the vapour barrier were taped up to ensure air tightness.

Next we could start fixing the boards.


Alan had previously installed ventilation ducts to all the 'wet' rooms (i.e., bathrooms, kitchen, utility). In order to fit the vent covers in the ceiling later on, we needed to drill holes in the plasterboard that lined up exactly with the grey pipes pictured below.

Plasterboard panel with cutout for the vents in the bathroom.

Alan installed the plumbing for the shower and made some wooden brackets to support the heavy shower head. We test-fitted it to make sure everything was in the right place before boarding.

Placing the shower tray where it will eventually be fitted.

We did the same thing for the en-suite bathroom. Here it is boarded, with holes cut out for both the vents and the shower head.

More cutouts were needed for the pipework in the landing cupboard.

The site manager subtly indicated that it was time to wrap this chapter up.
