Wednesday 25 February 2015

Boarding - Delivery

Before we could start boarding out the ceilings and walls, we needed a large quantity of materials, including various types of insulation, plasterboard and Fermacell (the German boarding system we had decided to use for the walls).

With a big order due to arrive imminently, we needed to figure out a way of shifting several hundred sheets of heavy (and in the case of Fermacell, extremely heavy) materials into the house. With the winter weather being rather rainy in Cornwall, we also needed to move everything into the house quickly before it got ruined outside.

Since there was just the two of us, there was no way we could simply lug every sheet of Fermacell (each weighing around 45kg - that's equivalent to two large bags of cement!) into the house quickly and easily so Alan built a canny little contraption to help us out.      

He started off with some rubberised castors off the bottom of an old cabinet... 


...chopped up an old delivery pallet and raided the scrap wood pile (again), in order to create his masterpiece, The Sheet-Buster 3000 (patent pending).   


Delivery day and the driver brought along his own rather-nifty forklift truck.


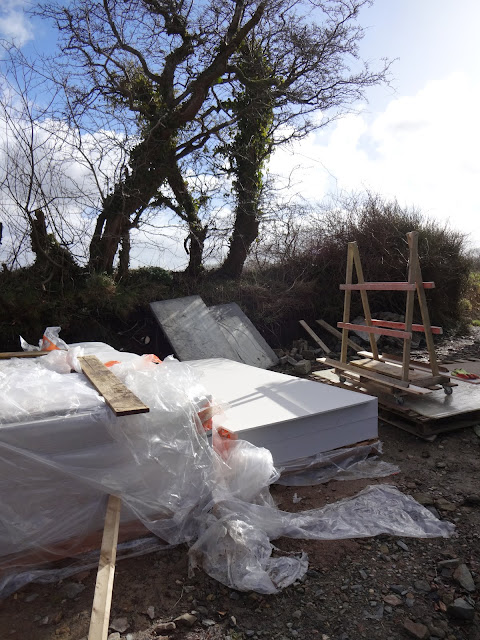
Each pallet of Fermacell weighed over 2 tons. The drainage pipes and soakaway that we'd recently laid at the front of the house could have easily been crushed under such a heavy load, so we had no option but to stack the boards much further down the garden away from the front door. The Sheet-Buster 3000 (patent pending) had better work or we would be in trouble...


With rain forecast to arrive later that day, we needed to get the boards in as soon as possible. First priority was the 15mm plasterboard we'd bought for the ceilings which would be completely ruined if it got wet. The Sheet-Buster 3000 (patent pending) was wheeled into position and readied for action.


As ever, the site manager was there to supervise the whole operation.


We made a special ramp for The Sheet-Buster 3000 (patent pending) using yet more scrap wood.


Success! We managed to get all the plasterboard stacked inside before the downpour arrived.


The site manager declared the job 'satisfactory'.


Finding a place to store over 50 packs of insulation wasn't easy (so we just gave up and shoved them anywhere).


Luckily the Fermacell was a good deal more weather-resistant than plasterboard and had also been delivered in strong polythene packages so we could leave it safely overnight. We extended the ramp using more pallets and any leftover wood we could lay our hands on and once the rain cleared the next day we could start hauling it inside. 


The 'runway' down to the first stack of Fermacell. 


It was hard enough just lifting each sheet onto The Sheet-Buster 3000 (patent still pending), so we were very relieved that we didn't have to carry them all the way in. 


The 'runway' was extended as each stack was cleared.


Once inside, we spread the Fermacell into several smaller piles dotted around the house to avoid any possibility of overloading the floor. The screed over the underfloor heating pipes should easily be strong enough to cope with the weight but a cracked floor was the last thing we'd need so it was better to be safe than sorry.  


Phew, it worked. Thanks to The Sheet-Buster 3000 (patent rejected) we got all the sheet materials safely stacked inside, and amazingly our backs were still intact. The next question though, was how on earth do we get half of them up onto the first floor...?


The solution was sitting right in front of us. Alan had just bought a panel lifter to help us to plasterboard the ceilings and after some discussion we came up with a cunning plan.


Each sheet was loaded onto the panel lifter...


...and raised up into the first floor via the stairwell.


Once clear of the floor, we could wheel the panel lifter backwards and from there were able to safely access each sheet. 


Hurrah!  1 down, only another 129 to go...


Tuesday 17 February 2015

Carpentry - 1st fix

With the 1st fix plumbing and electrics all completed, it was about time we tackled some of the 1st fix carpentry. Although my recollections of school woodwork lessons seemed to consist mainly of being hit on the head with lumps of wood by teacher Mr Lesser, I did feel confident about tackling most of these jobs myself.

First on the list was to enlarge the opening for the stairs. Raising the height of the ground floor meant that we might later struggle to fit a staircase that conforms to building regs, so we had no option but to create some extra space. After checking with the timber frame company that the modifications would be structurally sound, the existing joist hangers were cut away using an angle grinder and the timbers that supported the plywood floor were refitted in a new position. Once these supports were in place, it was relatively straightforward to cut back the plywood floor.

Spot the difference - before:


After:


The supports underneath were not easy to remove as they had been tied into the metal web joists when the timber frame was first assembled.

Before:


After:


Next up was installing the toilet frames. These come complete with a slimline cistern that will be concealed within the wall and allow us to fit a wall-hanging toilet. These frames need to be secured very firmly in place in order to carry a person's weight so the carpentry had to be sturdily built.

Measuring up for the downstairs WC.


Normally the toilet frame would be screwed to the floor, but with so much heat pump pipework and cabling running directly underneath, we needed to come up with an alternative solution. Captive studs installed into a thick piece of ply seemed to do the trick.


Additional timber supports were screwed to the wall studs and the frame was fixed securely in place.


The en-suite toilet was a little bit easier to install.


Strong piece of timber bolted to the wall studs.


Upstairs we were able to bolt the frame through the plywood floor and into the strong metal web joists.


The main bathroom toilet required a lot more carpentry as it was being built into an internal stud wall rather than an outside wall.


A lot of the existing studwork was cut away and replaced with a rigid frame built around a strong triple stud that would hold the toilet firmly in place. As you can see, we raided the pile of wood offcuts for supplies here!


The toilet frame bolted in place.


The back of the toilet sits in a snug space within the landing cupboard. Getting very busy in there...


Our biggest 1st fix carpentry job was creating a loft floor, however before we could get started on that we needed to install a loft hatch and ladder. This one came as a kit from a manufacturer in Poland and looked a good deal better than the ones at our local suppliers.


We needed to allow for plenty of headroom on entering the attic so decided that the best place to have our loft ladder was about midway along our landing corridor.


Strapping the ladder to some large lengths of timber allowed us to test it out and fine-tune its position.


Once we were happy with its position, timber trimmers (more offcuts from the pile) were fixed between the joists and the hatch could then be screwed into place.


It's important to get the frame lined up accurately otherwise the hatch might not open and close properly. After that, all that was needed was to cut the ladder to the appropriate length.


Once the loft hatch and ladder was installed we could get cracking on the loft floor.

We had a stack of 22mm thick OSB sheets left over from the timber frame construction which would be perfect to use for the flooring, though getting these large, heavy sheets up into the loft was bloody hard work. Once we'd squeezed several sheets up onto the attic trusses, we were able to slide them around and use them as working platforms. Not exactly health and safety approved but it worked well (as long as you remembered not to step on any overhanging edges...)

Although we'd specified attic trusses to be installed, these still needed a lot of woodwork before they were ready to hold a floor safely as every sheet needed to be supported at all its edges. After carefully planning how the sheets would be laid, I started fitting noggins and supports where needed.


Although we saved a lot of money by recycling leftover materials and doing the work ourselves, the absence of any tradesmen also meant that we had to hire or buy any tools that we needed. This new plunge saw was bought primarily to do the boarding out later on but proved very useful for the loft flooring too. Its first task was to trim down a large piece of recycled timber to use as a structural support.


No support:


Yes support:


Me installing noggins. Lots of noggins.


And more noggins.


The site manager turned up to inspect progress.


He had a good look...


... before explaining how it should be done.


What's all that on the other side of the room? Oh yes, more noggins.


Once all the supports were in, we could trim and fit the OSB sheets in situ using the plunge saw.


All boards in place.


Once the floor was down, we could get a better idea of the size of the loft room.


None of the boards were screwed down as we still need to insulate beneath them, however that can't be done until the first floor ceilings are in place.