

Cornwall doesn't get that much snow compared to the rest of the country but we saw a light dusting this year.

Our new shed seemed to be holding up pretty well through the winter.

It is hard to believe that a whole year has passed since we started putting up the timber frame of our house. At least this winter we would be working inside and the next job we needed to tackle was installing the ventilation system.
Modern building regulations require all new houses to be very well ventilated to avoid problems with condensation and damp. Traditionally this is achieved using individual extractors set in the walls/windows of all bathrooms (along with other 'wet' rooms such as the kitchen and utility room) but we had those type of extractors in our old house and found them to be noisy and inefficient. It's especially annoying that those fans are required to be triggered by the light switch so any late night visits to the toilet mean you have a fan roaring (for no reason) for the next 20 minutes... bonkers!
Luckily these days there are lots of alternative systems around and after looking closely at all the various options (such as passive stack, positive input, heat recovery), we decided to go for a continuous mechanical extract ventilation system. Despite its fancy title this is a fairly simple system consisting of a single fan unit sited up in the loft that extracts air from multiple rooms via a series of ducts.
Most of the major manufacturers offer a free design service and can send detailed plans showing exactly what components you will need.

Our central extraction unit was going to be sited up in the loft and would send all the stale air out of the house via a vent installed in the roof. One advantage of this system is that because the fan is designed to run constantly, it can run a lot slower (and thus quieter) than individual room extractors. Also, being located in the roof above the bathroom and far away from any bedrooms should (hopefully) make it barely audible.

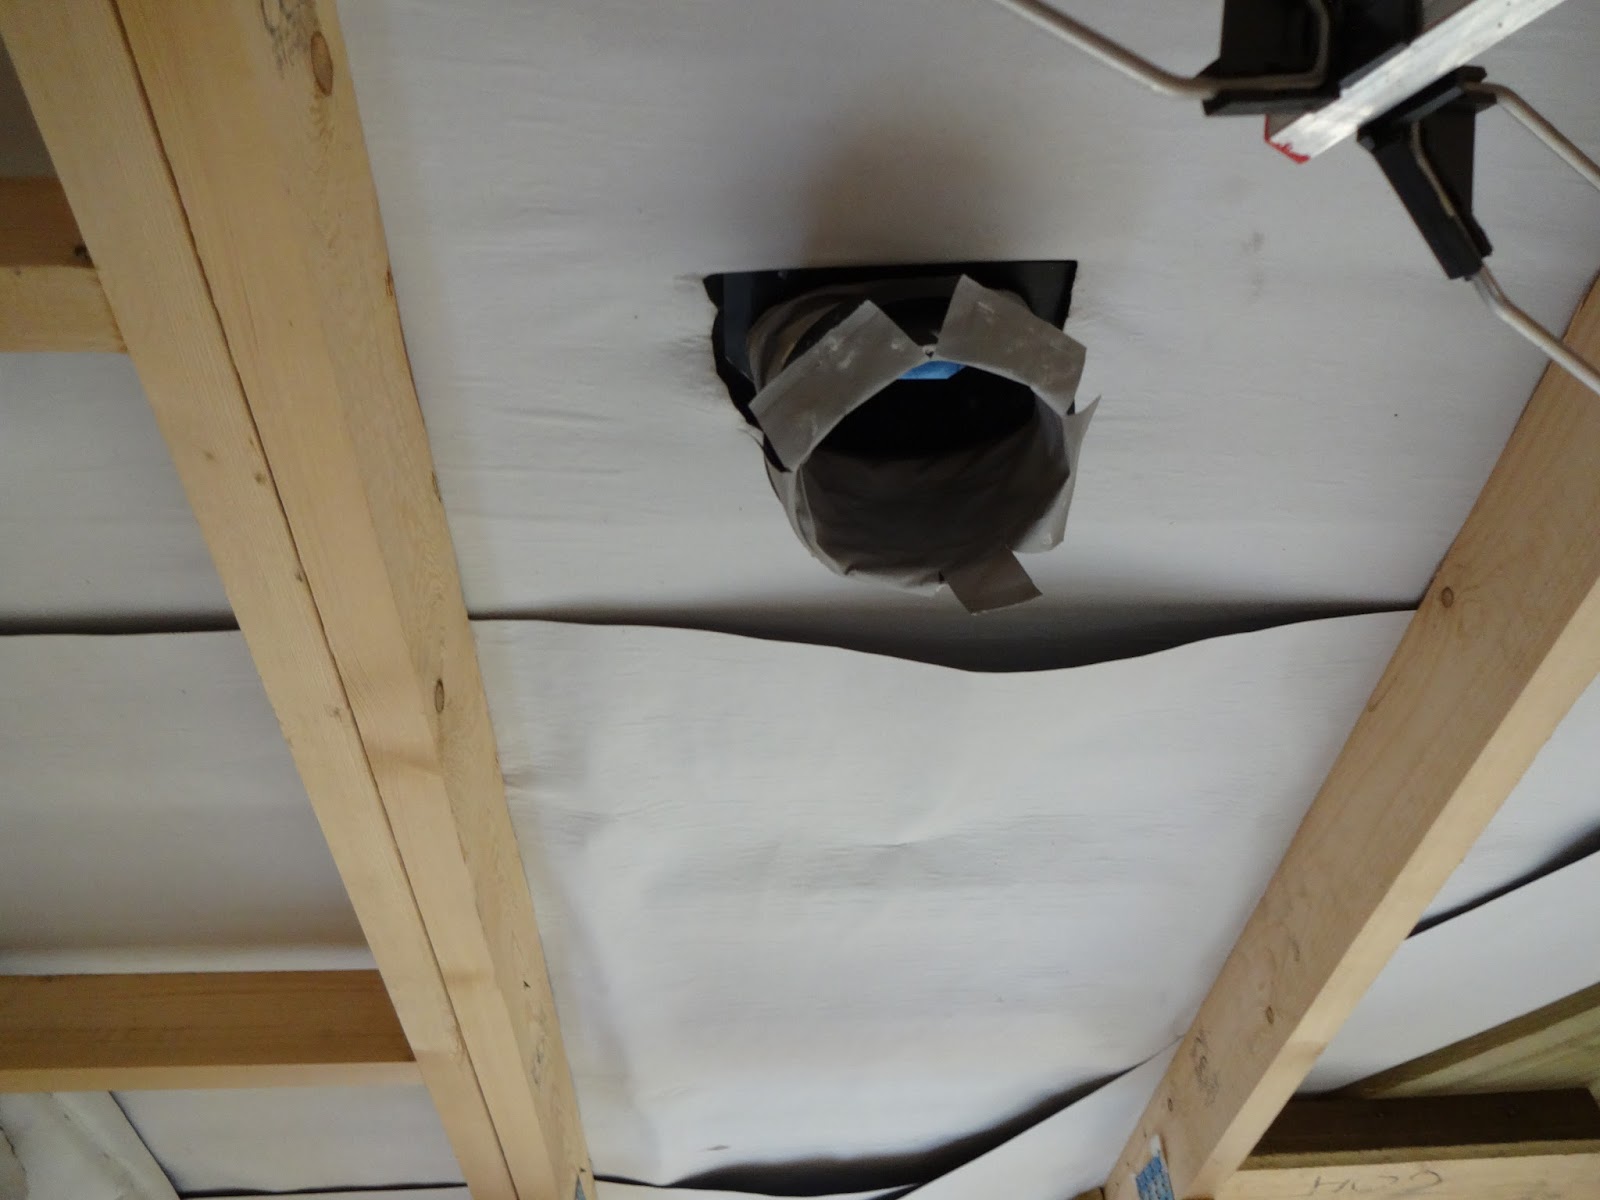
We had two vents put in when the roof was being built; one is for the soil stack serving the toilets (charmingly referred to as the 'stinkpipe') while the other was installed specifically for the ventilation.

We had five rooms that required ventilation so the duct runs needed to be carefully worked out, especially the main duct that stretched from the ground floor up to the attic. We already had the soil stack (grey pipe below) installed via a utility cupboard on the first floor landing so it made sense to run the main duct alongside it to keep it all neatly hidden away.

The ventilation ducts are pretty large pipes so finding a safe place to drill in an already-crowded cupboard proved a little tricky. Alan just managed to squeeze it in the corner in a tight space between electrical wires, water pipes, posi-joists and underfloor heating pipes...

The landing cupboard with soil stack (left), heating manifold and ventilation duct (right).

With the main vertical duct in place, we could work out a route for the rest of the ductwork in the ground floor ceiling. The supplied plans can't take account of every obstruction you might encounter so we had to amend the design where necessary to avoid drilling through anything of structural importance.

The duct run had to go through one part of the strongback support; it's not a crucial structural component but just to be absolutely safe, Alan fitted a new set of bracing timbers to bridge the gap once all the ducting was complete.

We were once again relieved to have chosen posi-joists instead of solid timber joists - the 125mm diameter ducts could be threaded neatly through the metal webs without the need for any drilling.

Once the sections of duct had been cut to the appropriate lengths, the whole run could be dry-assembled to make sure everything was going to fit before it was sealed for air-tightness.

The ventilation system has to be completely airtight in order to function properly. Every joint is sealed using silicone...

... and then wrapped using aluminium tape to make certain there can be no leaks.


The area above the ground floor ceiling was starting to get pretty busy - we had to squeeze the ventilation ducts in around water pipes, heating pipes, soil pipes, electrical wires and timber supports. The final step was to fix the ductwork securely in place using metal straps; Alan (paranoid as ever) lined these with strips of foam to try to avoid any possible vibration noise.

Building regulations specify that all ventilation ducting in unheated spaces (i.e., lofts) needs to be insulated to reduce any possible condensation. Usually this means you have to go round wrapping insulation around all the ducting once it has been sealed and taped, but the manufacturer we chose (Nuaire) supply a neat system of insulated ducting that you can just clip together.
The main duct from the ground floor comes up into the attic via the landing cupboard (see below) and this is where the insulated ductwork would need to start.

Flexible hoses create a lot more air resistance than smooth, solid pipes and can create bottlenecks in your extraction system, so the flexible outlet pipe connected to the roof vent needed a bit of adapting.

Alan cut back the flexible pipe then sealed it onto a plastic collar using silicone & tape...
... allowing the solid insulated pipe to fit as close to the vent as possible.

Working up in the loft space with no floor called for a bit of 'tightrope' walking across the roof trusses.


Alan built a small wooden platform for the central extraction unit which we were just about able to fit between two of the roof trusses.

These extractors are supposed to be whisper-quiet but to ensure we don't get any unwanted vibrations, Alan sat the wooden platform on rubber feet and even put the unit itself on a thick block of Celotex insulation.

To slightly complicate matters, the loft was going to be lined with a thick double layer of insulation so all the ducting would need to be raised up 400mm to leave room for that. Alan built a series of wooden supports to keep the pipes up at the right height.

The ducts were not laid perfectly level; to avoid any possibility of condensation getting into the electrics, best practice suggests that ducts are angled very slightly downwards after they exit the central extraction unit.

The timber supports proved a little time-consuming so a few late nights were needed to get it all finished.

Almost done. The blue plastic clips have teeth that firmly seal the insulated pipes and help make the whole system more rigid.

The final job was to put in the end pieces that will eventually join onto the metal grilles in the ceiling.

Looking up at the central extraction unit from the bathroom.

Designing the house so that all the 'wet' rooms were in close proximity works pretty well on a practical level as all the pipework, including the ventilation could be installed in a fairly compact space (as seen in loft photo below), with no ducts having to be stretched across the length of the house. For the ventilation, this has not only saved a lot of money on materials, but has also meant that the total length of ducting is relatively short which should result in a much more efficient system.
We were able to get the whole system for around the same price as it would have cost for five individual room extractors, were able to fit the whole thing ourselves and more importantly did not have to cut a series of holes through our walls (ruining the air tightness of the house) as you would using conventional extractors.
